


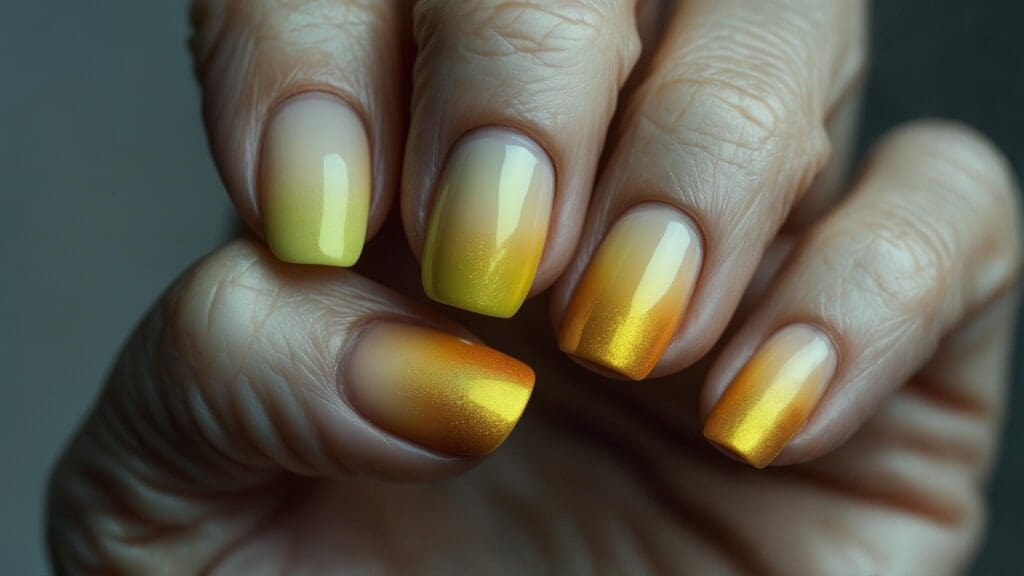

I’ll never forget my first attempt at yellow nails. I walked into the salon asking for “something cheerful but not too crazy” and walked out feeling like I had sunshine at my fingertips. That was three years ago, and I’m still obsessed with this trend.
If you’re curious about trying yellow ombre but don’t know where to start, you’re in the right place. I’ve tried dozens of variations (some disasters, some masterpieces) and learned what actually works in real life, not just in Instagram photos.
Quick Resources:
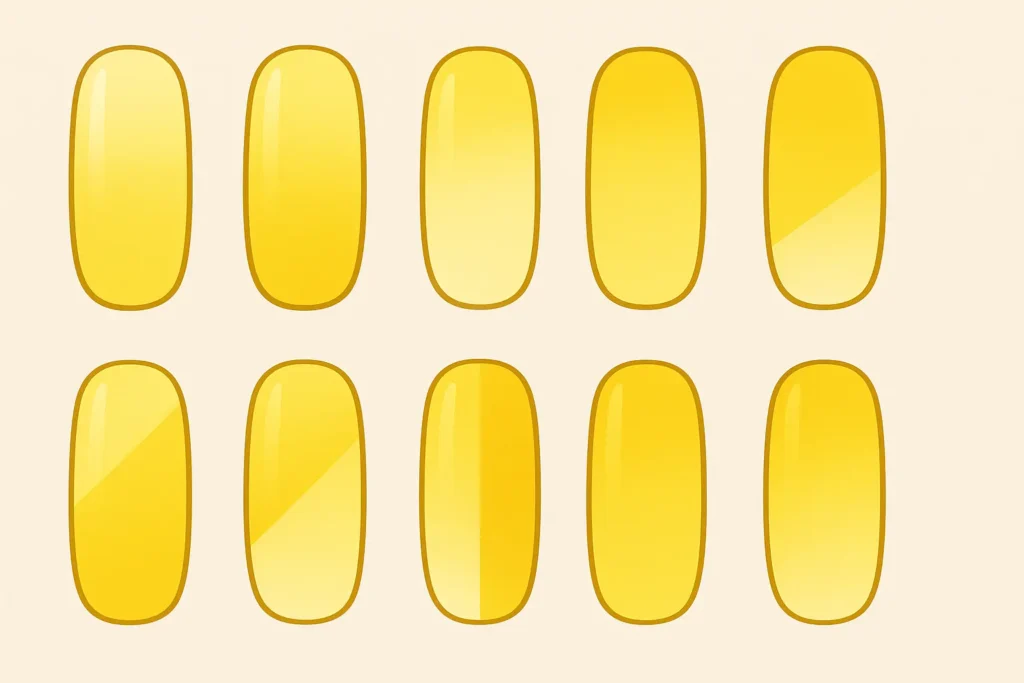
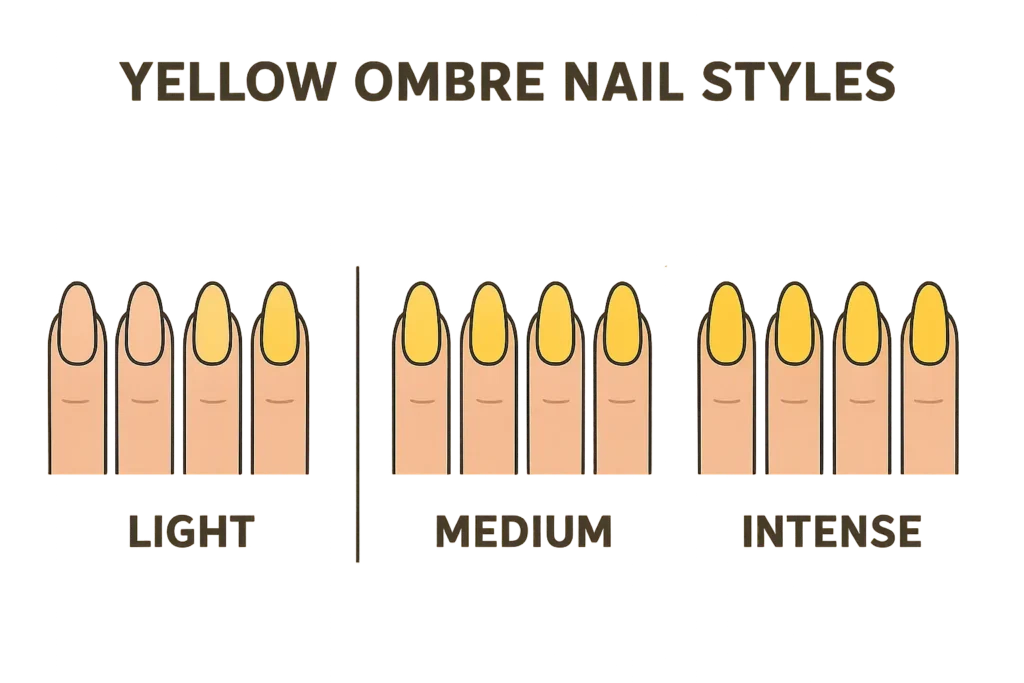
Yellow ombre nails are having a serious moment right now. According to recent beauty industry data from Momooze’s nail trend analysis, more people are specifically requesting these sunny gradients at salons than ever before. There’s something about that optimistic vibe that completely transforms your mood – trust me, I’ve tested this theory extensively.
Whether you’re planning a tropical vacation, need something work-appropriate with personality, or want to brighten up your everyday look, this sunny trend has evolved way beyond basic gradients. From whisper-soft fades that won’t get you called into HR to electric combinations that scream “look at me,” there’s honestly something for everyone here.
Find the yellow shades that flatter your skin tone best with our Free AI Color Analysis Quiz
What You Need to Know Before Diving In
Let’s get real about choosing the right yellow shade because this can make or break your look. I learned this the hard way after trying a golden yellow that made my fair skin look washed out for two weeks.
Here’s what I’ve figured out through trial and error: If you have warm undertones (think golden or olive skin), go for buttery, honey-toned yellows. Cool undertones? Stick with lemon or lime-leaning shades. When in doubt, ask your nail tech – they see this stuff all day and usually nail it on the first try.
Discover your perfect nail and wedding color palette with our Free AI Color Analysis Quiz
| Skin Tone | Best Yellow Undertones | Start With These | Avoid These |
|---|---|---|---|
| Fair | Cool yellows with blue/green hints | Lemon Drop Fade, Barely-There Yellow | Golden/orange-based yellows |
| Medium | Both warm and cool work | Sunshine Gradient, Electric Lemon | Extremely pale yellows |
| Olive | Warm golden yellows | Golden Hour Ombre, Butter to Bright | Cool-toned yellows |
| Deep | Rich golden and warm yellows | Canary Classic, Neon Pink-Yellow | Pale or washed-out yellows |
Think honestly about where you’ll wear these most often. I love bold neon combinations, but I learned quickly that they don’t fly in conservative office environments. Subtle gradients blend seamlessly into professional settings, while those eye-catching neon variations shine at parties and festivals.
Your nail length matters more than you’d think. Longer shapes give you more canvas space for dramatic color transitions, while shorter nails work better with subtle fades. I’ve got short nails and stick to simpler gradients – they look intentional rather than like I ran out of space.

Here’s the maintenance reality check nobody talks about: Some designs demand frequent touch-ups and special care, while others forgive minor chips gracefully. If you’re constantly using your hands or have zero time for nail maintenance, choose accordingly. I learned this after getting a gorgeous neon design that looked terrible after three days of normal life.
Work-Friendly Yellow Ombre Options
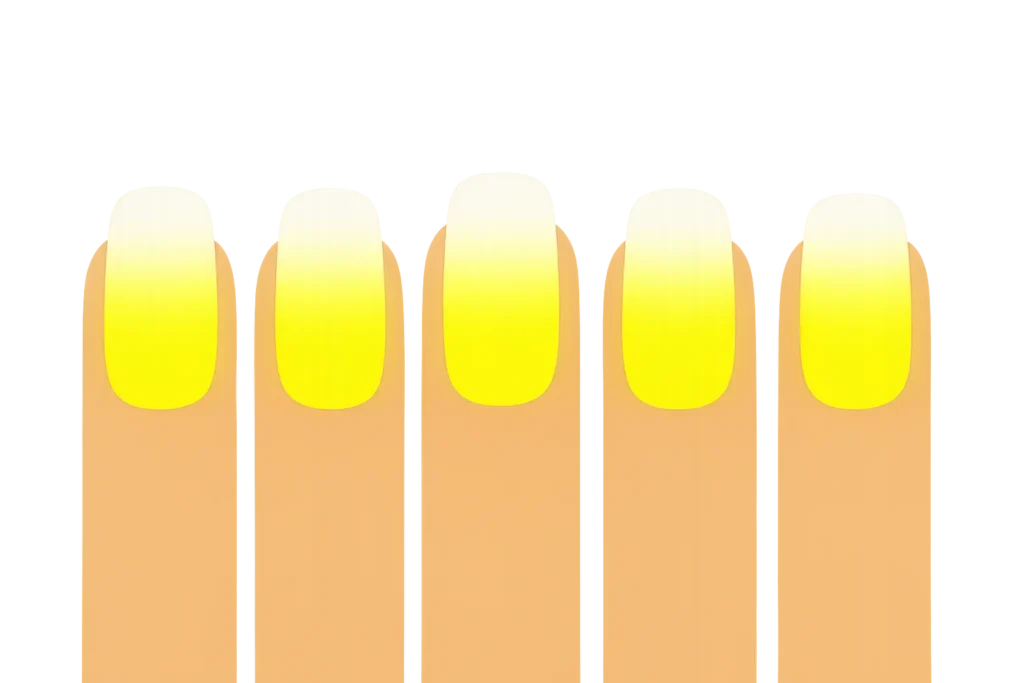
1. Barely-There Yellow
If you’re testing the waters or need something office-appropriate, this whisper-soft gradient is your best friend. It transitions from clear to the palest yellow imaginable – like sunshine filtered through clouds. I’ve worn this to client meetings and gotten compliments, not side-eyes from my boss.
The beauty is in its subtlety. You get that mood-boosting yellow without any drama. It works on literally every skin tone and nail length, making it perfect for beginners who aren’t sure about committing to color.
2. Yellow French Fade
This is my go-to when I want something familiar with a twist. Instead of traditional white tips, you get a soft yellow gradient that maintains that classic French structure everyone recognizes. It’s like wearing a blazer with fun earrings – professional but with personality.
The technique follows standard French manicure application, just swapping white for gentle yellow. Most nail techs can handle this without breaking a sweat, and it lasts about as long as a regular French mani.
3. Nude-Yellow Whisper
Think of this as the sophisticated cousin of barely-there yellow. The nude base keeps everything neutral and wearable, while the hint of yellow adds warmth without screaming for attention. I wore this to a wedding last month and it photographed beautifully without competing with my dress.
This design bridges the gap between “I want something special” and “I can’t wear anything too bold.” It’s particularly gorgeous on medium to deeper skin tones where the nude base enhances natural coloring.
4. Butter to Bright (Subtle Version)
When I first tried yellow ombre, this is where I started. The transition from pale butter yellow to medium brightness feels natural and forgiving if your application isn’t perfect. It’s bright enough to feel special but won’t get you in trouble at conservative workplaces.
The closely related yellow shades make blending easier than high-contrast combinations. I can usually achieve decent results at home, though it definitely looks more polished when done professionally.
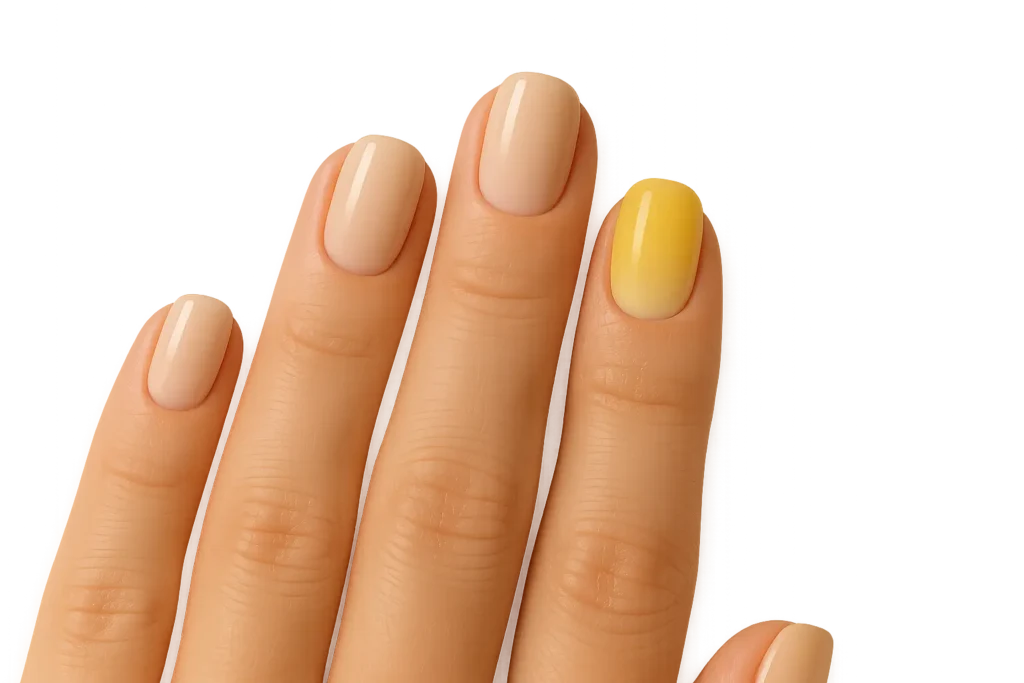
5. Single Accent Approach
Not ready for a full set? Try the gradient on just your ring fingers while keeping other nails neutral. This lets you experiment with bolder yellow shades while maintaining overall subtlety. It’s like dipping your toe in the water instead of jumping in the deep end.
I love this approach for trying out techniques before committing to a full manicure. Plus, if you mess up the application, you only have two nails to fix instead of ten.
Weekend Warriors and Vacation Vibes
6. Sunshine Gradient
This is what I picture when someone says “yellow ombre nails.” The transition from pale butter at your cuticles to bright sunshine at the tips feels like morning light gradually getting brighter. I wear this constantly during summer because it matches my mood and makes even mundane tasks feel more cheerful.
The color progression feels organic and natural, never forced or artificial. It photographs beautifully in natural light and pairs well with both casual sundresses and more put-together warm-weather outfits.
Plan your summer wedding beauty timeline with our AI Wedding Planner
7. Lemon Drop Fade
Fresh and citrusy, this starts with a clear or nude base and builds to vibrant lemon yellow. The transparency at the base keeps it from feeling overwhelming – perfect for those who want yellow but worry about it being “too much.” I got tons of compliments when I wore this to brunch last weekend.
The clear base makes this surprisingly wearable for different occasions. It’s bold enough to feel special but light enough that it doesn’t clash with most outfit choices.
8. Golden Hour Ombre
If you want something that feels expensive and sophisticated, this is it. The blend from champagne gold to deep golden yellow mimics those magical sunset tones we all chase for Instagram photos. I save this for evening events and date nights because it feels special and luxurious.
The metallic undertones catch light beautifully, making your hands look elegant even when you’re just gesturing while talking. It pairs gorgeously with gold jewelry and warm-toned clothing.
9. Orange Yellow Ombre
This warm gradient from deep orange to bright yellow captures that cozy autumn feeling perfectly. I wore this for a fall wedding and it complemented the seasonal colors without looking too matchy-matchy with the decorations.
The color combination evokes warmth and energy – perfect for when you want your nails to feel like a sunset. It’s particularly stunning on warmer skin tones where the orange base creates beautiful harmony.
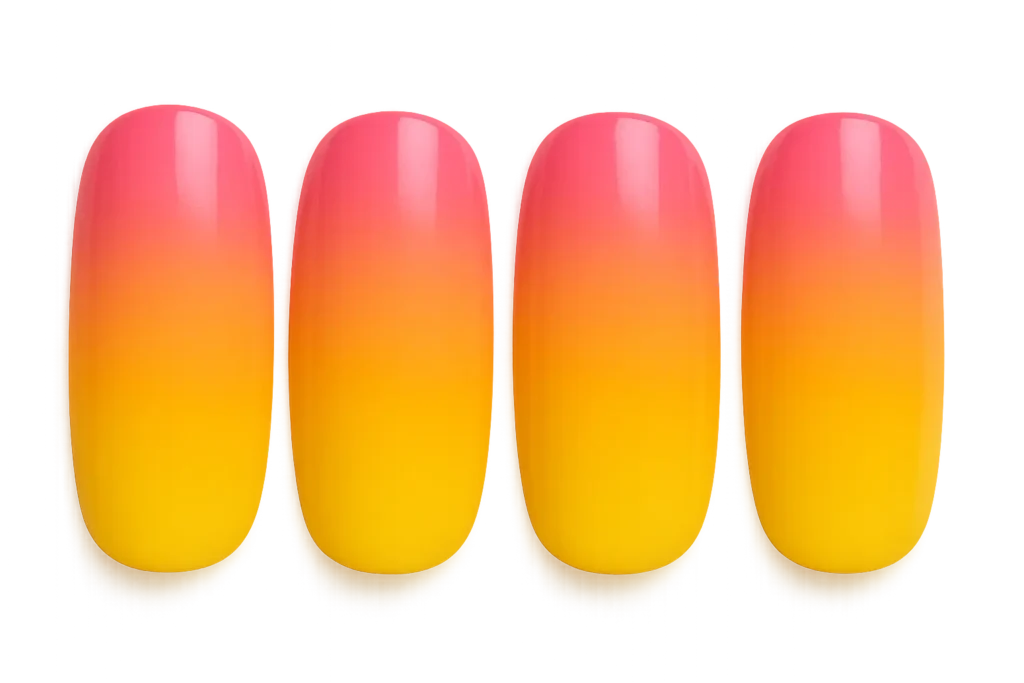
10. Tropical Sunset (Pink-Orange-Yellow)
Okay, this one requires some skill, but the payoff is incredible. The three-color flow from soft pink through coral orange to bright yellow perfectly captures those vacation sunset photos we all obsess over. I got this done professionally before a trip to Mexico and felt like I was carrying a piece of paradise with me.
The warm color progression feels natural and harmonious, never muddy or confused. It’s definitely a conversation starter and photographs amazingly well.
Go-Big-or-Go-Home Statement Makers
11. Electric Lemon
Fair warning: this neon gradient from white to electric yellow will get you attention. I wore this to a music festival and strangers kept asking about my nails. It’s bold, unapologetic, and definitely not for the faint of heart.
The intensity makes it perfect for concerts, parties, and any situation where you want to make a statement. It works best on medium to darker skin tones where the vibrant color creates beautiful contrast without overwhelming your natural coloring.
12. Highlighter Yellow Fade
Remember those bright highlighter pens from school? This captures that same fluorescent energy with a gradient that seems to glow from within. The translucent fade creates interesting depth that changes depending on the lighting.
This design works particularly well on longer nail shapes where the gradient has space to develop properly. It’s definitely a weekend-only look unless you work in a very creative environment.
13. Neon Pink and Yellow
This trending combination blends hot pink at the base with electric yellow at the tips, creating a vibrant effect that’s both unexpected and surprisingly harmonious. I tried this for a bachelorette party and it was absolutely perfect for the celebratory vibe.
The dual-neon approach creates incredible visual impact while following good color theory principles. These shades complement each other naturally, creating warmth that flatters most skin tones.
Maya, a friend of mine, chose this combo for Coachella and received countless compliments throughout the weekend. The vibrant colors photographed beautifully in both daylight and evening lighting, proving that sometimes the boldest choices create the most memorable looks.
14. Rainbow Yellow Blend
This incorporates yellow as the anchor while blending with other rainbow hues – think Pride celebration meets nail art. Each nail can feature different color combinations while maintaining yellow as the consistent thread throughout the set.
It’s playful, joyful, and perfect for festivals or any time you want to express happiness through color. Fair warning: this is definitely an advanced technique that’s best left to professionals.
15. Glow-in-the-Dark Yellow
Yes, this is a real thing, and yes, it’s as cool as it sounds. Special phosphorescent polish creates beautiful gradients in daylight and glows softly in darkness. I tried this for a Halloween party and people were fascinated all night.
The dual-purpose nature makes it perfect for evening events where you want an element of surprise. The glow effect is subtle but definitely noticeable in low-light situations.
Special Effects and Textured Options
16. Matte Yellow Gradient
Take any of these designs and finish them with a matte top coat for an instantly more sophisticated look. The velvety texture creates visual interest without additional colors or embellishments, making it perfect for when you want something modern and elegant.
I love how matte finishes make colors appear more saturated. This works particularly well in professional settings where you want color without excessive shine. Just be prepared for extra maintenance – matte shows fingerprints more easily.
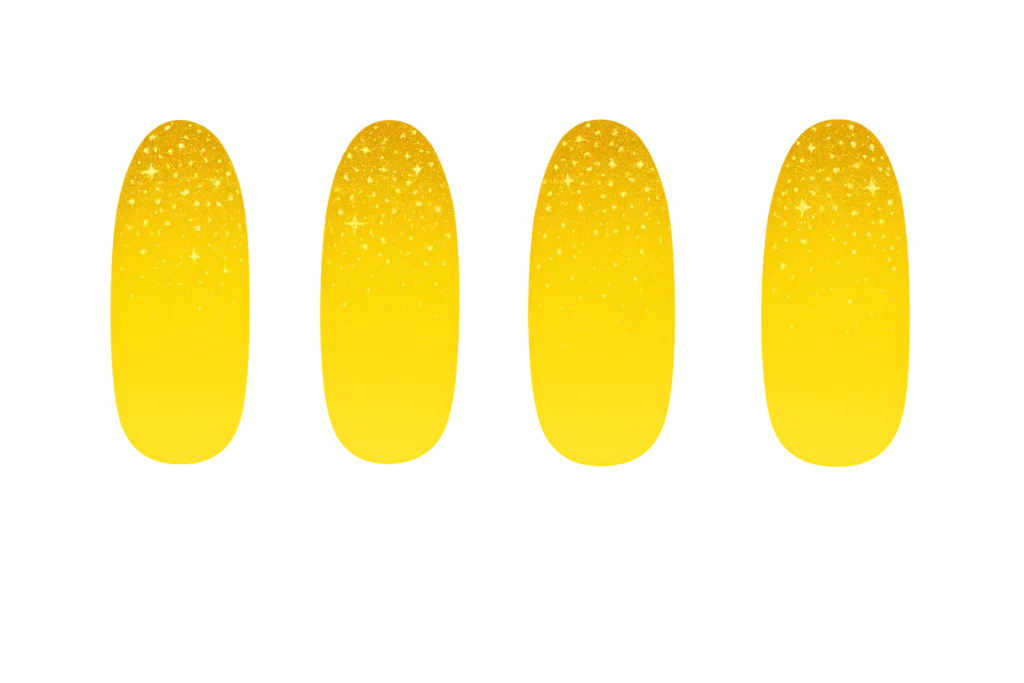
17. Glitter Yellow Ombre
Fine gold or yellow glitter that intensifies toward the tips adds sparkle and dimension to traditional gradients. The glitter concentration increases with the color intensity, creating a cohesive, glamorous design that’s perfect for special occasions.
I save this for evening events and parties where I want extra glamour. The sparkle catches light beautifully and adds movement to your gestures. Application requires layering glitter with regular polish, building up sparkle gradually.
18. Holographic Yellow Fade
This uses special holographic polish that shifts and changes in different lighting, creating a mesmerizing, futuristic effect that’s constantly evolving as you move your hands. It appears gold in warm light, green-yellow in cool light, and shows rainbow shimmer in direct sunlight.
The premium holographic polishes are pricey ($15-25 per bottle), but the effect is unlike anything else. It requires UV-protective top coat to prevent the color-shifting properties from degrading over time.
19. Textured Sand Yellow
This features a sandy, textured finish that transitions from light to dark yellow, creating a unique tactile experience. The organic texture adds dimensional interest and creates fascinating light play throughout the day.
It appeals to those who enjoy unique textures and want something completely different from standard smooth finishes. Application requires specialized textured polish and techniques to maintain the sandy effect while creating smooth color transitions.
Creative Color Combinations
20. Blue-Yellow Tropical
This gradient from ocean blue to sunshine yellow reminds me of clear skies meeting bright sunshine. The 40% blue to 60% yellow ratio creates the optimal tropical effect that’s perfect for beach vacations and summer parties.
The combination evokes those perfect vacation days when you can’t tell where the sky ends and the sun begins. It works beautifully on almond or oval nail shapes that showcase the sky-to-sun transition most effectively.
21. Purple to Yellow Gradient
This unexpected combination transitions from deep purple through lavender to bright yellow, creating a unique effect that’s both sophisticated and surprising. The complementary color relationship prevents either shade from overwhelming the design.
I was skeptical about this combo until I tried it, and now I’m a convert. The colors blend more harmoniously than you’d expect, creating interesting intermediate tones that photograph beautifully.
22. Green-Yellow Nature Fade
Transitions from forest or sage green to bright yellow create an earthy, nature-inspired look that suggests new growth and sunshine. The progression mimics natural plant growth patterns, making it feel organic rather than artificial.
This appeals to those who love natural color combinations and works beautifully for garden parties, outdoor weddings, and spring celebrations. The earth-to-sun progression feels grounding and energizing at the same time.
23. Lime-Yellow Fusion
This unique design combines lime green undertones with bright yellow, creating a citrus-inspired gradient that’s fresh and energetic. The green undertones add complexity and prevent the yellow from appearing flat or one-dimensional.
It’s perfect for those who want something different from standard yellow ombre while maintaining that cheerful, energetic vibe. The citrus theme works beautifully for summer events and tropical-themed celebrations.

Advanced Techniques and Multi-Color Blends
24. Coral-Peach-Yellow Sunset
This sophisticated three-color progression flows from coral through peach to bright yellow, creating a more subtle sunset effect than the pink-orange-yellow combination. The softer color transitions feel elegant and wearable for more formal occasions.
I chose this for a summer wedding and received compliments all day. The warm progression complemented the outdoor ceremony beautifully without being too bold for the formal setting.
25. Champagne-Gold-Yellow Luxury
The most sophisticated option on this list, this design transitions through metallic tones from champagne through gold to rich yellow. The metallic elements add luxury and depth that elevates this beyond basic color gradients.
This is my go-to for formal events and special occasions where I want something that feels expensive and elegant. The metallic progression catches light beautifully and pairs gorgeously with gold jewelry and formal attire.
Reality Check: What Actually Works
Let’s be honest about difficulty levels because I’ve learned this the hard way. Some of these designs require serious skill, and I’ve been doing my own nails for years but still can’t nail the rainbow blend. Know your limits and don’t be afraid to hit up a salon for the tricky stuff.
DIY-Friendly Options (I can do these at home with decent results):
- Barely-There Yellow
- Single Accent approach
- Basic Sunshine Gradient
- Yellow French Fade
- Simple two-color combinations
Professional Territory (Trust me, pay someone):
- Multi-color blends (3+ colors)
- Holographic effects
- Complex textured finishes
- Neon combinations
- Any design with special effects
The maintenance reality varies dramatically. Subtle designs like the nude-yellow whisper are forgiving and last about 7-10 days looking decent. Neon combinations? They start showing wear after 3-4 days and need frequent touch-ups to maintain that electric intensity.
Cost-wise, expect to pay $20-40 for basic yellow ombre at most salons, $45-75 for complex multi-color designs, and $35-60 for neon or special effect options. The premium holographic polishes alone cost $15-25 per bottle if you’re doing it yourself.
Application Tips That Actually Matter
Most of these techniques follow the same basic process, so I’ll walk you through it once rather than repeating myself 25 times. You’ll need makeup sponges (not kitchen sponges – learned that lesson), acetone for cleanup, and patience. Lots of patience.
Start with a white base coat if you’re using any neon or vibrant colors – it makes the colors pop and prevents them from looking muddy. Apply your lighter shade first, then use a damp makeup sponge to blend the darker shade from mid-nail to tips. Work in thin layers and let each dry completely.
The key is building up color gradually. I used to rush this step and end up with streaky, uneven gradients. Now I do 3-4 light applications rather than trying to get full coverage in one go.
Clean up is crucial – use a small brush dipped in acetone to clean around your cuticles and nail edges. This step makes the difference between “I did this myself” and “this looks professional.”
Connecting to Your Special Moments
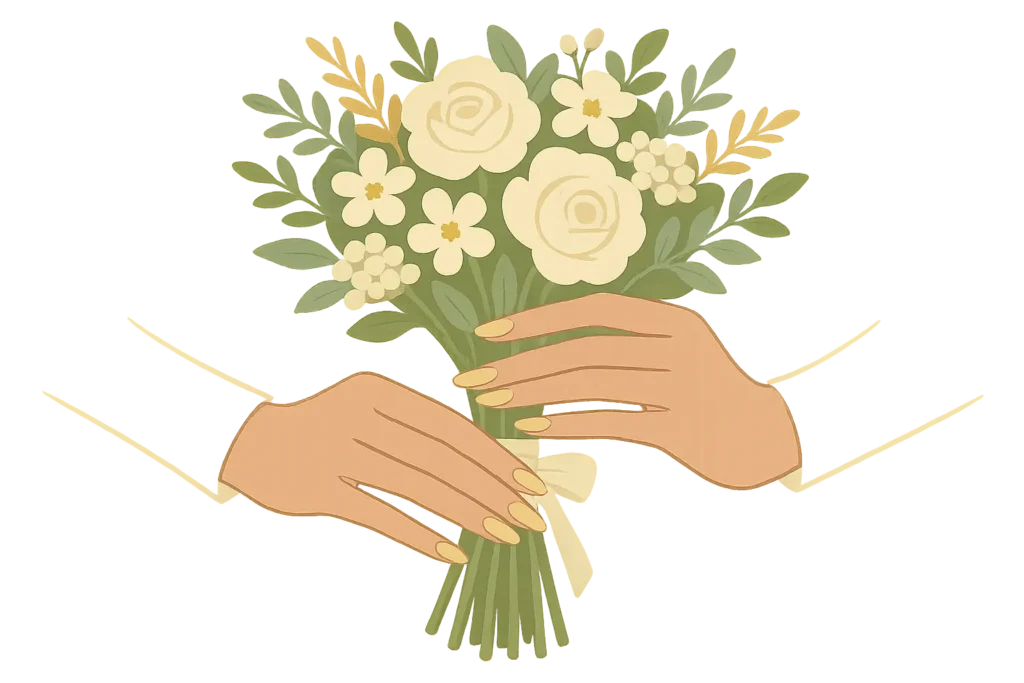
Planning a wedding or supporting someone else’s big day? Yellow ombre can be the perfect finishing touch for various celebrations. The sunny, optimistic nature makes it ideal for bachelorette parties, bridal showers, and even wedding day looks if you’re going for something unique.
I’ve seen brides choose subtle yellow ombre designs that photograph beautifully without competing with their dress or other wedding elements. The “Golden Hour Ombre” works particularly well for evening ceremonies, while “Lemon Drop Fade” is gorgeous for daytime celebrations.
Bridesmaids can use these designs to coordinate with wedding parties while expressing personal style. Sarah, a marketing executive I know, was worried about her conservative office environment but wanted to try the trend. She chose the “Nude-Yellow Whisper” design, which gave her that sunny mood boost while remaining professional enough for client meetings.
Coordinate your bridal beauty details stress-free with our AI Wedding Planner
For comprehensive wedding planning that includes coordinating beauty details, explore our ultimate maid of honor guide which covers everything from duties to style coordination.
This is where Bridesmaid for Hire becomes your ultimate wedding support system. Just as we provide professional bridesmaid services to ensure special days go smoothly, we understand that every detail matters – including your nails. Our professional bridesmaids have attended 150+ weddings and know exactly what works for different celebration types, venues, and dress codes.
Whether you need advice on which yellow ombre design will photograph best with specific wedding colors, or want someone experienced to help coordinate all beauty details for your bridal party, Bridesmaid for Hire offers the expert guidance you need. We’ve seen every possible wedding scenario and can help you navigate the sometimes overwhelming world of wedding beauty choices.
Plan every wedding beauty detail effortlessly with our AI Wedding Planner
My Honest Final Thoughts
Look, yellow isn’t for everyone, and that’s perfectly okay. But if you’ve been curious about adding some sunshine to your fingertips, start small. Try a subtle fade first – maybe the barely-there option or single accent approach. If you love it, you can always go bolder next time.
I’ve worn yellow ombre nails to job interviews, first dates, family dinners, and music festivals. Each time, they’ve made me feel a little more confident and a lot more cheerful. There’s something about carrying that sunny energy with you that genuinely affects your mood.
The key is honest self-assessment about your maintenance capabilities, lifestyle, and comfort level with attention-grabbing colors. Don’t feel pressured to go full neon if subtle gradients make you happy. Conversely, don’t hold back if you want to rock electric lime – life’s too short for boring nails.
Remember that professional application often yields better results for complex designs, but simpler gradients can definitely be mastered at home with practice. The investment in quality polishes and proper tools makes a significant difference in both appearance and longevity.
Whether you choose classic sunshine gradients for everyday wear or bold multi-color combinations for special celebrations, these designs bring joy and energy to your fingertips. The sunny disposition has a remarkable ability to boost both your mood and confidence – something we all need more of in our daily lives.
The worst that happens? You remove it and try something else. It’s just nail polish, not a tattoo. So go ahead, embrace the sunshine, and let your nails reflect the bright, optimistic person you are inside.
Explore every wedding-ready beauty tool in our full collection of Wedding Tools


1-800-BRIDESMAID
The Newlywed
Card Game
something extra to love
Read the weekly newsletter from Bridesmaid for Hire, 1-800-Bridesmaid, to hear about real stories, from strangers, who need advice on love, life, friendship, and so much more.
Looking for the perfect wedding gift for someone you adore? Grab The Newlywed Card Game. It's a fun and interactive game they can play on their honeymoon or future date nights.

