


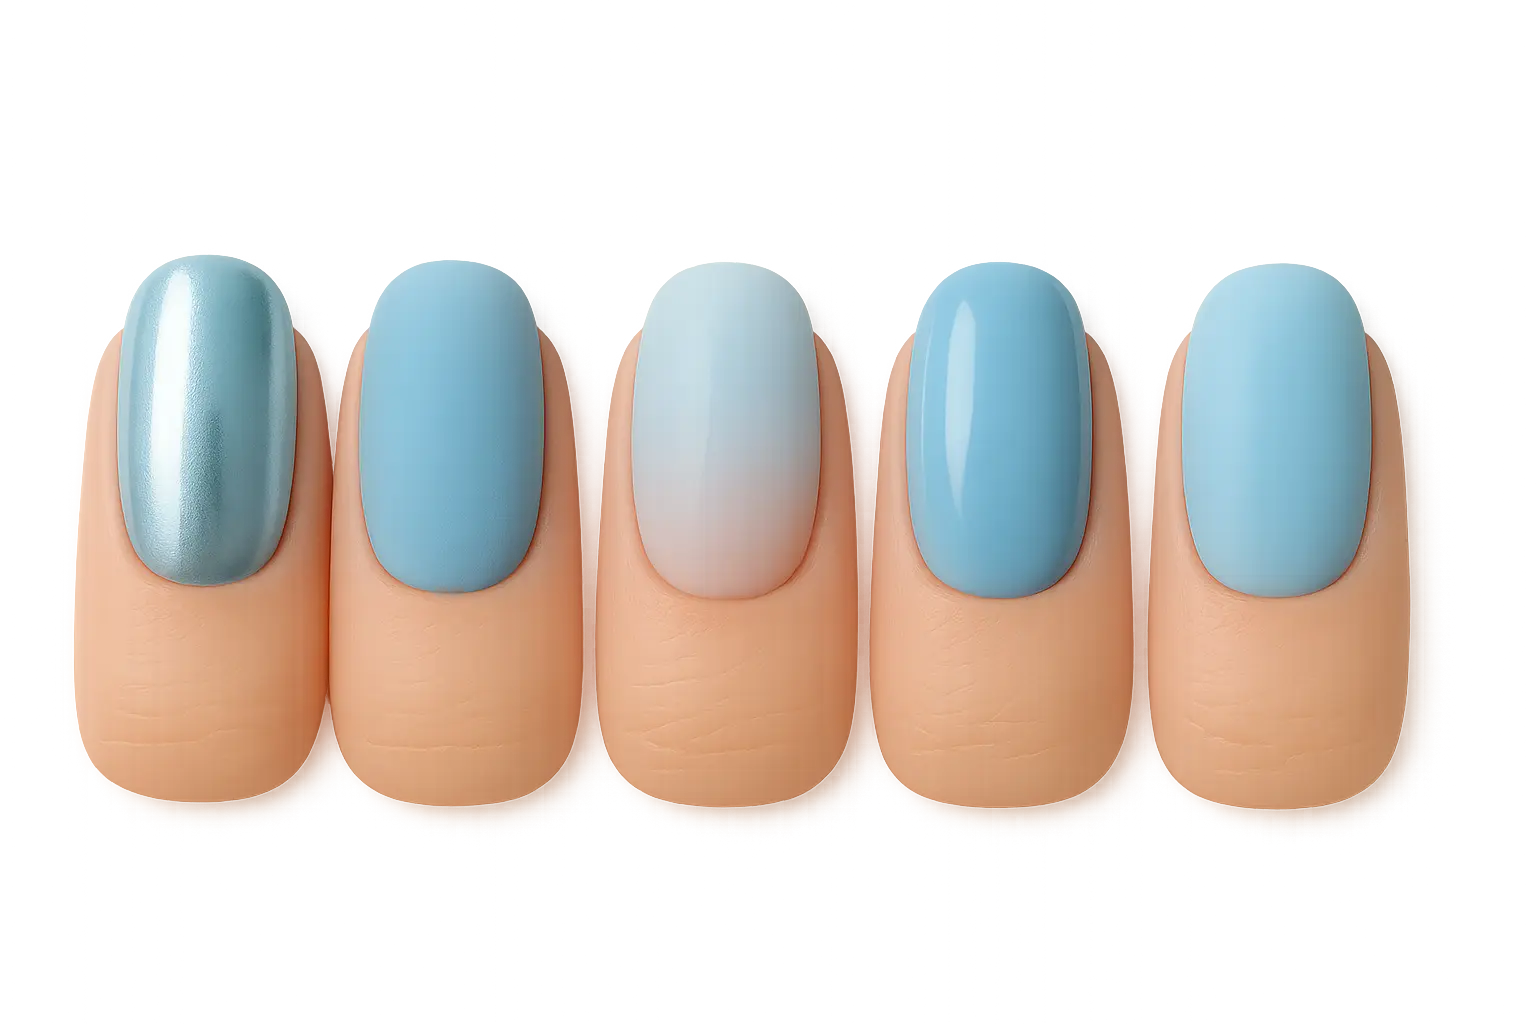
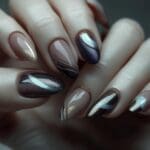
Okay, can we talk about how baby blue nails are having a serious moment right now? Google searches for ‘baby blue nail designs’ have skyrocketed by 5,000% in the last month according to Grazia Daily, and honestly? I get it.
I made the switch from my usual dark burgundy to a soft baby blue chrome finish for a friend’s wedding last month, and I’m still getting compliments. There’s something about this dreamy shade that feels both nostalgic and completely fresh at the same time. It’s like the perfect white t-shirt of nail colors – goes with everything and always looks put-together.
Quick Resources:
-
Find your most flattering nail shade with our Free Color Analysis Quiz
-
Explore all of our Wedding Tools for perfect event coordination
Whether you’re planning your next salon visit or thinking about trying some DIY magic at home, these 25 baby blue nail designs offer the perfect mix of sophistication and playfulness. From simple solids that work in boardrooms to show-stopping embellished looks for special occasions, there’s something here for every vibe and lifestyle.
TL;DR
- Baby blue nails work on everyone, but cool undertones make them pop even more
- Simple solids and gradients are your low-maintenance friends (2-3 weeks of perfect wear)
- Textured and embellished designs look amazing but need more TLC (weekly touch-ups)
- Short nails showcase minimalist designs beautifully, longer nails let you go wild with artwork
- Some techniques really do need professional skills – don’t feel bad about splurging on salon visits
- Budget ranges from $8-15 for DIY basics to $100+ for full glamour treatments
- Good prep work and quality topcoats are non-negotiable for lasting results
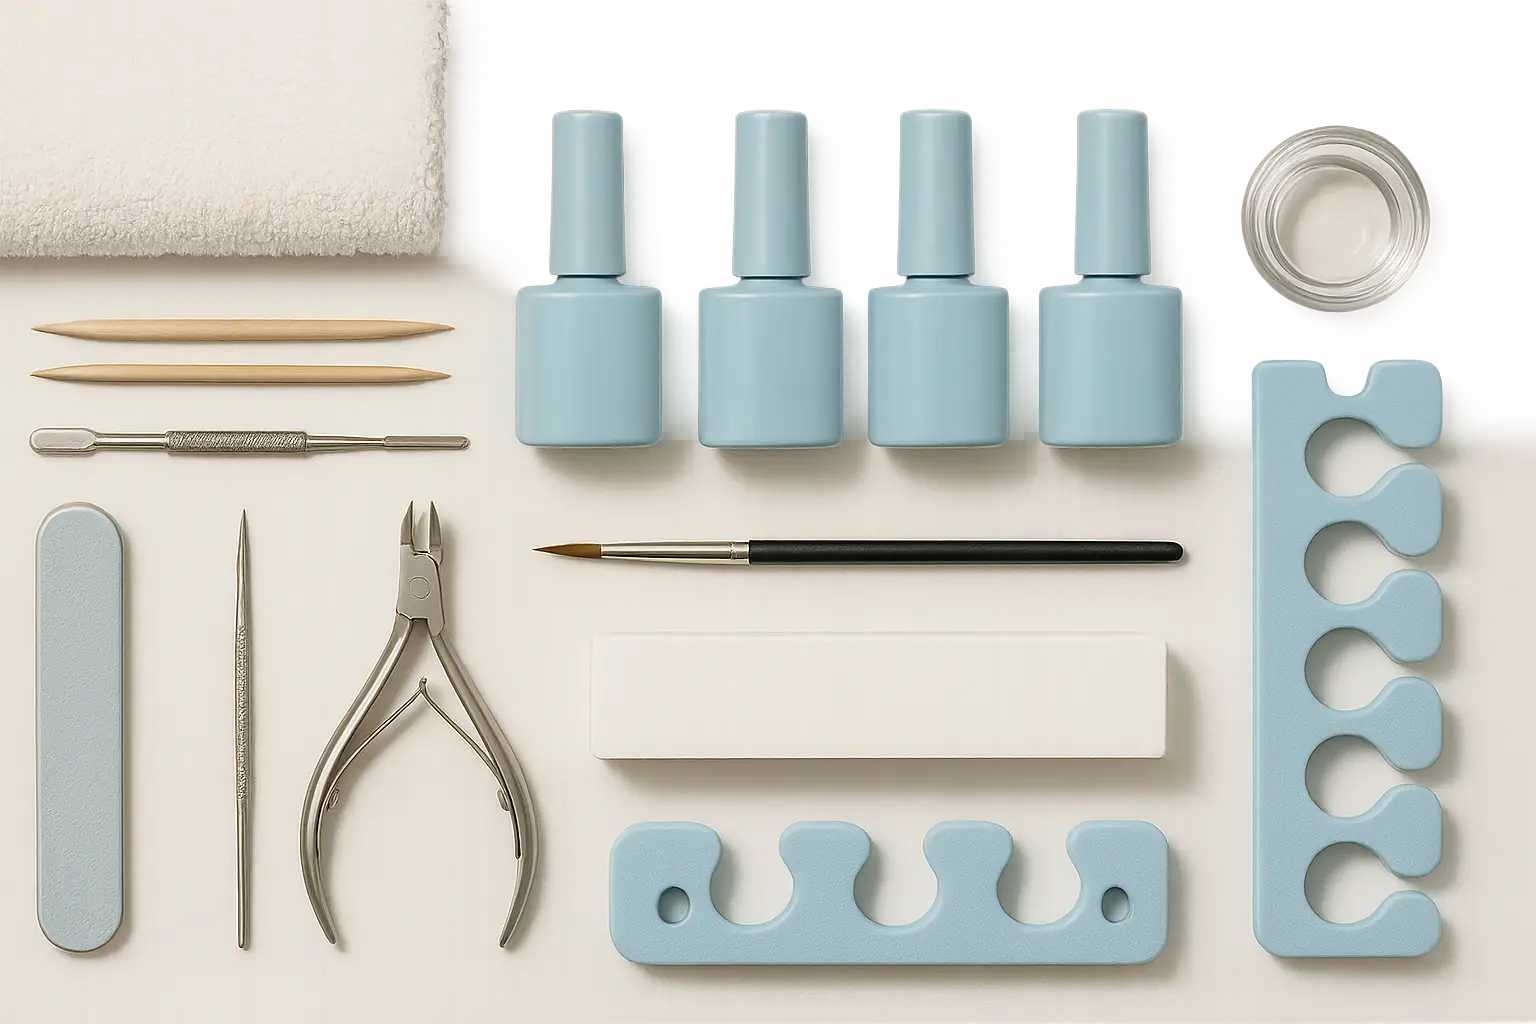
What to Consider Before Choosing Your Perfect Look
Picking the right baby blue nail design isn’t just about scrolling through Pinterest until something catches your eye. Your skin’s undertones make a huge difference in how these shades look on you. If you can see pink or blue veins through your wrist, you’ve got cool undertones and these colors will make your hands look amazing. Warm undertones might need slightly different blue variations to avoid that washed-out look.
Discover which shades complement your undertones best with our Free Color Analysis Quiz
Think about your daily life too. That gorgeous crystal-encrusted design might look incredible on Instagram, but if you’re constantly typing or handling things all day, you’ll be picking off rhinestones within 48 hours. A simple baby blue solid, on the other hand? That’ll go strong for weeks with minimal fuss.
Here’s where people get caught off guard – maintenance. Those stunning textured finishes catch on everything and need touch-ups constantly. Meanwhile, a classic matte finish can go nearly a month looking fresh with just some cuticle oil and gentle handling.
Match your ideal nail shade to your skin tone using our Free Color Analysis Quiz
| Lifestyle | Best Design Types | Wear Time | Reality Check |
|---|---|---|---|
| Busy Professional | Solids, simple gradients | 2-3 weeks | Boardroom-appropriate, low drama |
| Weekend Warrior | Basic textures, simple art | 1-2 weeks | Fun but not high-maintenance |
| Special Occasion | Embellished, 3D elements | 5-10 days | Gorgeous but handle with care |
| Creative Freedom | Mixed media, artistic | Varies | Perfect for self-expression |
Your nail length matters more than you might think. Short, practical nails look amazing with minimalist designs where the focus stays on that beautiful color. Longer nails give you the canvas for intricate artwork and dimensional elements, but they also require more careful handling in daily life.
Budget planning goes beyond just the salon appointment. Factor in quality base coats, potential professional removal, and how often you’ll need refreshes. Sometimes investing upfront in professional application actually saves money because it lasts longer and looks better.
Keep It Simple
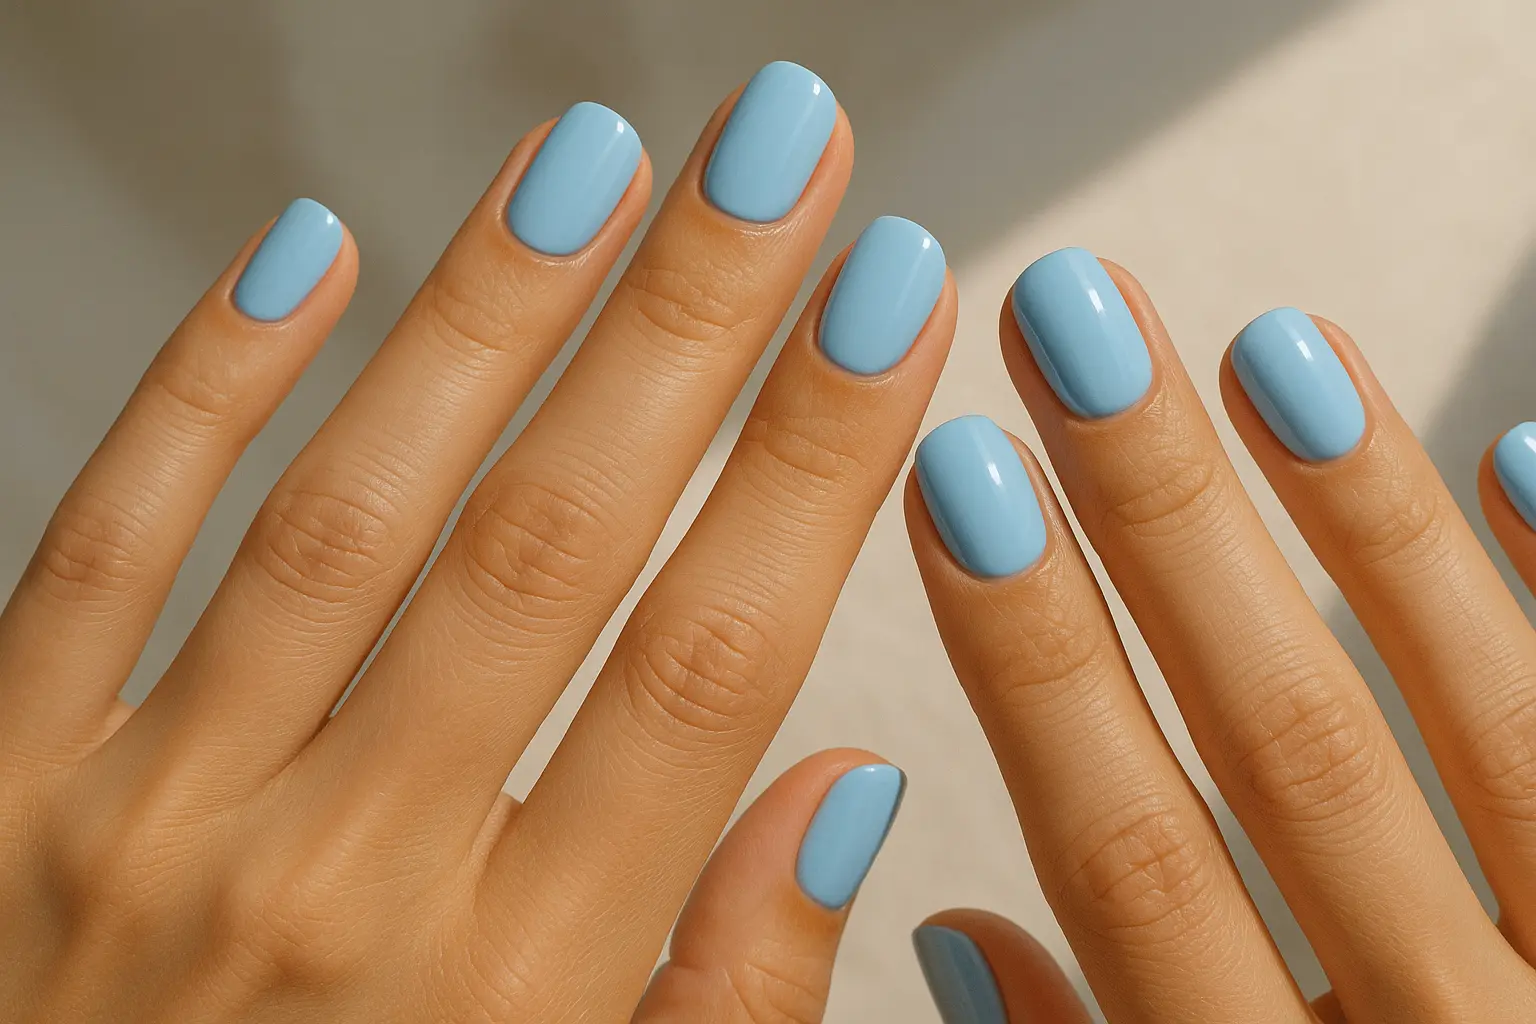
1. Pure Baby Blue Solid
Sometimes the simplest option is the best one. A classic baby blue gel manicure is like that perfect white t-shirt – it goes with everything and always looks put-together. Plus, if you’re new to doing your own nails, this is where you want to start.
The beauty of solid baby blue nails lies in their incredible versatility. You can dress them up with statement jewelry for evening events or keep them simple for everyday elegance. They work particularly well on shorter nail lengths where the focus stays on the gorgeous color rather than dramatic length.
Maintenance couldn’t be easier – just reapply topcoat every few days to keep that mirror-like shine. Most people get 2-3 weeks of perfect wear before needing a refresh, making this one of the most practical choices on the list.
2. Chrome Baby Blue
Chrome finishes create that stunning mirror-like effect that catches light from every angle. It’s like having liquid metal on your fingertips, and honestly, the wow factor is incredible. This technique works by applying chrome powder over a baby blue base, creating depth and dimension that photographs beautifully.
Fair warning though – this definitely needs professional application. I tried the DIY chrome powders once and ended up with what looked more like metallic smudges than that smooth mirror finish. The technique requires specific products and timing that nail techs have mastered.
Also, chrome finishes show fingerprints more than other options, so you’ll be wiping them down throughout the day. Small price to pay for nails that literally look like they’re made of precious metal.
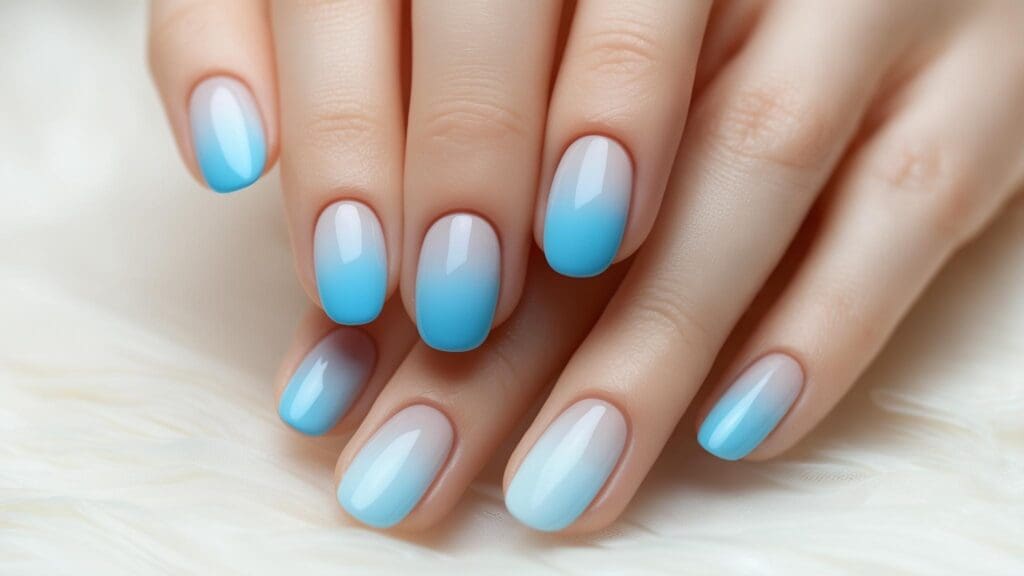
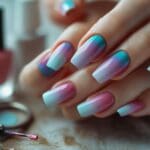
3. Baby Blue to White Gradient
This seamless blend creates the most ethereal, cloud-like effect. The transition from baby blue at the cuticle to pure white at the tips feels romantic and dreamy – perfect for weddings or any time you want something soft and feminine.
Professional application gets you the smoothest results, but patient DIYers can achieve lovely effects with makeup sponges and some practice. The key is working quickly while everything’s still blendable and building up the color in thin layers.
This design photographs incredibly well and pairs beautifully with both silver and gold accessories. The soft transition feels fresh and modern while staying completely timeless.
Sarah’s Wedding Success Story: “I wanted something special for my wedding but not too over-the-top. My nail tech created this baby blue to white gradient that looked like actual clouds – it was perfect with my silver jewelry and looked amazing in all our photos. Best part? It lasted through the entire honeymoon without a single chip.”
Planning your own wedding look? Find the perfect polish and palette with our Free Color Analysis Quiz
4. Dual-Tone Blue Gradient
Blending baby blue with deeper blue tones creates sophisticated depth while staying in the same color family. It’s like having multiple shades of sky on your fingertips, from that soft morning blue to deeper twilight tones.
This technique works particularly well on longer nail shapes where there’s more space to showcase the gradient effect. Almond and coffin shapes especially complement the flowing transition.
You can customize the intensity by adjusting the ratio of light to dark blue. More baby blue creates a softer, more subtle look, while emphasizing the deeper tones adds drama and sophistication.
5. Matte Baby Blue
Transform that classic baby blue into something completely modern with a matte topcoat. The velvety finish feels incredibly current and offers a sophisticated alternative to traditional glossy manicures. It’s like the difference between a silk blouse and a cotton t-shirt – same color, totally different vibe.
Matte finishes are having a major moment right now, and baby blue is the perfect shade to showcase this trend. The soft color prevents the matte finish from looking too stark or harsh, which can happen with darker shades.
Application is straightforward – apply your regular baby blue polish and finish with matte topcoat instead of glossy. The result feels luxurious and contemporary, perfect if you want something different without going too bold.
Add Some Texture
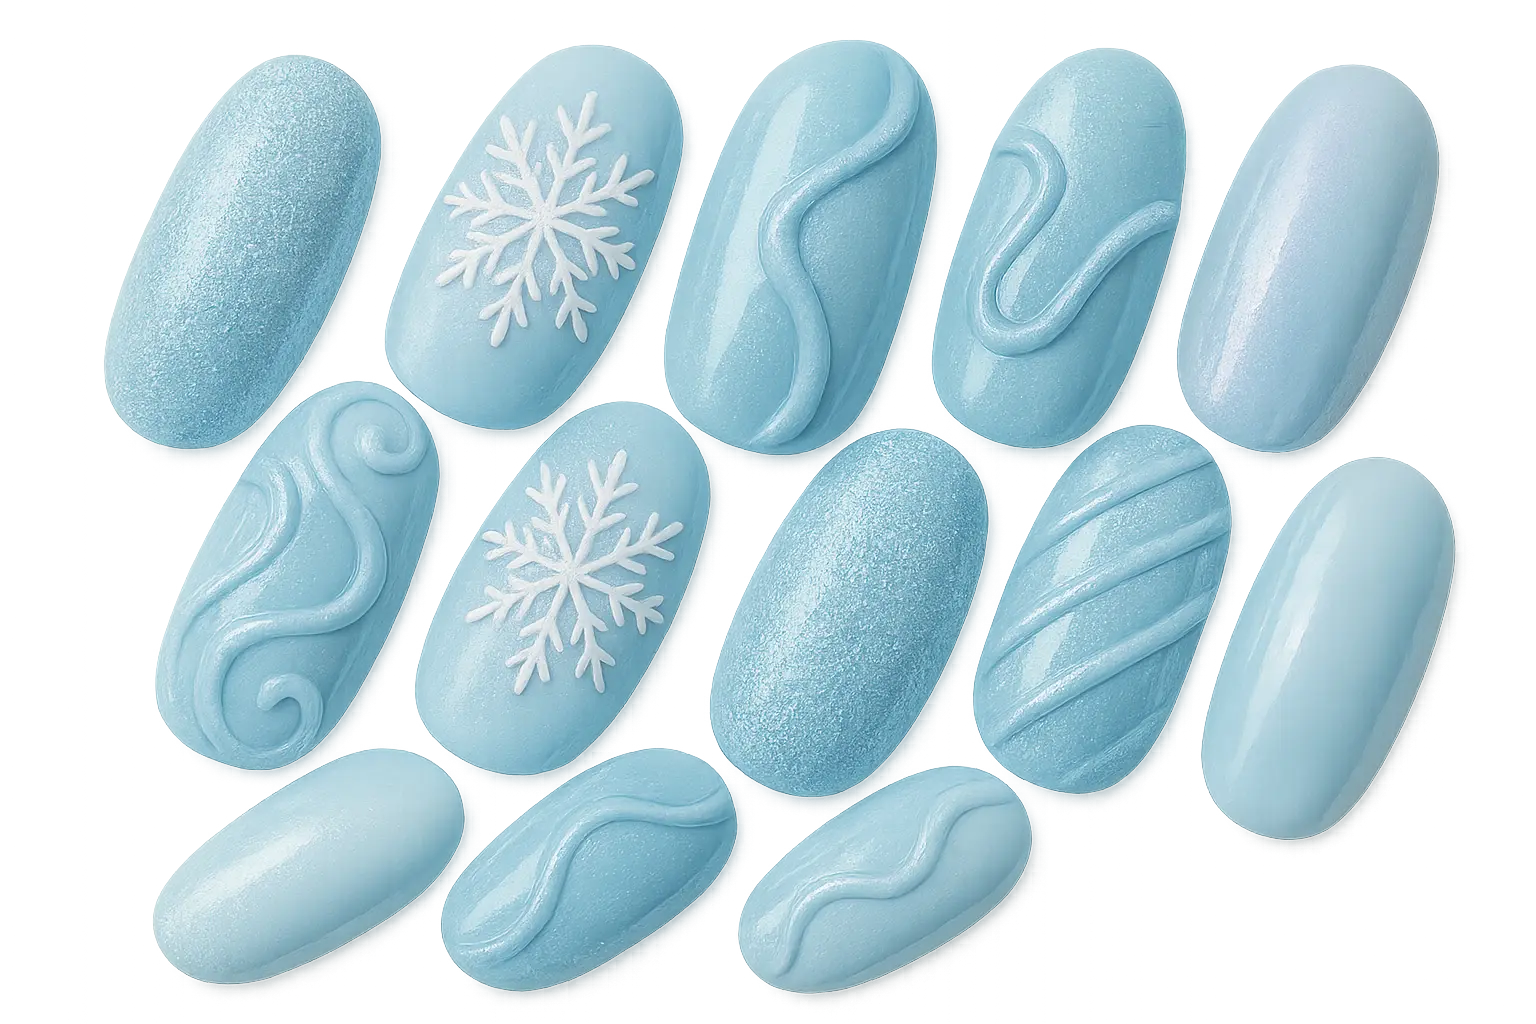
6. Ice Crystal Texture
You know those mornings when frost forms perfect patterns on your car windshield? That’s exactly what this technique captures on your nails. The textured polish creates these amazing three-dimensional crystals that look like winter magic happened right on your fingertips.
Fair warning though – this stuff catches on everything. Your sweaters, your hair, that bag of chips you’re trying to open. It’s gorgeous for photos and special events, but maybe not the best choice if you’re constantly typing or handling things all day.
The application definitely needs a pro. I tried this at home once and ended up with what looked more like chunky glitter than delicate ice crystals. Sometimes it’s worth splurging on salon expertise, especially for techniques this specialized.
7. Velvet Flocking
This one’s wild – your baby blue nails literally feel fuzzy, like tiny pieces of velvet. It’s such a conversation starter because people can’t resist touching them (with permission, hopefully!). The velvet powder creates this incredibly soft, touchable texture that’s completely unique.
The catch? It lasts about as long as fresh flowers. Maybe a few days if you’re really careful about not touching anything. But for a special event where you want something completely unique and don’t mind the short wear time, it’s pretty amazing.
The application involves dusting velvet powder over wet polish, then brushing away the excess. It requires working quickly and definitely benefits from professional application to get even coverage.
8. Sugar Coating Effect
This is like the sweet spot between boring and high-maintenance. You get that sparkly, textured look without the drama of velvet or ice crystals. It reminds me of those sugar cookies with the coarse sugar on top – hence the name.
Fine glitter mixed directly into the gel creates this granular, sugar-like texture that sparkles subtly while keeping that baby blue base color. It’s way more practical for everyday wear than other textured options, but still gives you that “something special” factor when the light hits just right.
The technique involves mixing fine glitter into your base color before application, creating texture without the extreme raised surface of other dimensional options. You get visual interest without sacrificing too much practicality.
9. Bubble Effect Design
Okay, this one either looks really cool or really weird – there’s not much middle ground. When done well, it’s like having tiny soap bubbles frozen on your nails in various shades of blue. When done poorly… well, let’s just say it can look like a nail disaster.
The bubbles create interesting light play and shadow effects that change as you move your hands. It’s definitely a conversation starter that feels fun without being childish, though the playful nature might not work for every professional setting.
Definitely a professional-only situation. The timing has to be perfect to get those bubbles to form properly, and it requires specific products that aren’t typically available for home use.
10. Crackle Finish
Remember when crackle nail polish was everywhere about ten years ago? Well, it’s back, and honestly, it works really well with baby blue nails and the whole winter theme. The random crack patterns genuinely look like ice that’s starting to break up.
This is one texture you can actually do at home pretty easily. Crackle topcoats are widely available and the technique is straightforward – just don’t go too thick with the crackle coat, or you’ll end up with muddy-looking results instead of crisp, defined cracks.
The crackled surface adds visual interest without being too raised or textured for practical wear. It strikes a nice balance between special effect and everyday wearability, making it perfect for those who want something different but still functional.
Get Artistic
11. Snowflake Art
Hand-painted snowflakes over baby blue base are absolutely gorgeous, but let’s be real – unless you have steady hands and some serious patience, you’re going to want a nail artist for this one. I’ve seen too many DIY attempts that look more like white blobs than delicate snowflakes.
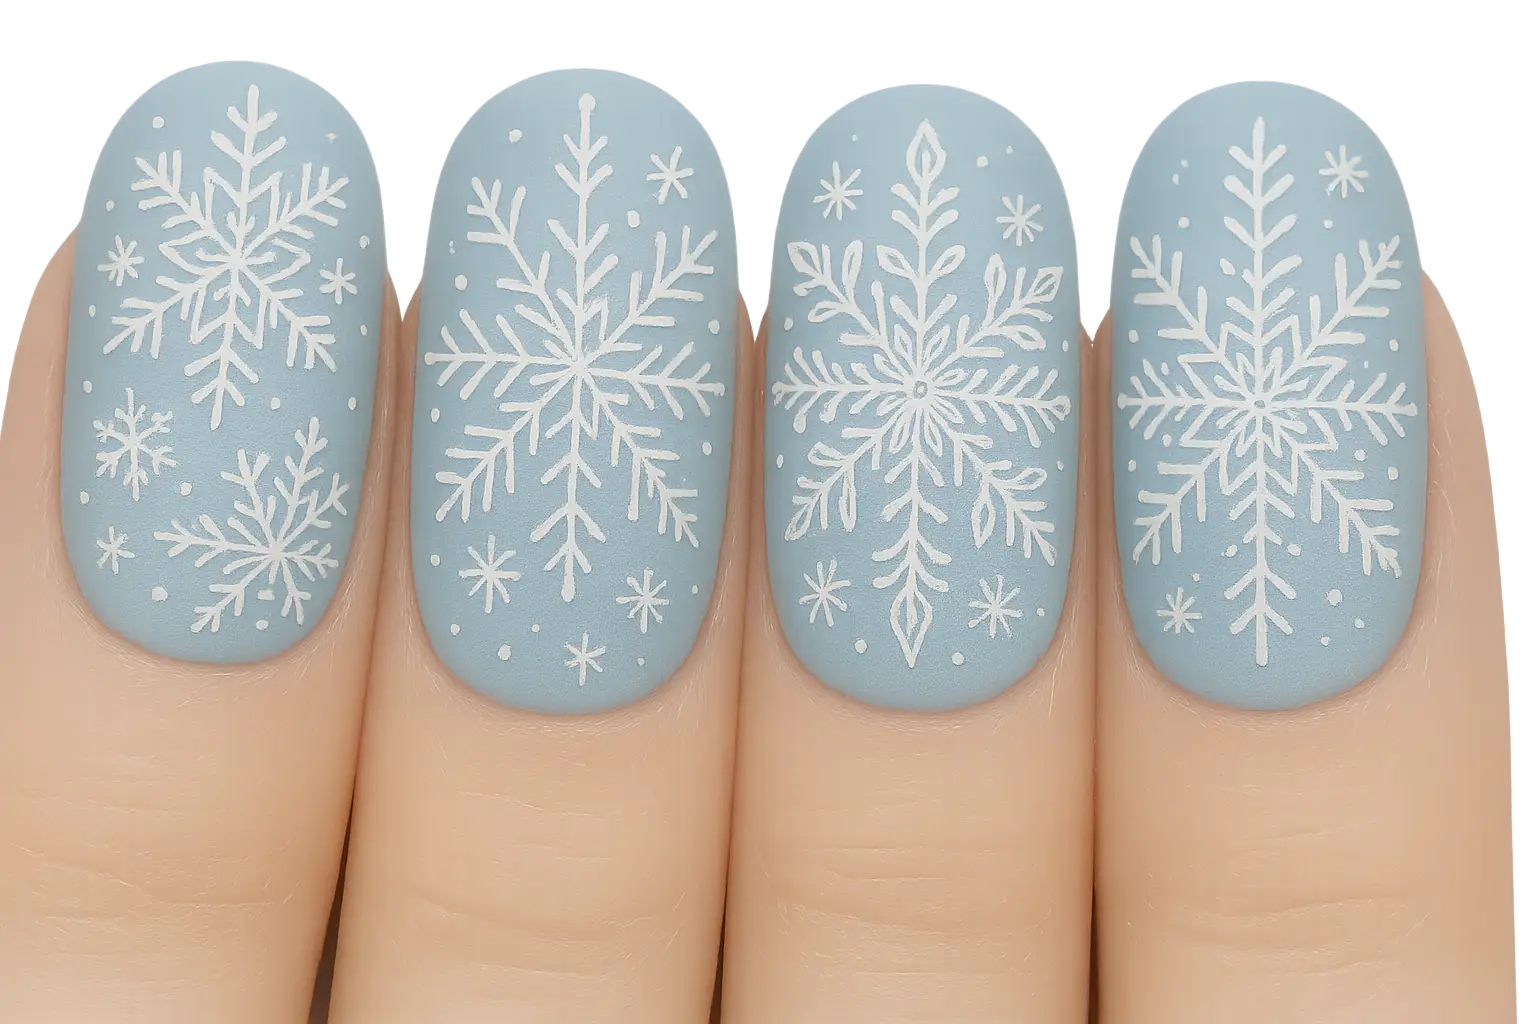
Each snowflake can be unique, just like in nature, making every manicure one-of-a-kind. The technique ranges from simple stamped designs that confident DIYers can manage to intricate hand-painted masterpieces that require professional skill and specialized brushes.
The stamped versions are a good middle ground if you want the look without the price tag or time commitment. Adding micro-glitter to snowflake centers creates extra sparkle that catches light beautifully and photographs amazingly well.
12. Marble Effect
This technique is so satisfying to watch, but tricky to master. You’re basically creating tiny pieces of art on each nail using white and various blue shades to mimic natural stone patterns. The swirling effects feel organic and sophisticated.
The process involves dropping different colored polishes into wet base coats and swirling with toothpicks or marbling tools. Working quickly is essential since gel begins setting rapidly, and each nail becomes a unique piece of wearable art.
I love that each nail turns out slightly different – it feels more organic and natural than perfectly matching designs. Professional application ensures the cleanest results, though adventurous DIYers can achieve lovely effects with practice and patience.
Emma’s Marble Success: “I was skeptical about marble nails until my nail artist showed me how sophisticated they could look in baby blue and white. The organic swirls looked like real stone, and I got so many compliments at work. The technique looked complex but my tech made it seem effortless – definitely worth the professional application.”
13. Geometric Ice Patterns
Clean lines and sharp angles over that soft blue base create such a cool contrast. It’s very modern and architectural-looking, with geometric shapes in white and silver creating contemporary, fashion-forward designs.
Just know that achieving those crisp lines usually means tape, steady hands, and probably a professional. The precision required makes messy edges really obvious, so it’s worth investing in proper application if you want clean, striking results.
This style works particularly well on longer nail shapes where there’s more space to showcase the geometric elements. Square and coffin shapes especially complement the angular design aesthetic.
14. Watercolor Wash
This gives you that dreamy, artistic vibe without looking too try-hard. The soft, flowing watercolor effects blend multiple blue tones for an organic, dreamy appearance that feels like wearable art.
The technique creates unpredictable, flowing patterns by working with wet polish and allowing colors to blend naturally. The unpredictable results are part of the charm – each application creates unique patterns that can’t be exactly replicated.
Even if your technique isn’t perfect, the organic blending can still look intentional and beautiful. This design photographs incredibly well and works great for creative professionals or anyone who appreciates artistic expression.
15. Ice Shard Design
Sharp, angular designs using tape and multiple blue shades create the appearance of actual ice shards or crystals. The geometric precision contrasts beautifully with the soft baby blue base, creating something that feels both edgy and winter-appropriate.
Professional application ensures clean lines and proper color placement. The technique involves careful taping and layering to achieve that crystalline shard effect, requiring precision that’s hard to achieve at home.
This design feels modern and edgy while maintaining the cool, winter aesthetic. It’s perfect for those who want something artistic but with clean, defined elements rather than organic, flowing patterns.
Go Glamorous
16. Crystal Accent Nails
A few well-placed crystals can make your baby blue nails look like they cost way more than they actually did. The key is restraint – too many crystals and you’ll look like a disco ball, but strategic placement creates instant elegance perfect for special occasions.
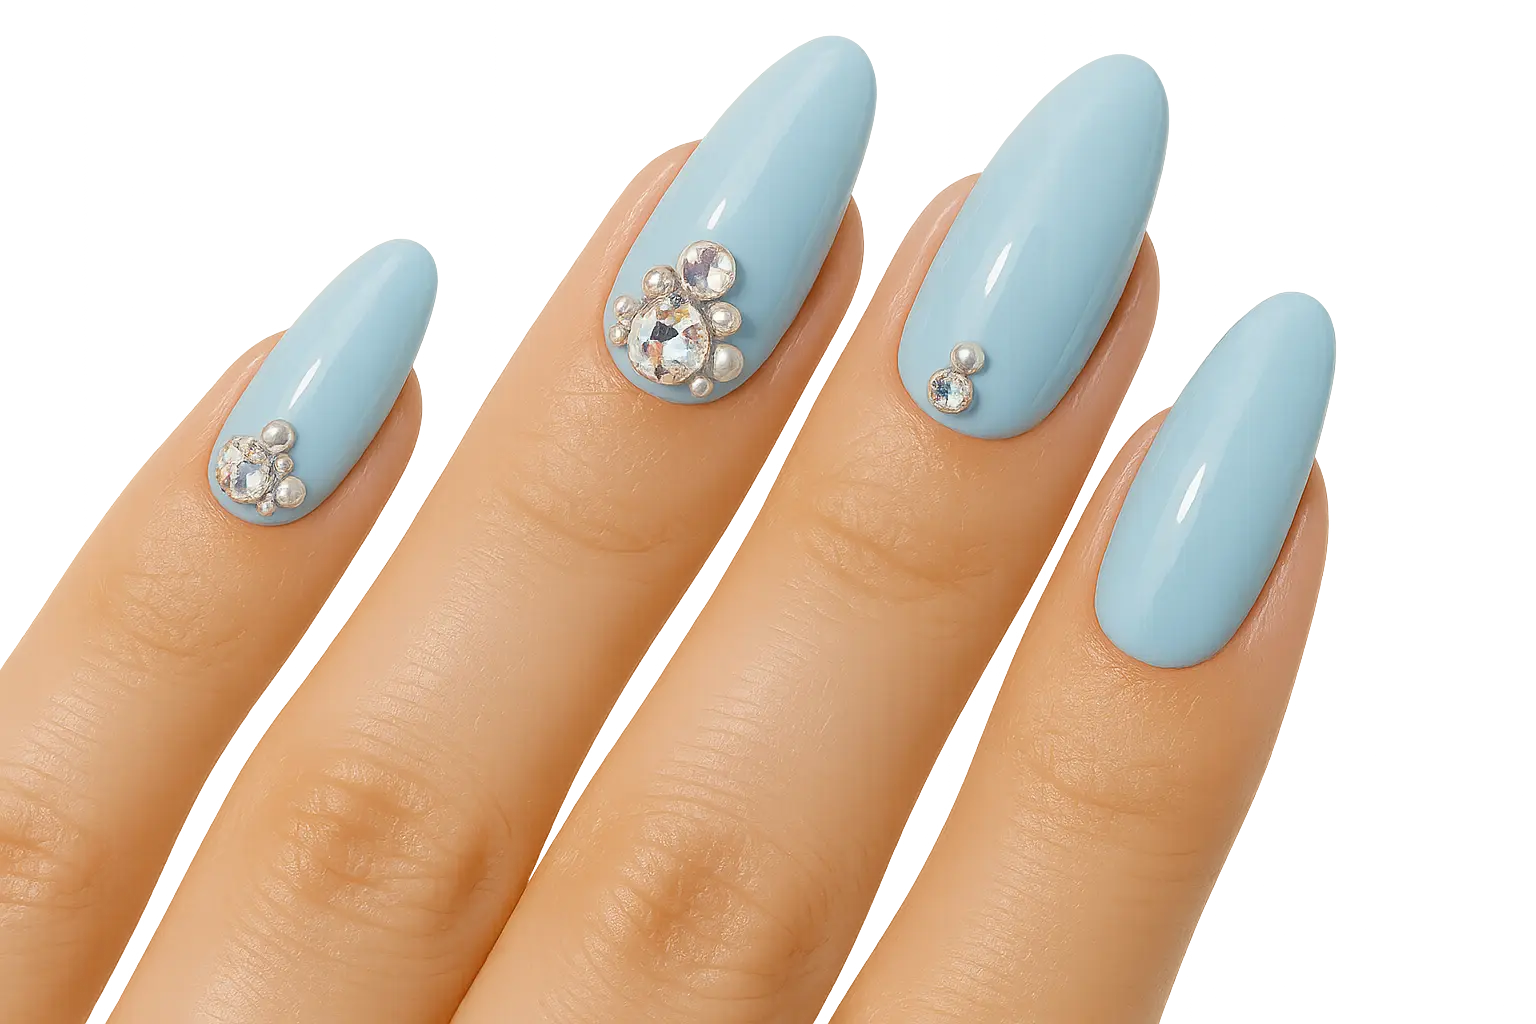
Professional application ensures crystals stay secure and are properly sealed with quality nail glue or gel adhesive. This prevents stones from popping off during wear, which always seems to happen at the worst possible moments.
Just remember that crystals have a way of disappearing when you least expect it. Always have a backup plan if you’re wearing these to something important, and maybe keep a few spare crystals for emergency repairs.
17. Pearl Detail Design
Pearls feel so classic and bridal. They add that touch of elegance without being too flashy, creating sophisticated luxury that’s perfect for weddings, anniversaries, and romantic occasions where feminine elegance is desired.
Small pearls embedded in baby blue gel create timeless appeal that photographs beautifully. The technique involves placing pearls while the gel is still wet, then curing to secure them permanently with proper sealing around pearl edges to prevent lifting.
This design feels incredibly sophisticate d and works beautifully with silver jewelry and accessories. The pearls complement the soft baby blue perfectly, creating a cohesive look that feels expensive and well-thought-out.
18. Glitter Gradient
This is probably the most wearable of the glamorous options. Fine silver or iridescent glitter concentrated at the tips and fading into pure baby blue at the base creates sparkle without overwhelming the design. The gradient effect feels sophisticated rather than juvenile.
The glitter concentrated at the tips means it grows out way better than all-over glitter coverage, and it’s not as in-your-face as full coverage sparkle. You get that glamorous appeal without looking like you’re headed to a rave.
Application involves building glitter density gradually, starting heavy at tips and blending toward the base. Multiple thin layers create smoother gradients than trying to do it all in one thick application.
19. Foil Accent Strips
Thin foil strips create these cool linear elements that catch light differently than glitter. It’s very modern and high-fashion looking, with metallic strips in silver or holographic finishes adding contemporary edge while maintaining elegance.
The foil catches light in straight lines rather than scattered sparkles, creating architectural interest that feels current and editorial. However, the application needs to be precise or it looks messy rather than intentionally geometric.
Professional application ensures foil strips adhere properly and are sealed to prevent lifting. The precision required for clean, straight lines makes this a salon-recommended design rather than a DIY project.
20. 3D Flower Embellishments
These tiny sculpted flowers are like little pieces of jewelry for your nails. Small 3D acrylic flowers in white or silver applied to accent nails create romantic, dimensional beauty that’s absolutely stunning for special occasions.
They’re absolutely beautiful but require the gentlest handling. Think of them as special occasion nails, not everyday wear. The flowers are created separately using acrylic powder and sculpting tools, then attached with strong adhesive once fully cured.
Perfect for romantic occasions like weddings or date nights where you want maximum feminine impact. The 3D elements create beautiful shadows and depth that flat nail art simply can’t achieve.
Try Something Different
21. Cloud Nail Art
Fluffy white clouds over baby blue base – it’s like having a piece of sky on your nails. The sponge technique creates that soft, billowy texture that actually looks like real clouds floating across a perfect blue sky.
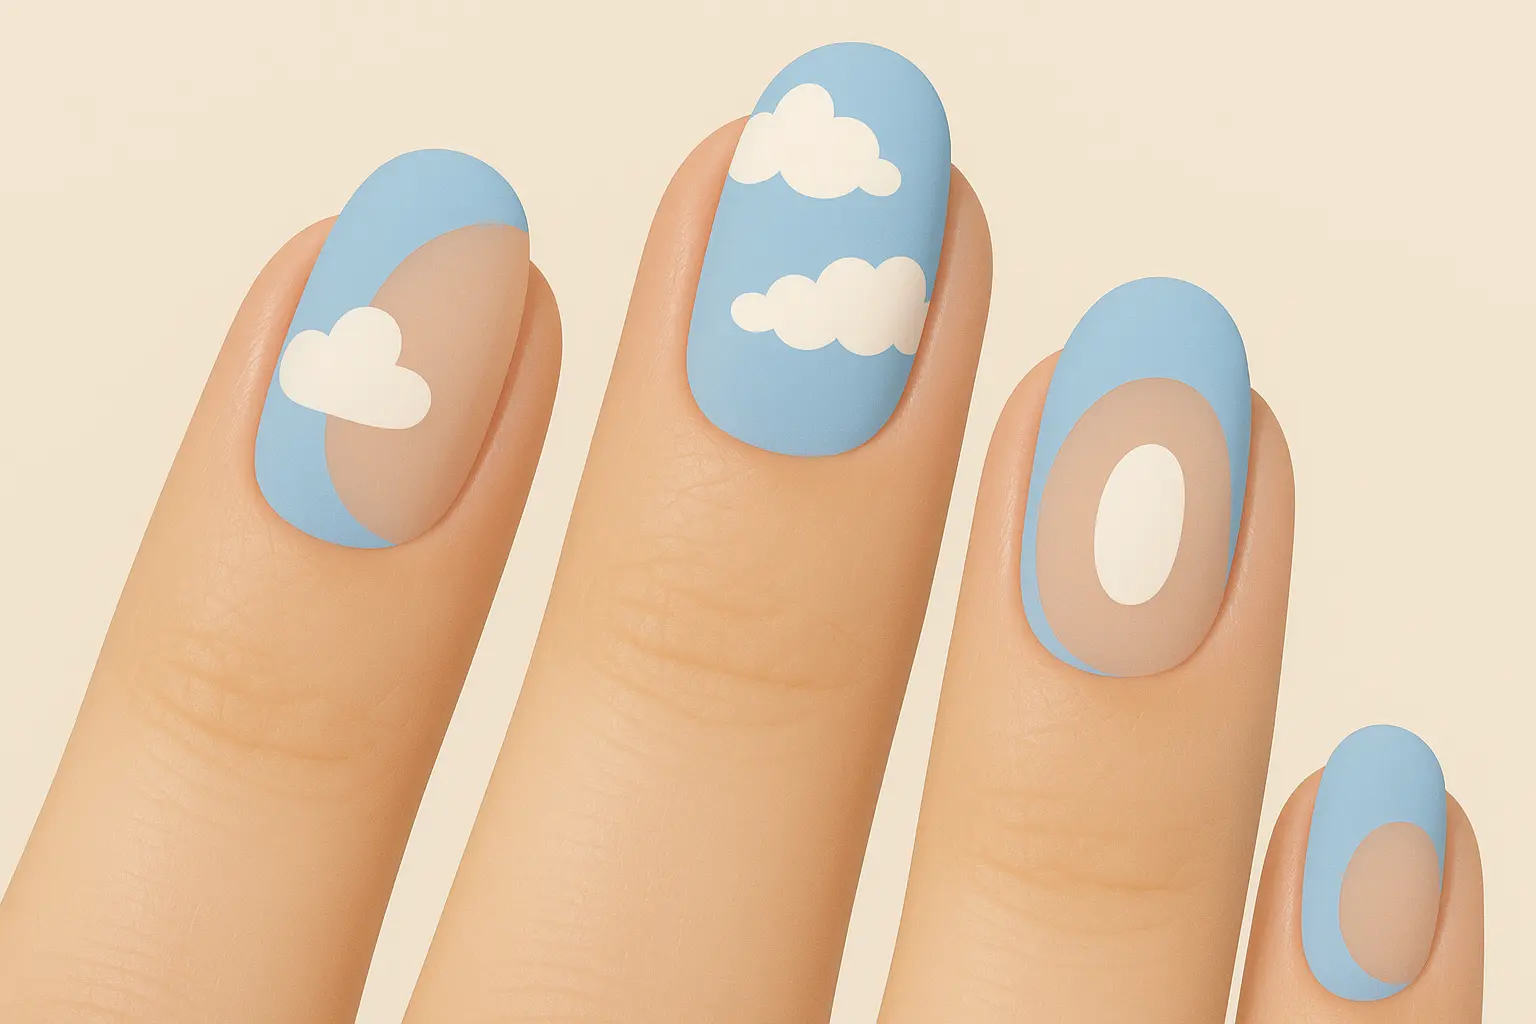
This is one of those designs that photographs amazingly well for social media, if that’s your thing. The whimsical, dreamy quality feels perfect for spring and summer seasons, festivals, vacations, and any time you want playful creativity.
Sponge application creates the organic cloud shapes by dabbing rather than wiping motions, building up the cloudy opacity gradually for natural-looking results that feel optimistic and cheerful.
22. Negative Space Design
Sometimes what you don’t paint is just as important as what you do. Strategic areas of natural nail showing through baby blue polish create modern, minimalist patterns that feel fresh and contemporary.
The contrast between polished and natural areas creates interesting geometric effects using tape, stencils, or freehand techniques. The key is clean, precise lines – messy edges will make it look unfinished rather than intentionally minimalist.
This trend aligns perfectly with minimalist aesthetics while still offering visual interest. It’s perfect for those who want something current without being too bold or attention-grabbing.
Maya’s Minimalist Success: “I love the negative space trend because it feels so modern and clean. My nail tech created geometric cutouts that showed my natural nail through the baby blue polish – it looked expensive and editorial. Plus, it grew out beautifully without looking messy like traditional polish does.”
23. Color-Changing Thermal Polish
Your nails literally change color based on temperature – how cool is that? Special polish shifts between baby blue and deeper blue based on body temperature and environmental conditions, creating an interactive element that never gets boring.
It’s like having a mood ring, but prettier and on your fingertips. Cold temperatures reveal one shade while warmth brings out another, creating constant visual interest throughout the day as conditions change.
This playful technology appeals to those who love unique, conversation-starting elements. It’s perfect for people who get bored with static nail colors and want something dynamic and fun.
24. Holographic Baby Blue
This shifts colors in different lighting, creating rainbow effects that are pretty mesmerizing. Quality holographic polishes contain special particles that refract light into spectrum colors, with the effect being most dramatic in direct sunlight or bright artificial lighting.
It’s definitely a statement choice – you’ll catch yourself staring at your own nails throughout the day. The multidimensional finish feels futuristic and eye-catching, perfect for music festivals, parties, and any occasion where you want maximum visual impact.
The holographic effect works beautifully with the soft baby blue base, creating rainbow sparkles that dance across the nail surface without being too overwhelming or childish.
25. Mixed Media Design
Different finishes on each nail but keeping the same baby blue color family – it’s like getting to try multiple trends at once without committing fully to any single one. You might have matte on one nail, chrome on another, glitter gradient on a third.
The key is balancing different finishes so they complement rather than compete with each other. Usually one or two nails feature special techniques while others remain simpler to avoid overwhelming the overall look.
This approach lets you experiment with multiple trends simultaneously and creates unique, personalized results that reflect your individual style preferences. It’s perfect for indecisive people who want to try everything.
How Each Design Matches Your Lifestyle
Look, not every nail design works for every lifestyle. If you’re constantly typing, washing dishes, or working with your hands, those gorgeous 3D flowers are going to drive you crazy within a day.
For busy professionals: Stick with solid colors (Design 1), simple gradients (Designs 3-4), or matte finishes (Design 5). They look polished without being distracting, last longer with minimal touch-ups, and work in conservative office environments.
For special events: This is when you can go all out with crystals (Design 16), detailed artwork (Designs 11-15), or dimensional elements (Design 20). Just plan for shorter wear time, more careful handling, and potentially higher costs.
For everyday glamour: Glitter gradients (Design 18) and subtle textures (Design 8) give you that extra something without being impractical for daily activities like typing, cleaning, or general life tasks.
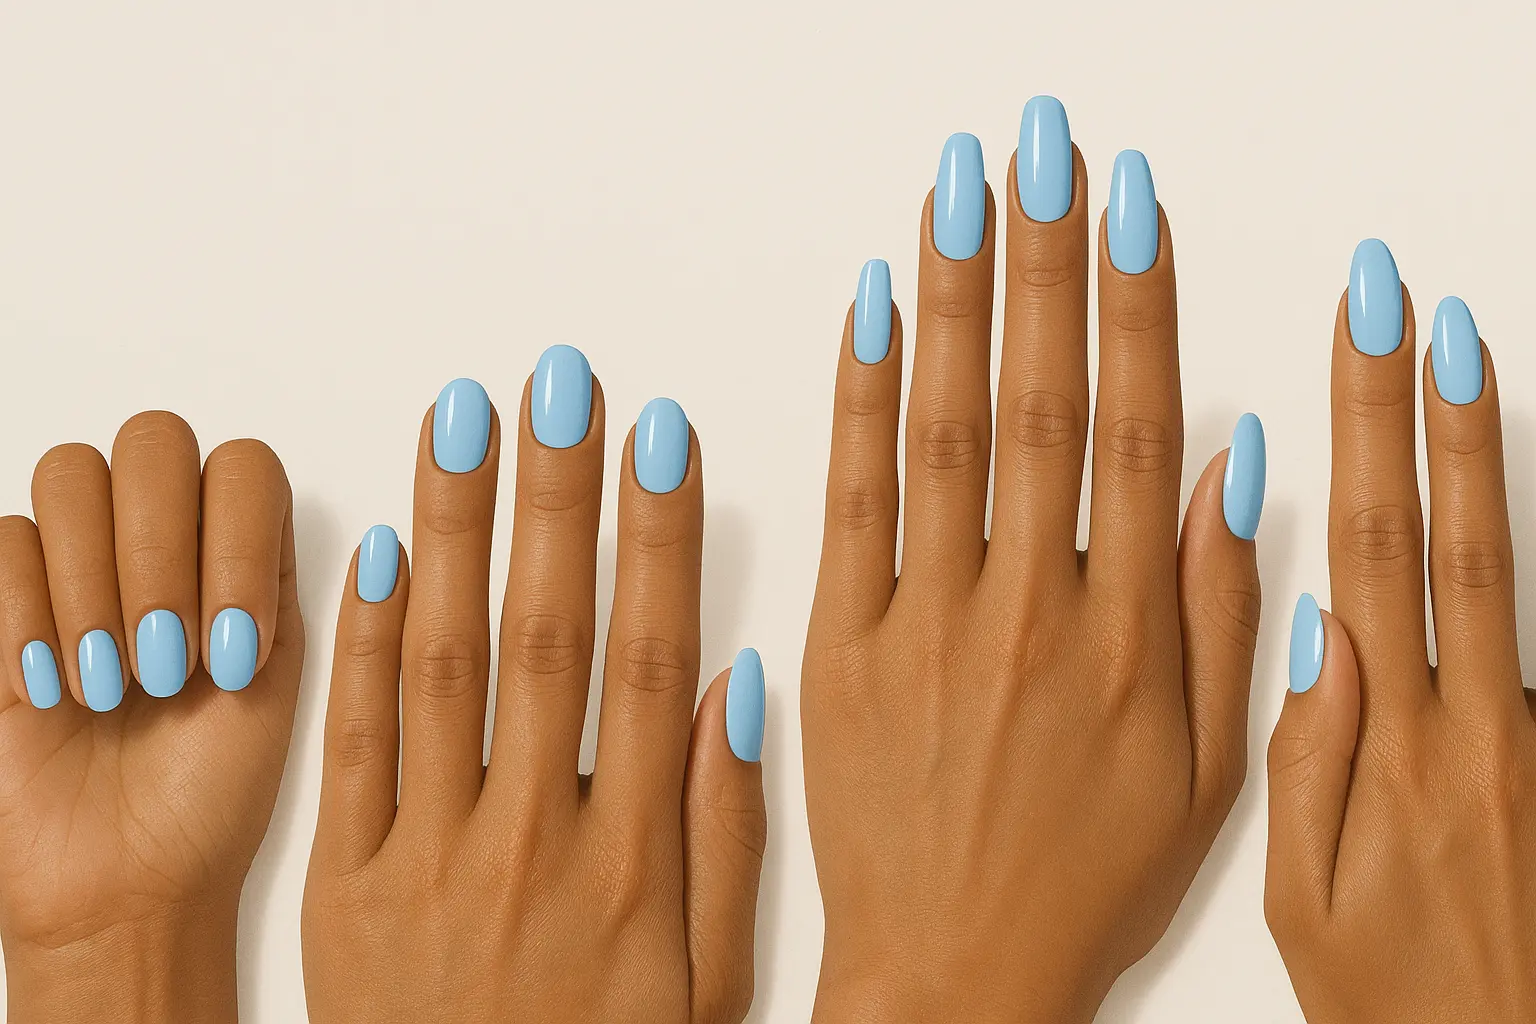
Skin tone considerations: Baby blue nails work universally, but cool undertones make them absolutely pop. Warmer skin tones might want to lean toward designs with silver accents (Designs 16, 19) or pearl details (Design 17) to enhance the overall effect.
Not sure which baby blue shade suits you best? Take our Free Color Analysis Quiz to find your perfect tone.
Nail length compatibility: Short, practical nails showcase minimalist designs (Designs 1, 5, 22) beautifully, while longer nails provide the canvas needed for intricate artwork (Designs 11-15) and dimensional embellishments (Design 20).
Professional vs. DIY: The Real Talk
Here’s the truth: some of these baby blue nail designs require skills, tools, and products that most of us don’t have at home. Chrome finishes (Design 2), hand-painted artwork (Designs 11-15), and 3D embellishments (Design 20) really do need professional expertise.
But plenty of options work great for DIY – solid colors (Design 1), simple gradients (Design 3), basic glitter applications (Design 18), and matte finishes (Design 5) are all totally doable with some practice and decent products.
Professional Application Recommended: Chrome finishes require specialized powders and application techniques that professionals master through training. Complex hand-painted artwork benefits from artistic skill and steady hands that come with experience. 3D embellishments need proper sculpting tools and curing knowledge to ensure secure attachment.
DIY-Friendly Options: Solid baby blue applications work well with quality gel systems and proper preparation. Simple glitter gradients are achievable with makeup sponges and patience. Basic stamping designs offer professional-looking results with minimal skill requirements.
Don’t feel like you have to attempt everything yourself. Sometimes paying for professional application saves you time, frustration, and money in the long run, especially when you factor in the cost of all those “practice” attempts and potential mistakes.
Simplify your color choices and nail planning with our Free Color Analysis Quiz — it’s quick and spot-on.
| Skill Level | DIY Success Rate | Time Investment | Professional Cost | Best Choice |
|---|---|---|---|---|
| Beginner | 85% (Designs 1, 5, 10) | 30-45 minutes | $25-40 | DIY friendly |
| Intermediate | 70% (Designs 3, 8, 18) | 45-75 minutes | $40-60 | Either works |
| Advanced | 50% (Designs 11, 12, 14) | 75-120 minutes | $60-80 | Consider pro |
| Expert Only | 20% (Designs 2, 16, 20) | 2+ hours | $80-120+ | Definitely pro |
Keeping Them Looking Good
The best baby blue manicure in the world won’t last if you don’t take care of it. Here’s the real talk on maintenance that actually works.
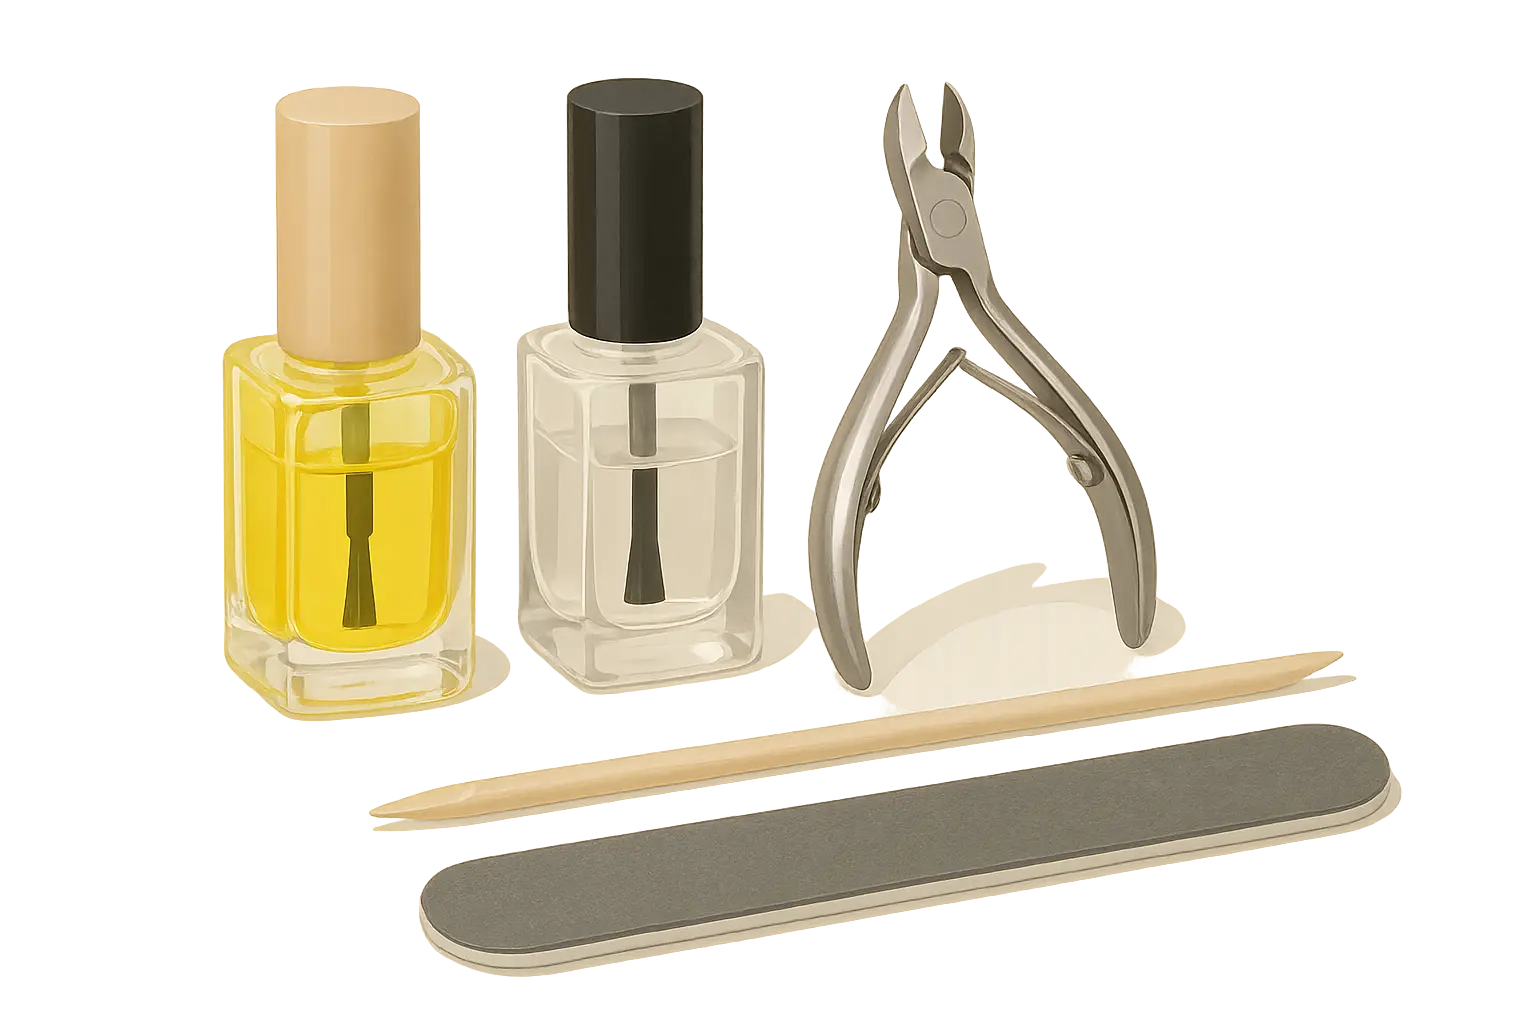
Daily reality checks: Apply cuticle oil every night – it keeps your nail beds healthy and prevents that lifting around the edges that ruins the whole look. Wear gloves when cleaning, doing dishes, or handling harsh chemicals because water and cleaning products are polish killers.
Stop using your nails as tools. I know it’s tempting to open packages or scratch things off, but that’s how you get chips and breaks that ruin the whole vibe.
Weekly maintenance: Gently buff any small chips with a fine-grit file before they become big problems. Reapply topcoat every 3-4 days for glossy designs to maintain shine and add protective layers – this simple step significantly extends wear time.
Realistic expectations: Simple solid colors and gradients typically last 2-3 weeks before needing complete refresh. Complex artwork requires attention every 10-14 days because intricate details show wear more obviously. Embellished designs with crystals need professional attention every 7-10 days to ensure nothing falls off.
Be honest about your lifestyle. If you’re hard on your hands, even the most beautiful baby blue nails won’t last as long as they would on someone with a gentler routine.
Final Thoughts
Baby blue nails are having their moment, and honestly, I hope it lasts. There’s something so fresh and optimistic about this color that feels perfect right now – like a breath of fresh air after years of dark, moody shades.
Whether you go simple with a classic solid or get adventurous with crystals and artwork, the key is choosing something that fits your life and makes you happy every time you look at your hands. Don’t get caught up in what looks amazing on Instagram if it won’t work with your actual daily routine.
These 25 designs prove that baby blue nails can be just as versatile and captivating as any bol d trend. From boardroom-appropriate solids to wedding-worthy embellishments, there’s a perfect option for every personality, occasion, and skill level.
Remember – nails grow, polish chips, and trends change. Don’t stress too much about making the “perfect” choice. Sometimes the best manicure is simply the one that makes you smile every time you catch a glimpse of your hands.
Your fingertips deserve to feel as beautiful as the rest of you, and these stunning baby blue options deliver exactly that. Whether you choose classic elegance or trendy innovation, you’re embracing one of 2025’s most versatile and gorgeous color choices.
Before your next manicure, take our Free Color Analysis Quiz to find your most flattering nail shades.
Related posts:


1-800-BRIDESMAID
The Newlywed
Card Game
something extra to love
Read the weekly newsletter from Bridesmaid for Hire, 1-800-Bridesmaid, to hear about real stories, from strangers, who need advice on love, life, friendship, and so much more.
Looking for the perfect wedding gift for someone you adore? Grab The Newlywed Card Game. It's a fun and interactive game they can play on their honeymoon or future date nights.

