


I’ll be honest – I used to think ombre nails were just another passing trend. Then I tried my first pink gradient at home and ended up with what looked like a cotton candy explosion. But here’s the thing: once I figured out what I was doing wrong, I became completely obsessed.
Now my Instagram feed is flooded with hot pink ombre nails, and I’m not even mad about it. There’s something magical about watching color melt seamlessly from light to dark, especially when it’s done in those gorgeous pink tones that somehow work for everything from board meetings to beach vacations.
Quick Resources:
Plan the perfect pink ombre for your wedding with our AI Wedding Planner
Match your pink tone to your skin with our Color Analysis Quiz
See all our wedding planning tools
If you’re ready to dive into the world of pink ombre but don’t know where to start, you’re in the right place. I’ve tested, failed at, and perfected more designs than I care to admit, so let me save you some time (and polish) by sharing what actually works.
What Makes Hot Pink Ombre Worth the Obsession
Ombre remains one of the most stylish and popular nail designs, with the trend firmly established and continuing to grow. But let’s talk about why this particular technique has such staying power.
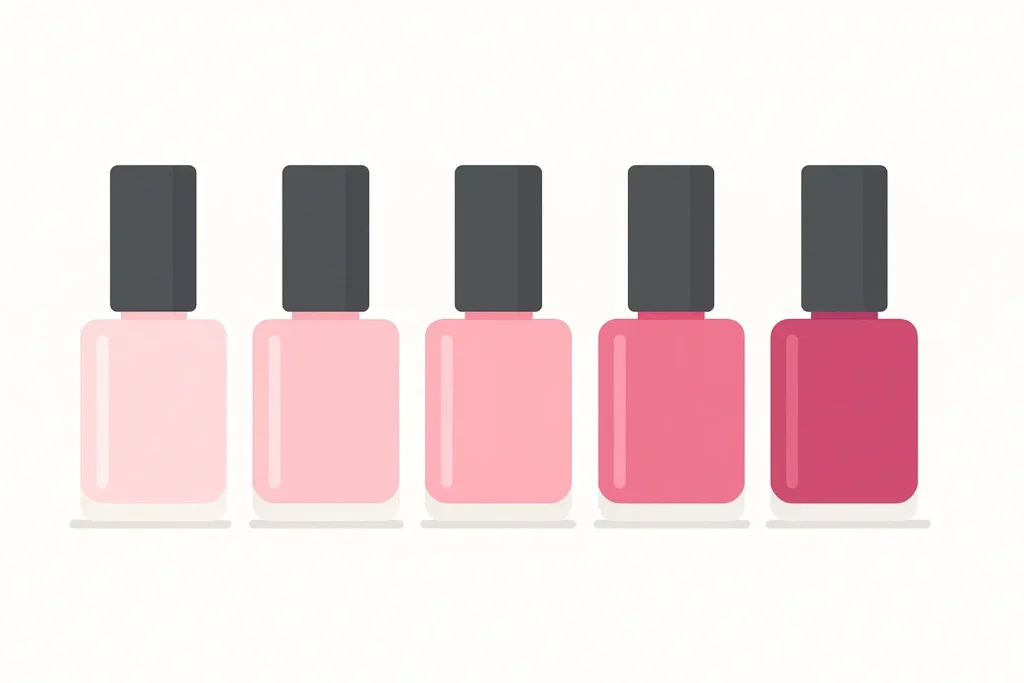
The magic lies in those seamless color transitions. When done right, you get this dreamy gradient that flows from light to dark without any harsh lines. It’s like watching a sunset on your fingertips – each shade melts into the next creating this visual harmony that’s somehow both subtle and striking.
Here’s what I’ve learned about what makes or breaks an ombre design:
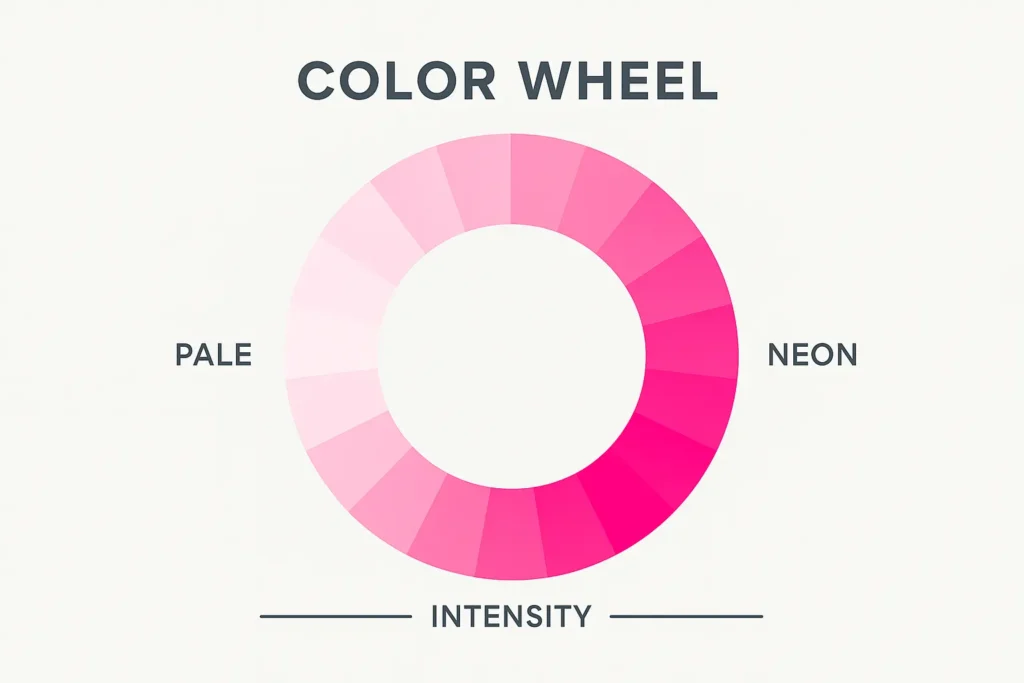
Color intensity is everything. You can go whisper-soft with peachy transitions that barely register, or full neon statement that stops traffic. Your skin tone plays a huge role here – cool undertones pair beautifully with blue-based pinks and silver accents, while warm undertones absolutely glow with coral-based pinks and gold details.
Match your pink tone to your skin with our Color Analysis Quiz
Nail length changes the whole game. Longer nails give you more canvas for complex gradients and artistic elements. Shorter nails work better with subtle transitions that won’t overwhelm the smaller space.
Skill level matters more than you think. Some designs work perfectly for beginners with basic drugstore tools, while others need professional expertise and specialized products. There’s no shame in knowing your limits – sometimes investing in professional application pays off in both results and how long they last.
| Your Level | Best Designs | Time Investment | Success Rate |
|---|---|---|---|
| Beginner | Single color gradients | 30-45 minutes | 85% |
| Intermediate | Multi-color transitions | 45-75 minutes | 65% |
| Advanced | Complex artistic blends | 90+ minutes | 40% DIY |
Your Complete Hot Pink Ombre Collection
Let me break down the best designs without overwhelming you. I’ve tried most of these myself (some more successfully than others), so I’ll give you the real scoop on what works and what’s just Instagram fantasy.
Classic Pink Gradients (The Safe Bets)
These are your gateway designs – proven techniques that work beautifully whether you’re a complete beginner or seasoned pro.
1. Light Pink to Hot Pink Gradient
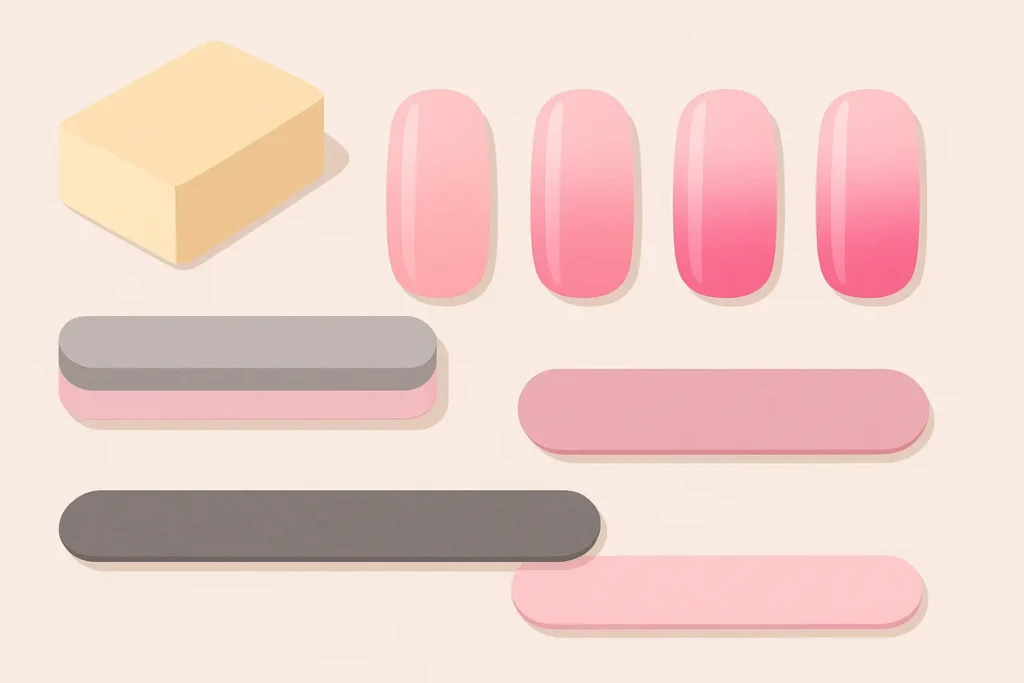
This is your gateway drug to ombre addiction. Start with three shades – a barely-there pink, something in the middle, and a bold hot pink. Use a makeup sponge and dab gently from cuticle to tip.
Real talk: My first attempt looked like I’d dipped my nails in Pepto-Bismol. The secret? Thin layers. Build it up slowly instead of trying to get it perfect in one go.
Sarah’s Success Story: “I was terrified to try ombre at home, but I started with this gradient using three drugstore polishes: a barely-there pink, medium rose, and bright fuchsia. I practiced the sponge technique on a nail wheel first, then took my time with thin layers. The result looked so professional that my coworkers asked which salon I went to! The key was patience – I did three light coats instead of trying to get it perfect in one go.”
Plan your pink ombre nails with our AI Wedding Planner
2. White to Hot Pink Fade
Think French manicure’s cooler, more confident sister. The white base makes the pink pop like crazy, but you need steady hands or a good nail tech for this one. The contrast creates serious visual impact while staying elegant enough for formal occasions.
3. Nude Pink to Fuchsia Ombre
Perfect for when you want to dip your toe into bold color without diving headfirst. Professional enough for work, fun enough for happy hour. The nude base makes the fuchsia feel intentional rather than overwhelming.
4. Baby Pink to Magenta Vertical Gradient
Here’s where things get interesting – instead of gradient on each nail, you create the effect across your entire hand. Your thumb starts in baby pink, and by the time you get to your pinky, you’re in deep magenta territory. It photographs amazingly and makes for great social media content.
5. Rose Pink to Hot Pink Sunset
This warm-toned gradient mimics actual sunset colors, creating romantic, dimensional effects. Multiple pink tones blend together for depth and visual interest. It’s particularly gorgeous on warm skin tones and perfect for romantic occasions.
Glitter & Sparkle (For When You Want Attention)
These designs add that extra something when you want your nails to catch the light and start conversations.
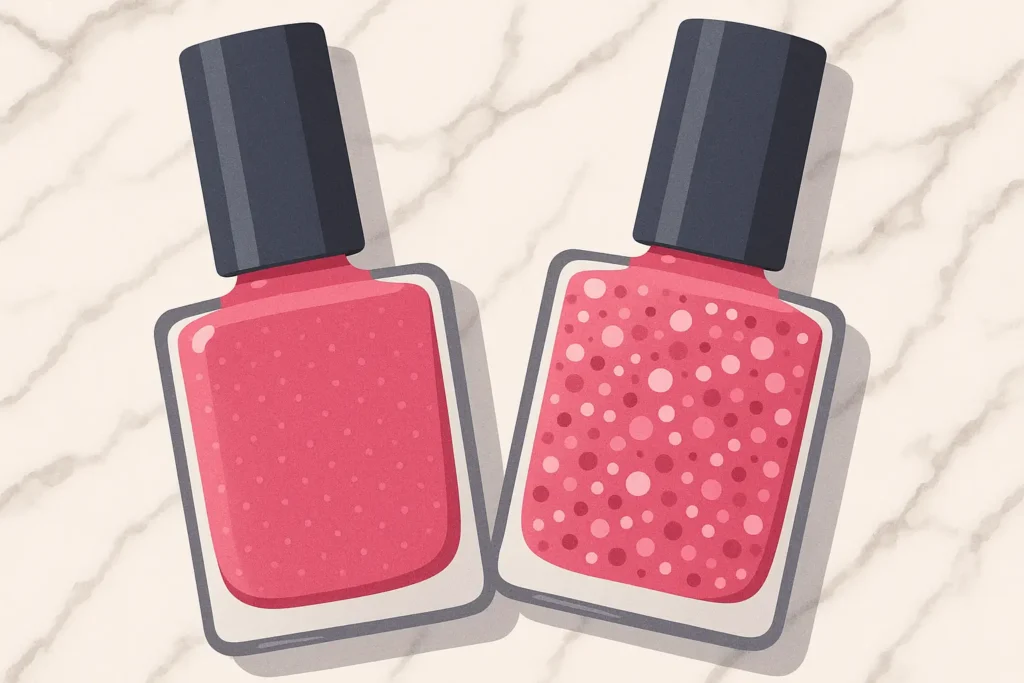
6. Hot Pink to Silver Glitter Ombre
Heavy glitter at the tips fading into solid pink creates serious drama. Fair warning: removing this is like trying to scrape glitter off a craft project. Worth it for special occasions though.
The trick is building the glitter gradually in thin layers. Start with fine particles and add larger ones for depth – it prevents that chunky, craft-store look.
7. Light Pink Base with Hot Pink Glitter Fade
This balances subtlety with glamour perfectly. Light pink provides elegant foundation while increasing hot pink glitter toward tips adds just enough sparkle for special occasions. It’s sophisticated enough for weddings yet fun enough for parties.
8. Holographic Pink Glitter Ombre
This changes color in different light and will absolutely become a conversation starter. The multi-dimensional particles create rainbow effects that shift as you move your hands. Pro tip: thin layers prevent it from looking muddy.
9. Chunky Glitter Pink Accent
Smart compromise – classic pink ombre on most nails with one statement accent nail showcasing chunky glitter. You get visual interest without the maintenance nightmare of a full glitter set.
Bold Color Combos (For the Adventurous)
Ready to push boundaries? These designs expand beyond traditional pink palettes for those who want to make a statement.
10. Pink to Purple Ombre
Hot pink transitioning through coral and magenta to deep purple creates sophisticated color story. This requires 4-5 shades for smooth transitions and works particularly well with cool skin tones.
Color Theory in Action: Professional nail artist Maria Chen recommends using magenta as your bridge color. “Pink and purple can clash if you jump directly between them,” she explains. “But when you use magenta – which contains both red and blue undertones – as your middle shade, the transition becomes seamless.”
11. Pink to Orange Sunset Ombre
Pure summer energy. This warm gradient works especially well if you have warm undertones in your skin. Hot pink blending into coral and ending in soft orange captures those perfect vacation sunset vibes.
12. Pink to Blue Galaxy Ombre
Hot pink melting into deep purple with subtle sparkle creates that cosmic vibe. Requires some skill but photographs amazingly. The trick is understanding how pink and blue interact through purple intermediates.
13. Pink and Yellow Tropical Ombre
Hot pink transitioning to coral and ending in sunny yellow creates energetic, tropical vibes. This bright combination works perfectly for vacation, summer events, or anytime you want to channel pure optimism.
Textured and Dimensional Styles
These techniques add tactile interest that goes beyond traditional smooth finishes.
14. Matte Hot Pink Ombre
Classic pink gradient finished with matte topcoat creates sophisticated, modern edge. The velvety texture provides high-end, editorial appearance that photographs beautifully. Perfect for fashion-forward individuals who prefer subtle elegance over glossy shine.
15. Chrome Pink Ombre
Metallic chrome finish over pink base creates mirror effects that look almost futuristic. This requires professional application – the timing has to be perfect, and the rubbing technique affects the final result.
16. Textured Sand Pink Ombre
Gradient with textured, sandy finish creates unique tactile elements. Special textured polishes provide dimensional surface that feels as interesting as it looks. Fair warning: this becomes a conversation starter due to its unusual texture.
17. 3D Flower Pink Ombre
Pink base with raised 3D flower elements combines classic technique with sculptural artistry. This requires skilled technician expertise and careful planning for both aesthetics and practicality.
Geometric and Artistic Designs
These creative approaches challenge traditional ombre applications with geometric patterns and artistic interpretations.
18. Diagonal Pink Ombre
Gradient running diagonally across nails instead of traditional base-to-tip creates modern geometric interest. This technique requires precise masking and blending skills but results in striking contemporary effects.
19. Reverse Pink Ombre
Hot pink at cuticle fading to light pink at tips reverses traditional direction. This unexpected choice creates visual interest while elongating nail appearance – it challenges conventional expectations beautifully.

20. Striped Pink Ombre
Horizontal stripes in graduating pink shades create ombre effects through precise geometric application. This graphic element requires steady hands but results in striking, modern nail art.
21. Watercolor Pink Ombre
Soft, blended effects mimicking watercolor painting create organic, artistic appearance. The watercolor technique embraces imperfection as part of its charm – each nail ends up slightly different while maintaining overall cohesion.
Special Occasion Styles
These elegant designs cater to specific celebrations and memorable moments.
Use our AI Wedding Planner to match your nails to your event
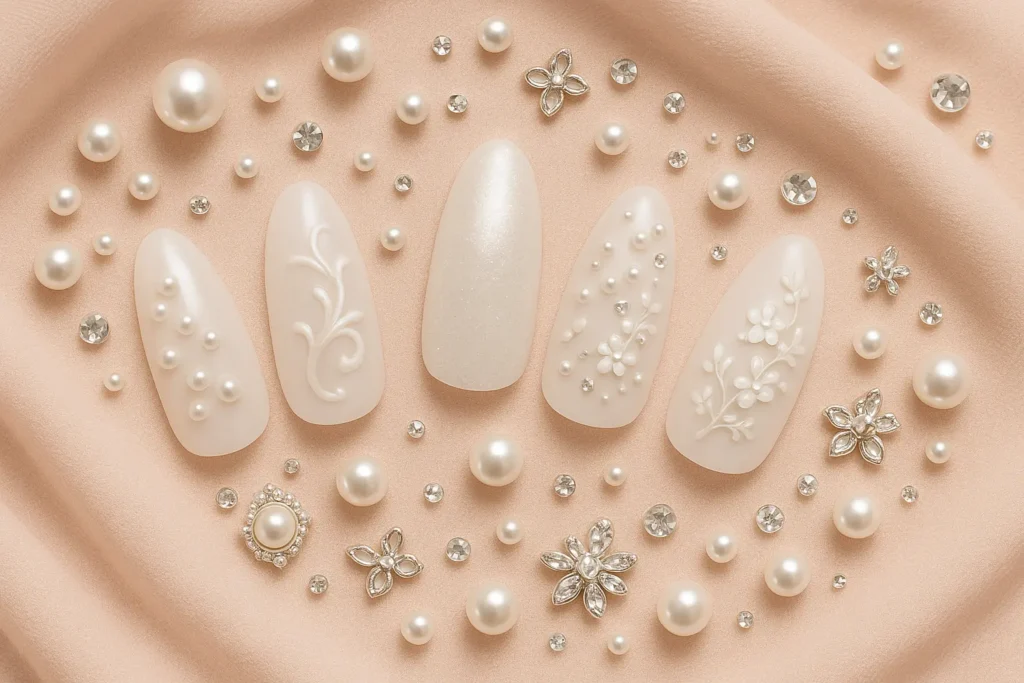
22. Bridal Pink Ombre with Pearls
Soft pink gradient with delicate pearl accents creates timeless bridal elegance. Classic technique combined with small pearl embellishments provides sophisticated beauty perfect for wedding photography without competing with bridal attire.
23. Valentine’s Day Pink Hearts
Pink gradient background with small heart details creates romantic, playful celebration. The ombre base provides elegant foundation while heart accents add festive charm.
24. New Year’s Pink with Gold
Hot pink ombre with gold glitter accents and geometric details creates festive celebration vibes. Pink provides feminine foundation while gold elements add party-appropriate glamour.
25. Summer Festival Neon
Ultra-bright neon pink gradient with glow-in-the-dark elements. Because sometimes you need nails that can be seen from space. This design embraces bold, unapologetic color perfect for music festivals and summer parties.
What Actually Works vs. What Looks Good on Instagram
Let me give you the real breakdown based on actual experience, not just pretty photos:
Easiest for beginners: Classic gradients with 2-3 similar shades (designs 1, 4, 7)
Best bang for your buck: Simple glitter fade – looks expensive, relatively easy
Most versatile: Nude to hot pink – works everywhere from office to dinner dates
Biggest commitment: Chrome or textured finishes – gorgeous but high maintenance
| Design Category | Durability | Skill Level | Budget Range | Best For |
|---|---|---|---|---|
| Classic Pink | 1-2 weeks | Beginner | $15-45 | Daily wear |
| Glitter Pink | 2-3 weeks | Intermediate | $25-70 | Special events |
| Multi-Color | 1-2 weeks | Intermediate | $30-80 | Creative expressionCreative expression |
| Textured | 1-3 weeks | Advanced | $50-150+ | Statement making |
| Geometric | 1-2 weeks | Advanced | $40-120 | Artistic flair |
| Special Occasion | 1-2 weeks | Varies | $35-100 | Celebrations |
Budget reality check: Jessica, a college student, wanted festival-ready nails for Coachella but had a tight budget. She chose the Pink and Yellow Tropical Ombre and did it herself using four drugstore polishes ($12 total), a makeup sponge ($2), and basic base/top coats she already owned. Total cost: $14. The same design at a salon would have cost $65-85, but her DIY version looked amazing in photos and lasted the entire weekend. Her tip: “Practice on fake nails first – I wasted $8 on my first attempt, but the second try was perfect!”
Picking What Actually Works for Your Life
If you type all day: Skip heavy textures and chunky glitter – they’ll drive you crazy
Short nails: Subtle gradients look better than dramatic ones
Can’t commit: Regular polish over gel – easier to change when you get bored
Special event: Invest in professional application for complex designs
Skin tone cheat sheet:
– Cool undertones: Blue-based pinks with silver accents (designs 2, 6, 10, 15)
– Warm undertones: Coral-based pinks with gold details (designs 5, 11, 13, 24)
– Not sure: Classic hot pink works on everyone (designs 1, 8, 14)
The Maintenance Reality
Low maintenance: Simple gradients (designs 1-3, 22) last 1-2 weeks with easy touch-ups
Medium maintenance: Glitter designs last longer but are harder to remove – plan ahead
High maintenance: Textured and 3D elements (designs 16, 17) look amazing but need weekly attention
Pro tip from my nail tech: “If you’re doing this at home, practice the sponge technique on a paper plate first. Get the color placement right before you touch your actual nails.”
| Maintenance Level | Designs | Touch-up Frequency | Removal Difficulty |
|---|---|---|---|
| Low | 1-3, 14, 22 | 10-14 days | Easy |
| Medium | 4-13, 15, 18-21, 23-25 | 7-10 days | Moderate |
| High | 16, 17 | 5-7 days | Professional recommended |
Making It Work for Your Big Day
Wedding nails deserve special mention because they’re in every photo forever. Pink ombre hits that sweet spot between elegant and personal – refined enough for formal photography yet vibrant enough to showcase your personality.
Choose your perfect bridal nail look with our AI Wedding Planner
Best wedding choices:
– Light pink to hot pink gradient (design 1) – photographs beautifully
– Bridal pink with pearl accents (design 22) – timeless elegance
– Nude to fuchsia (design 3) – sophisticated with personality
Timing matters: Book your appointment 1-2 days before the wedding. Fresh enough to be perfect, not so fresh you’re worried about smudging while getting dressed.
Ring consideration: Your engagement ring will be the star – choose a design that complements rather than competes. Subtle gradients work beautifully with intricate settings, while simpler bands can handle bolder designs.
At Bridesmaid for Hire, we recognize that wedding success lies in seamless coordination of countless details. Just as choosing the perfect light pink ombre requires understanding your style, skin tone, and occasion’s formality, planning your entire wedding day benefits from experienced professionals who know how to bring all pieces together beautifully.
Coordinate wedding beauty details effortlessly with our AI Wedding Planner
Whether you need help coordinating vendor timelines so your nail appointment fits perfectly into your pre-wedding schedule, or ensuring your bridesmaids’ choices complement your own, professional support makes the difference between stress and celebration.
Final Reality Check
Here’s what I wish someone had told me when I started: not every design you see online is practical for real life. That gorgeous chrome finish? It shows every fingerprint. Those 3D flowers? They’ll catch on everything.
The investment in quality application, whether DIY or professional, pays dividends in both appearance and confidence. There’s something undeniably empowering about looking at your hands and seeing nails that perfectly express your personality while looking absolutely flawless.
Start simple, build your skills, and don’t be afraid to experiment. The right design is the one that makes you smile every time you catch a glimpse of your hands. Pink ombre offers endless versatility while maintaining that perfect balance between sophistication and fun.
And remember – even nail professionals mess up sometimes. I once watched my nail tech completely restart a design because she wasn’t happy with the blend. If the pros have do-overs, you’re definitely allowed them too.
The beauty of ombre is that it’s forgiving. Slightly uneven blending often looks intentional and artistic. Perfect gradients are lovely, but character beats perfection every time.
Don’t stress about achieving perfection on your first attempt, or worry about whether your choice is “appropriate” for every situation. Hot pink ombre nails have proven their staying power for good reason – they work across so many different situations and personal styles.
As trends continue evolving, this classic technique remains a foundation you can build upon, modify, and make uniquely yours. Whether you’re drawn to subtle workplace elegance or ready for neon festival statements, there’s truly an option for every personality, skill level, and budget.
Find your ideal pink ombre style with our AI Wedding Planner
The key to success lies in understanding your personal needs, choosing designs that match your lifestyle, and embracing the versatility this enduring nail art technique offers. Start with the basics, experiment with what appeals to you, and most importantly, have fun creating something beautiful that’s entirely your own.


1-800-BRIDESMAID
The Newlywed
Card Game
something extra to love
Read the weekly newsletter from Bridesmaid for Hire, 1-800-Bridesmaid, to hear about real stories, from strangers, who need advice on love, life, friendship, and so much more.
Looking for the perfect wedding gift for someone you adore? Grab The Newlywed Card Game. It's a fun and interactive game they can play on their honeymoon or future date nights.

