


25 Stunning Lipstick Nails That’ll Make Everyone Ask Where You Got Them Done
October 17, 2025
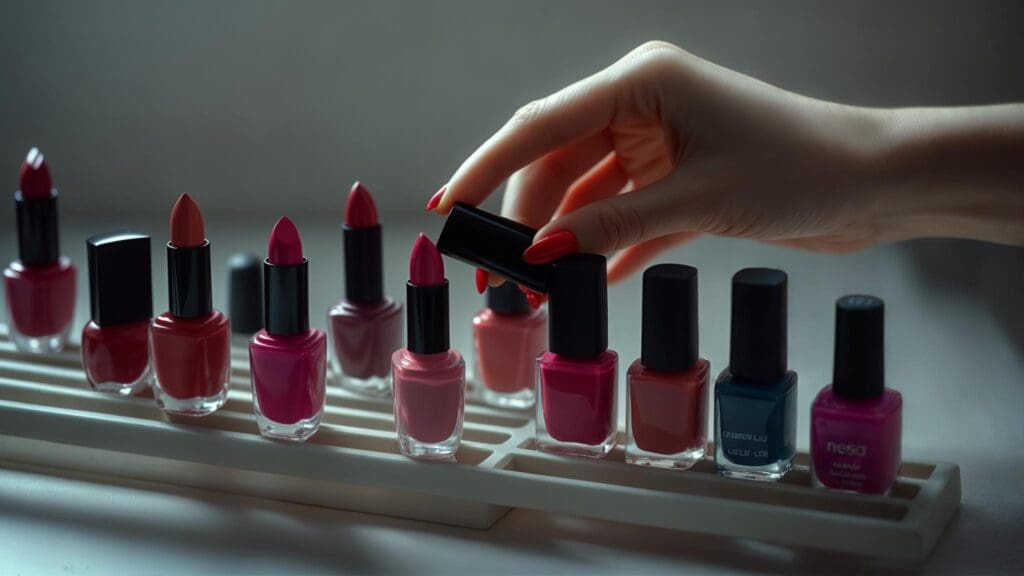

The lipstick nails trend has exploded across social media platforms, with searches increasing by over 300% in recent months according to Allure’s trend analysis. I remember scrolling through Instagram last month and seeing these uniquely angled nails everywhere – they immediately caught my attention because they looked so different from the typical almond or coffin shapes I was used to seeing. The diagonal cut creates such a striking silhouette that I knew I had to try them myself.
Quick Resources:
Coordinate your wedding nail look with our AI Wedding Planner
Find your perfect lipstick nail shade with our Color Analysis Quiz
See all our wedding tools in one place
TL;DR
Lipstick nails feature a diagonal cut that mimics a lipstick bullet’s angled tip. Twenty-five different variations exist, from classic red to holographic chrome finishes. The shape works best on medium to long nail beds for structural integrity.
Press-on options offer convenience and consistency for beginners. Maintenance requirements vary significantly based on angle sharpness and finish type. Professional application is recommended for complex textures and artistic designs.
Budget ranges from $10 press-ons to $150 professional chrome applications. These trendy nails are perfect for special occasions, including weddings with proper coordination. Lipstick-shaped nails deliver maximum visual impact when executed properly.
What You Need to Consider When Choosing Lipstick Nails
Okay, let’s be real for a second. Before you jump into this trend, there are a few things you should honestly ask yourself. Do you actually have time to maintain super sharp angles? Will your boss side-eye you for having chrome mirror nails? And most importantly – can your natural nails even handle this shape without snapping off?
Your natural nail bed length plays a huge role in whether this look will work for you. The signature angled tip needs enough length to create that distinctive slanted effect without compromising your nail’s structural integrity. If you have shorter nail beds, don’t panic – there are definitely options designed specifically for you.
| Consideration Factor | Impact on Choice | Recommended Options |
|---|---|---|
| Natural nail bed length | Determines shape feasibility | Short beds: Soft angles, press-ons; Long beds: Any variation |
| Daily lifestyle | Affects durability needs | High-activity: Rounded edges, glossy finish; Low-activity: Sharp angles allowed |
| Maintenance willingness | Influences complexity level | Low maintenance: Press-ons, nude colors; High maintenance: Chrome, artistic designs |
| Budget constraints | Limits professional services | Budget-friendly: DIY soft angles, basic press-ons; Premium: Professional chrome, custom art |
| Skill level | Determines DIY feasibility | Beginner: Press-ons, soft angles; Advanced: Sharp angles, complex designs |
| Professional requirements | Affects color/finish choices | Conservative: Nude mattes, soft angles; Flexible: Bold colors, dramatic shapes |
Think about your daily routine honestly. Do you type constantly, work with your hands, or play sports? These angled nails can be more prone to chipping at that diagonal edge, so factor in your willingness to do regular touch-ups or invest in more durable options.
Your nail health is also crucial here. Weak or damaged nails might need some reinforcement through press-on options or professional strengthening treatments before attempting this shape. Trust me, skipping this assessment will just lead to frustration later.
Budget considerations go way beyond just the initial application. You’ll need to factor in professional services, quality products for at-home maintenance, and ongoing touch-up costs. The price range varies dramatically from $10 press-on sets to $150 professional applications with premium finishes.
Find your perfect lipstick nail shade with our Color Analysis Quiz
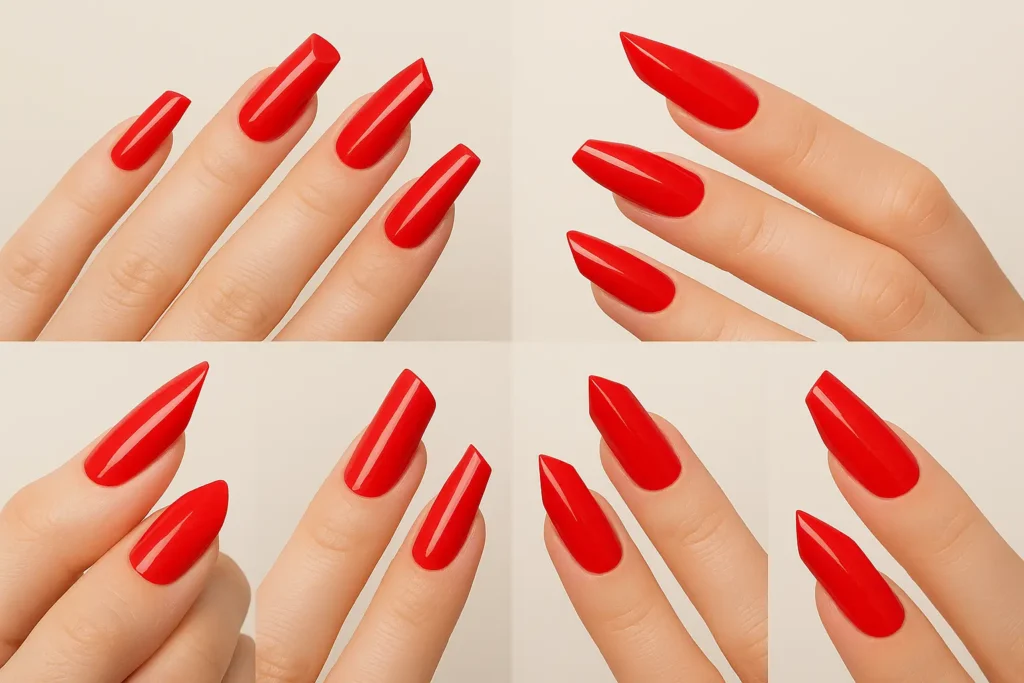
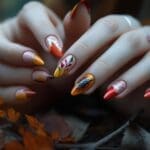
1. Traditional Angled Lipstick Shape
This is the OG shape that started the entire trend. You’ll file your nail at a precise 45-degree angle, creating that unmistakable diagonal edge that looks exactly like a lipstick bullet. The technique requires patience and a steady hand, but the results are absolutely stunning.
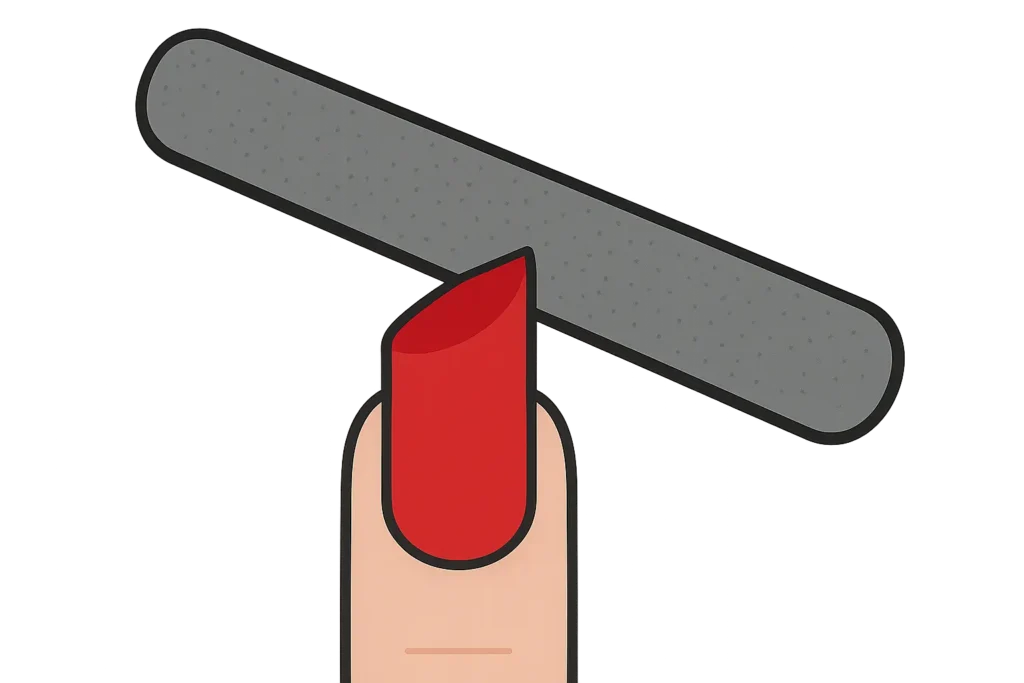
Start with a 240-grit file for initial shaping, then switch to 400-grit for smoothing. Work from the outer corner inward, maintaining consistent pressure to achieve that perfect angle. The key is taking your time – rushing this step will result in uneven edges that completely ruin the effect.
Traditional Angled Application Process: Sarah, a nail art enthusiast, starts with clean, dry nails cut to medium length. She uses a 240-grit file to create the initial 45-degree angle, working in one direction from the outer corner toward the center. After achieving the basic shape, she switches to a 400-grit file for smoothing, then applies base coat, two thin coats of classic red polish, and finishes with glossy top coat. The entire process takes 45 minutes, but the results look exactly like miniature lipstick bullets.
Here’s the reality check: maintenance becomes your biggest challenge with this shape. You’ll need weekly touch-ups at the angled tip where chips are most likely to happen. Plan for filing maintenance every 10-14 days to keep that crisp diagonal line looking sharp.
2. Soft Angled Lipstick Shape
Perfect for first-timers who want to try the trend without committing to the high-maintenance sharp angle. The 30-degree cut still gives you that distinctive look while being much more forgiving during daily activities.
This variation grows out more gracefully than its sharper counterpart, meaning fewer emergency salon visits when your nails start looking uneven. The gentler angle also forgives minor filing imperfections that would be glaringly obvious on traditional angled shapes.
Professional environments love this option because it’s eye-catching without being distracting. You get the trendy shape without worrying about catching the angle on keyboards, papers, or other work materials.
3. Sharp Angled Lipstick Shape
When you want to make a serious statement, this is your go-to option. The 60-degree angle creates such a dramatic silhouette that people will definitely stop and stare at your nails. It’s editorial-level striking and perfect for photoshoots, special events, or when you’re feeling particularly bold.
The sharp angle requires advanced technique to execute properly. One wrong move with the file and you’ll have an uneven mess that’s difficult to correct. Consider having this done professionally unless you’re very experienced with nail shaping.
Expect higher maintenance with this variation. The extreme angle creates more stress points, leading to increased chipping and breakage. You’ll need to be extra careful with daily activities and plan for more frequent touch-ups.
4. Rounded Lipstick Shape
This hybrid approach gives you the best of both worlds – the trendy shape without the sharp edges that can catch on things or feel uncomfortable. The rounded edges soften the overall look while still maintaining that distinctive diagonal line.
Comfort becomes a major advantage here. Sharp angles can sometimes feel awkward when you’re not used to them, but the rounded variation eliminates that adjustment period. You can wear these comfortably for extended periods without constantly thinking about your nails.
The softer edges also mean less likelihood of accidental scratching or snagging. If you’re worried about the practical aspects of sharp angles, this variation addresses those concerns while keeping you on-trend.
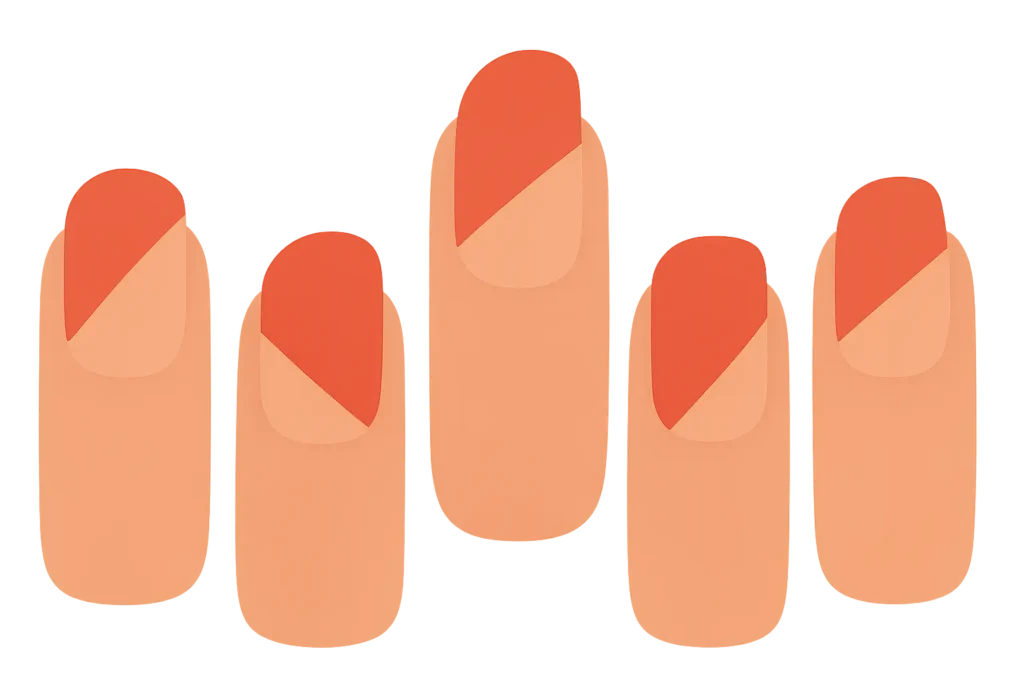
5. Asymmetrical Lipstick Shape
For the truly adventurous, this variation intentionally breaks the rules. Each nail gets a slightly different angle, creating an artistic, purposefully imperfect look that’s absolutely captivating. It’s nail art meets high fashion.
The asymmetrical approach requires an artistic eye to execute well. You’re not just filing nails – you’re creating a cohesive yet varied design across all ten fingers. This is definitely advanced territory that benefits from professional application.
Expect lots of compliments and questions about your nails. This isn’t a subtle trend – it’s a conversation starter that showcases your willingness to experiment with unconventional beauty choices.
6. Classic Red Lipstick Nails
You can’t get more authentic than classic red – it’s literally what started this whole trend. When people see deep crimson nails cut at that perfect angle, their brain immediately goes “oh, that looks exactly like lipstick!”
Go for deeper reds like cherry or wine instead of those bright orange-y reds. Trust me, the deeper tones just hit different – they scream expensive makeup counter, not drugstore impulse buy.
Fair warning though: red shows every single chip. Like, EVERY one. So if you’re the type who picks at your nails or types aggressively, maybe save this for special occasions.
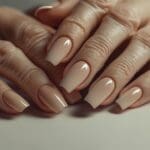
7. Nude Lipstick Nails
This is your “I’m trendy but also have a real job” option. You get the cool shape without your coworkers spending the entire meeting staring at your hands instead of listening to your presentation.
The trick is finding the right nude – and yes, it matters just as much as finding the right nude lipstick. Cool undertones? Go for taupes and mauves. Warm skin? Peachy beiges are your friend.
Plus, when these inevitably chip (because all nails chip), it’s way less obvious than with bright colors. You can actually get away with longer touch-up intervals.
8. Berry Lipstick Nails
Berry shades are like the sophisticated older sister of red nails. Deep plums and burgundies give you that “I have my life together” vibe while still being interesting enough that people notice.
These are perfect for fall and winter when you want something richer than summer brights but not as in-your-face as classic red. They photograph amazingly too – no weird color shifts in different lighting.
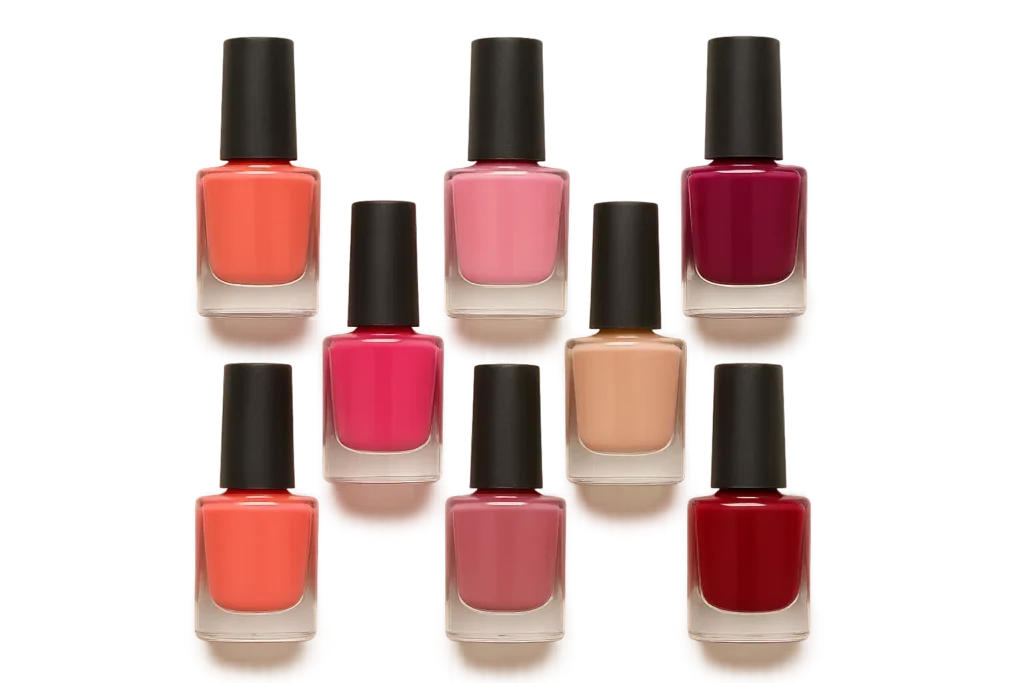
9. Pink Lipstick Nails
Pink is basically the Swiss Army knife of nail colors. Soft rose for the office, hot fuchsia for girls’ night, dusty pink for that vintage vibe – there’s literally a pink for every mood and occasion.
The best part? Pretty much everyone looks good in some shade of pink. If you’re ever unsure about color choices, pink is your safe bet that still feels intentional and put-together.
10. Coral Lipstick Nails
Coral is that perfect warm-weather color that makes you look like you just got back from vacation (even if you’ve been stuck in meetings all week). It’s got those orange undertones that really pop against golden skin tones.
If cool-toned pinks make you look washed out, coral might be your holy grail. It’s bright enough to feel fun but not so intense that it overwhelms your whole look.
11. Ombre Lipstick Nails
Okay, this is where things get fancy. Ombre adds this gorgeous dimension that makes people lean in closer to figure out how you did it. It’s like having a tiny sunset on each fingertip.
Real talk though – this is not a “Netflix and chill” kind of nail art. You need to work fast, blend while everything’s still wet, and honestly? Your first attempt might look more “muddy mess” than “gradient goddess.” Consider this your practice-makes-perfect project.
Ombre Application Technique: Maria creates a stunning nude-to-burgundy ombre on her lipstick-shaped nails by applying nude polish to the base, then immediately dabbing burgundy at the angled tip while the nude is still wet. Using a makeup sponge, she gently blends the colors in small dabbing motions, building up the gradient gradually with three thin applications. The result is a seamless transition that makes her nails look like expensive lipstick bullets with natural color variation.
Pro tip from someone who learned the hard way: Start with colors that are already similar. Nude-to-pink is way more forgiving than trying to blend completely different color families.
12-17. Finish Game-Changers
Let’s group these texture options because they’re all about transforming the same basic shape into completely different vibes:
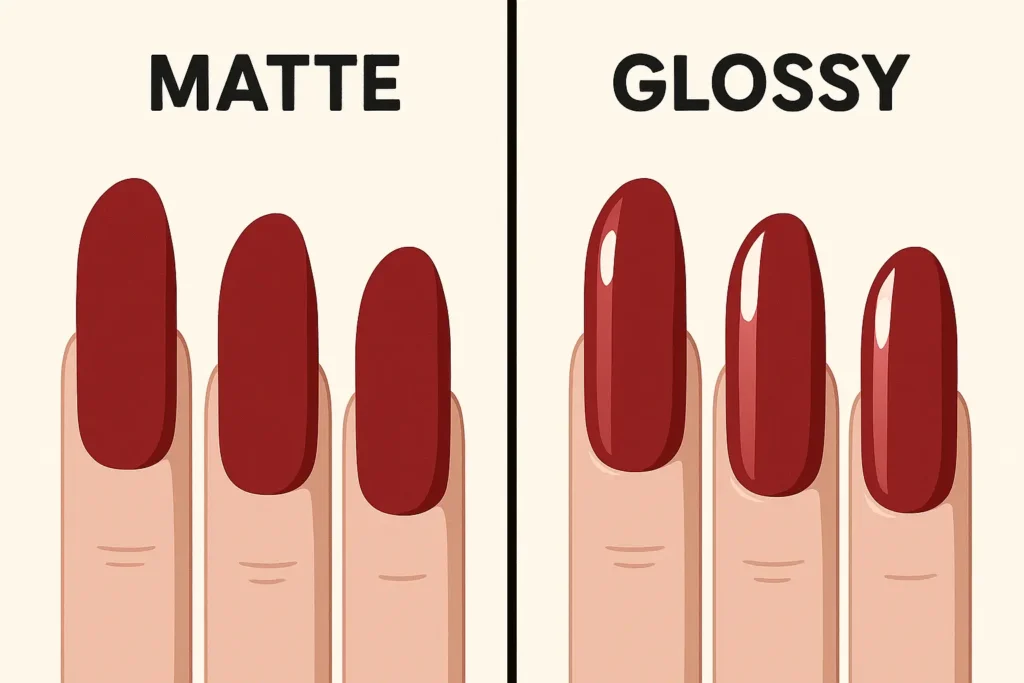
Matte = Modern liquid lipstick energy. Looks expensive, feels sophisticated, but shows dust like nobody’s business. Great for work environments where you want to look polished without being flashy.
Glossy = Your reliable best friend. Lasts longer, hides minor imperfections, and gives you that classic lipstick shine. Plus, it’s the easiest to apply without special techniques.
Metallic = Evening event perfection. Gold, silver, rose gold – they all catch light beautifully and make the angular shape even more dramatic. Just know that brush strokes show up easily, so take your time.
Holographic = Pure magic that shifts colors as you move. Definitely a conversation starter, but requires some serious skill (or professional help) to look right.
Velvet = The texture everyone wants to touch. Feels as cool as it looks, but needs special products and techniques. Think of it as the advanced level of nail finishes.
Chrome = Maximum drama, maximum maintenance. When done right, it’s absolutely stunning. When done wrong… well, let’s just say imperfections are very obvious on mirror surfaces.
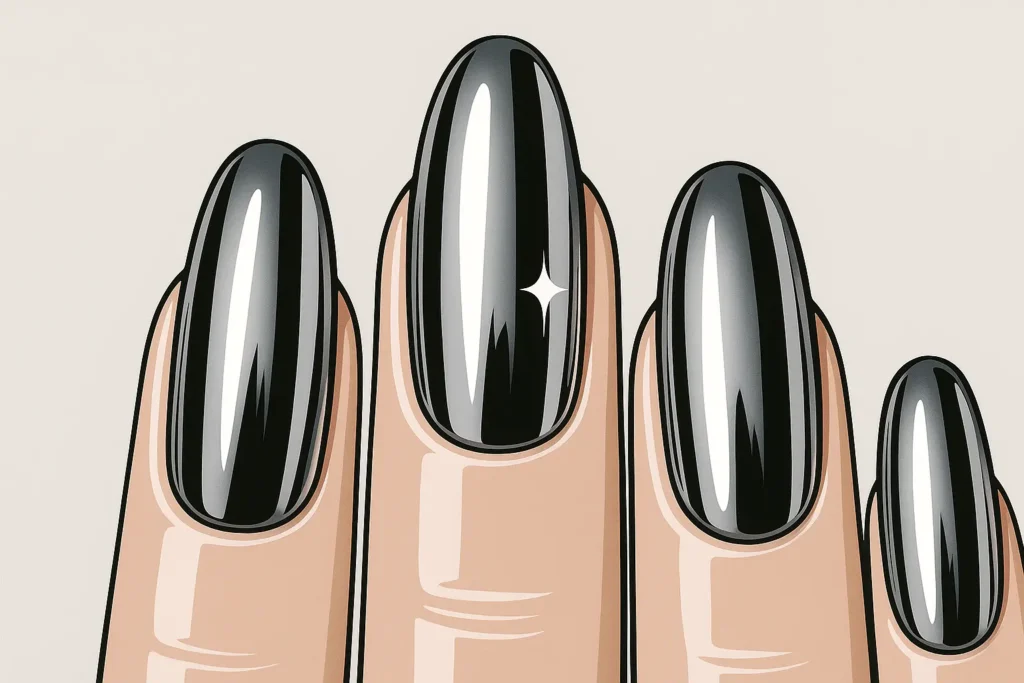
Finish Type Durability (Days) Application Difficulty Best For Maintenance Level Matte 7-10 Medium Professional settings Medium – dust shows easily Glossy 10-14 Easy Everyday wear Low – hides minor chips Metallic 8-12 Medium-Hard Evening events Medium – brush strokes visible Holographic 6-10 Hard Special occasions High – complex application Velvet 5-8 Hard Unique texture lovers High – specialized products needed Chrome 10-12 Expert High-fashion looks Very High – shows all imperfections
18-21. Artistic Upgrades
French Tips with a Twist: Instead of following your natural nail curve, the white tip follows that diagonal line. It’s familiar enough to feel classic but different enough to be interesting. Color variations expand your options beyond traditional white tips . Try nude tips for subtle sophistication, metallic tips for glamour, or bold colors that complement your base shade. The angled line creates interesting geometric patterns that feel very contemporary.
Application technique differs from regular French tips because you’re working with an angled rather than curved line. Use tape or nail guides to ensure clean, straight lines along the diagonal edge. The precision required makes this a good candidate for professional application.
Negative Space: For the minimalist who still wants to be on-trend. Strategic gaps in the polish create geometric patterns that look way more expensive than they actually are. The technique involves using tape, stencils, or freehand painting to create clean lines that incorporate your natural nail color into the overall design.
Marble Effect: Each nail becomes a tiny work of art. The organic swirls look sophisticated and no two nails end up exactly the same. Just don’t overwork the design – less is definitely more here. Technique involves working with multiple colors while they’re still wet, using tools like toothpicks, brushes, or water to create natural-looking veining and swirls.
Gradient: Similar to ombre but with more defined color zones. Vertical gradients make nails look longer, horizontal ones can make them appear wider. Direction choices affect the overall impact – consider how the gradient direction interacts with the diagonal shape for maximum visual appeal.

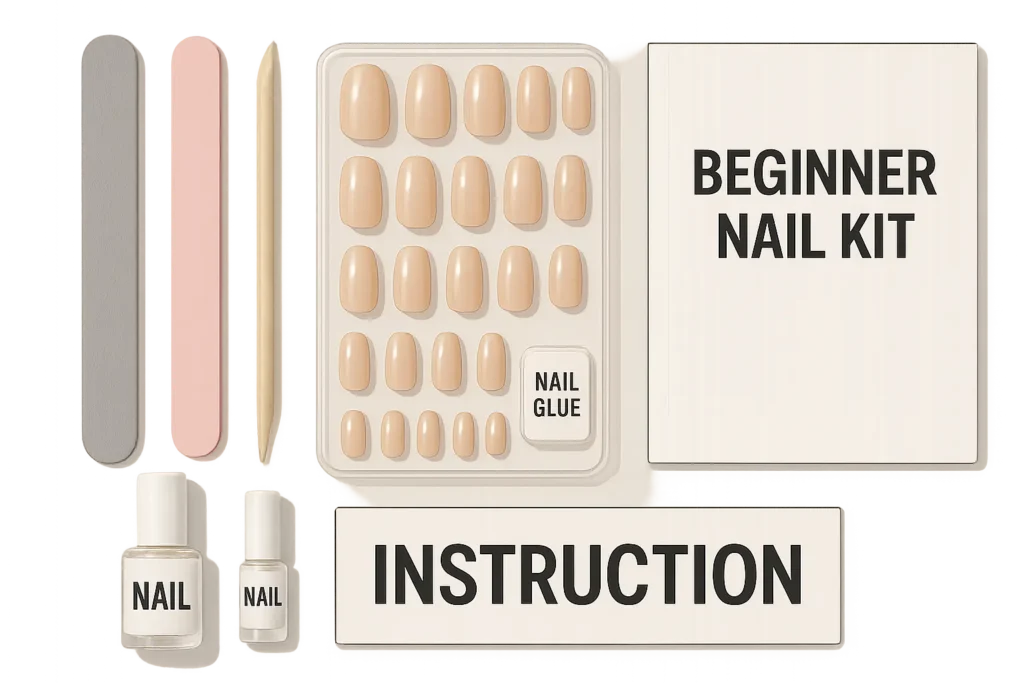
22-25. The Press-On Revolution
Here’s where I’m going to be completely honest: press-ons have gotten SO much better. Like, scary good.
Pre-shaped options eliminate all the skill and guesswork. Fifteen minutes, zero drying time, consistent results across all ten nails. For special events when you need guaranteed perfection, these are clutch.
Quality indicators include ABS plastic construction, precision-cut angles, and comprehensive size ranges (typically 10-12 different sizes per set). Look for sets that include prep materials like alcohol wipes, nail files, and detailed instructions.
Press-On Success Story: Jennifer needed perfect nails for her sister’s wedding but had never successfully filed lipstick shapes herself. She ordered pre-shaped press-ons in classic red two days before the event. Following the included instructions, she prepped her natural nails, selected the perfect sizes, and applied them in 20 minutes. The result looked professionally done, lasted through the entire wedding weekend, and cost only $25 compared to a $80 salon visit.
Customizable sets give you blank canvases that are already perfectly shaped. You get to be creative without risking your natural nails or spending hours trying to file matching angles. Required supplies include base coat, color polish, top coat, and any nail art tools you want to use. The time investment increases to 45-60 minutes including decoration, but you get completely personalized results.
Short-length versions make this trend accessible for everyone. You get the distinctive shape without the impracticality of long nails that catch on everything. Practicality becomes the major selling point here – shorter nails are less likely to break, easier to maintain, and more appropriate for hands-on work environments.
Beginner kits include everything you need plus actual instructions that make sense. It’s like having a nail tech walk you through the process step by step. Complete kits take the intimidation out of trying this trend for the first time – pre-shaped tips, proper files, adhesive, and detailed instructions with photos or diagrams showing proper filing angles and application techniques.
Real Talk: How These Actually Perform
After trying most of these options (yes, really), here’s what actually works in real life:
| Category | Top Performers | Runner-Ups | Budget Options | High-Maintenance |
|---|---|---|---|---|
| Authenticity | Traditional Angled + Classic Red | Matte Red, Berry Tones | Press-on Classic Red | Chrome, Artistic Designs |
| Durability | Glossy Finishes, Press-ons | Soft Angled Shapes | Nude Colors | Sharp Angles, Matte |
| Professional | Nude Soft Angles, Matte | Short Press-ons | DIY Nude | Holographic, Chrome |
| Beginner-Friendly | Pre-shaped Press-ons | Soft Angled DIY | Basic Kits | Sharp Angles, Complex Art |
Most authentic-looking: Traditional angled shape in classic red with matte finish. It’s literally indistinguishable from actual lipstick bullets.
Most practical: Soft angled nude with glossy finish. Trendy enough to feel current, practical enough for everyday life.
Best for beginners: Pre-shaped press-ons in any color you love. Why stress about technique when you can get perfect results immediately?
Highest maintenance: Anything with sharp angles or chrome finishes. Beautiful? Yes. Worth the constant touch-ups? Depends how much you love perfect nails.
Best value: Basic press-on sets or single-color DIY with drugstore polish. You can try the trend without breaking the bank.
Budget-Friendly Reality Check: Basic press-on sets ($15-25) and single-color applications with drugstore polish ($10-20) provide the most value. DIY soft angled shapes keep costs minimal while still achieving the desired look.
High-Maintenance Warnings: Sharp angled shapes, chrome finishes, and complex artistic designs require frequent professional touch-ups. Factor in $40-60 monthly maintenance costs for these premium options.
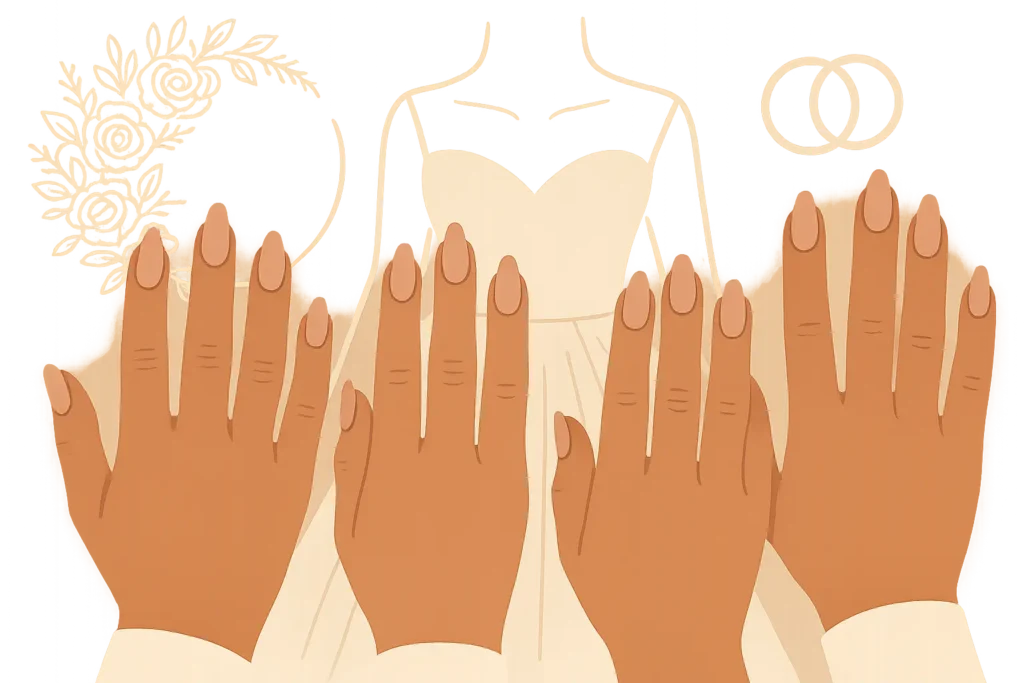
Wedding Beauty Coordination
If you’re planning a wedding, nail coordination shouldn’t add to your stress. Classic options like nude or berry tones photograph beautifully and won’t clash with anyone’s skin tone. Press-ons are perfect for ensuring your entire bridal party has matching, perfect nails without multiple salon appointments.
Get matching bridal party nails with our AI Wedding Planner
Whether you’re the bride seeking sophisticated nude variations that complement your dress, or coordinating berry tones across your entire bridal party, the key is finding options that make everyone feel confident and beautiful without adding unnecessary complexity to your routine.
Coordinate your wedding nail look with our AI Wedding Planner
For weddings, consider classic red for timeless bridal elegance, nude variations for versatile sophistication that photographs beautifully, or press-on options for reliability and consistency across your entire bridal party.
Bridesmaid for Hire understands that wedding planning involves a million tiny decisions. Their comprehensive support can help coordinate these beauty details so you can focus on the bigger picture. Their expertise in creating seamless, stress-free experiences makes them the perfect resource for coordinating these beauty details.
Let our AI Wedding Planner help you perfect your beauty details
Ready to ensure your wedding beauty details are perfectly coordinated? Contact Bridesmaid for Hire to discuss how their comprehensive support can extend to beauty planning and bridal party coordination, removing the guesswork from your special day preparations.
Use our AI Wedding Planner for effortless coordination
Bottom Line
This trend works because it’s genuinely different from the usual shapes we’re used to seeing. Whether you go full dramatic with sharp angles and chrome, or keep it subtle with soft angles and nude colors, you’re guaranteed to get “where did you get your nails done?” questions.
Lipstick nails represent more than just another nail trend – they’re a perfect example of how beauty innovation continues to surprise and delight us. From the original traditional angled shape that started it all to the futuristic chrome finishes that push boundaries, these 25 options prove that creativity in nail art knows no limits.
Start simple if you’re new to this. Try press-ons or soft angled shapes before committing to high-maintenance options. Your nails should make you feel confident, not stressed about chipping or maintenance.
Your choice ultimately depends on balancing authenticity with practicality. If you want the most convincing lipstick illusion, go with traditional angled shapes in classic red with matte finish. For everyday wearability, soft angled shapes in nude colors offer the perfect compromise. When convenience matters most, pre-shaped press-ons deliver professional results without the skill requirements.
Find your best nail style with our AI Wedding Planner
The beauty of having so many options means you can find something that actually fits your lifestyle instead of just following trends blindly. Pick what makes YOU feel amazing – that’s when any nail trend truly works. The best lipstick-shaped nails are the ones that make you feel authentically yourself.


1-800-BRIDESMAID
The Newlywed
Card Game
something extra to love
Read the weekly newsletter from Bridesmaid for Hire, 1-800-Bridesmaid, to hear about real stories, from strangers, who need advice on love, life, friendship, and so much more.
Looking for the perfect wedding gift for someone you adore? Grab The Newlywed Card Game. It's a fun and interactive game they can play on their honeymoon or future date nights.

