


25 Stunning Rose Gold Nail Designs That’ll Make You the Envy of Every Wedding Party
October 15, 2025
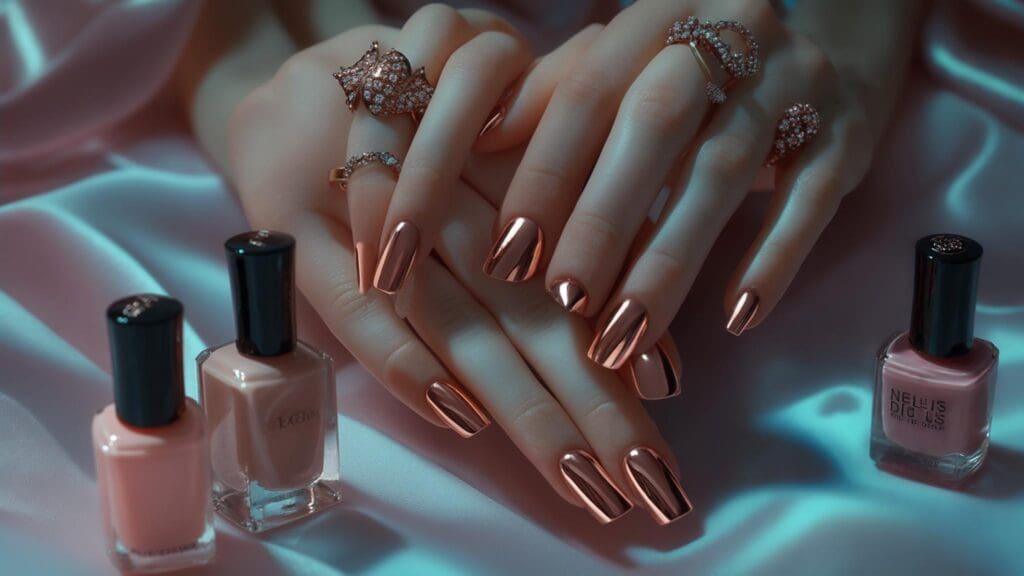

I remember the first time I tried rose gold nails for my friend’s wedding – I was hesitant about the metallic trend, but the way it caught the light during the ceremony photos made me an instant convert. That subtle shimmer added just the right amount of glamour without overwhelming my overall look.
This metallic shade strikes the perfect balance between elegance and modern sophistication. Whether you’re planning your dream wedding, attending as a bridesmaid, or simply want nails that photograph beautifully, these 25 designs will give you options for every occasion, skill level, and personal style preference.
Quick Resources:
-
Find your most flattering nail shade with our Free AI Color Analysis Quiz
-
Coordinate your entire wedding beauty plan with the AI Wedding Planner
-
Explore all our Wedding Tools for planning every detail perfectly
TL;DR
- This metallic hue complements both warm and cool skin tones when you choose the right shade variation
- Chrome and glitter finishes create the most dramatic impact but need professional application
- Matte finishes and nude combinations offer the longest wear time with minimal fuss
- Textured designs add unique dimension but don’t expect them to last as long
- Budget-friendly options include basic polish applications and simple accent nails
- Special occasion designs with pearls and crystals photograph beautifully but need careful handling
- Proper base coat and cuticle care are your best friends for any manicure
What to Consider When Choosing Your Perfect Look
Before you dive in, think about a few things that’ll help you pick the perfect style for your lifestyle, budget, and the occasion you’re prepping for.
Your skin tone plays a huge role in which shade looks best on you. Warm undertones pair naturally with copper-leaning versions, while cooler undertones look amazing with pink-leaning variations. Don’t stress if you’re not sure about your undertones – neutral shades work beautifully across the spectrum.
Not sure about your undertones? Discover your perfect shade match with our Free AI Color Analysis Quiz
| Skin Tone | Best Rose Gold Shade | Complementary Colors | Skip These |
|---|---|---|---|
| Warm Undertones | Copper-leaning rose gold | Coral, peach, warm browns | Cool pinks, silver accents |
| Cool Undertones | Pink-leaning rose gold | Lavender, soft blues, grays | Orange-based metallics |
| Neutral Undertones | Any variation works | Most colors work well | Extremely warm or cool shades |
Think about the occasion and how long you need your manicure to last. Wedding nails need different staying power than your everyday look. Special events call for designs that photograph well under various lighting, while work settings might need something more subtle.
Let’s be real about maintenance – some designs are high maintenance divas while others are your low-key best friends. Simple polish applications need minimal upkeep, while chrome finishes and textured designs require regular touch-ups and sometimes professional removal.
Budget matters too, and it’s not just about the initial cost. Some designs need specialty products, professional application, or frequent salon visits. Factor in both upfront and ongoing expenses when making your choice.
Simplify your beauty and budget planning with the AI Wedding Planner
Everyday Elegance: Classic & Nude Combinations
These are your go-to designs that work from boardroom to brunch. They showcase the beauty of this metallic hue without being over-the-top, perfect for beginners or anyone who prefers timeless elegance.
1. Pure Rose Gold Chrome
This mirror-like finish is absolutely stunning in photos and creates that coveted high-shine effect. You’ll need a black base coat, chrome powder, and gel topcoat – this is definitely professional territory. The chrome powder has to be applied while the base is still tacky, and timing is everything.
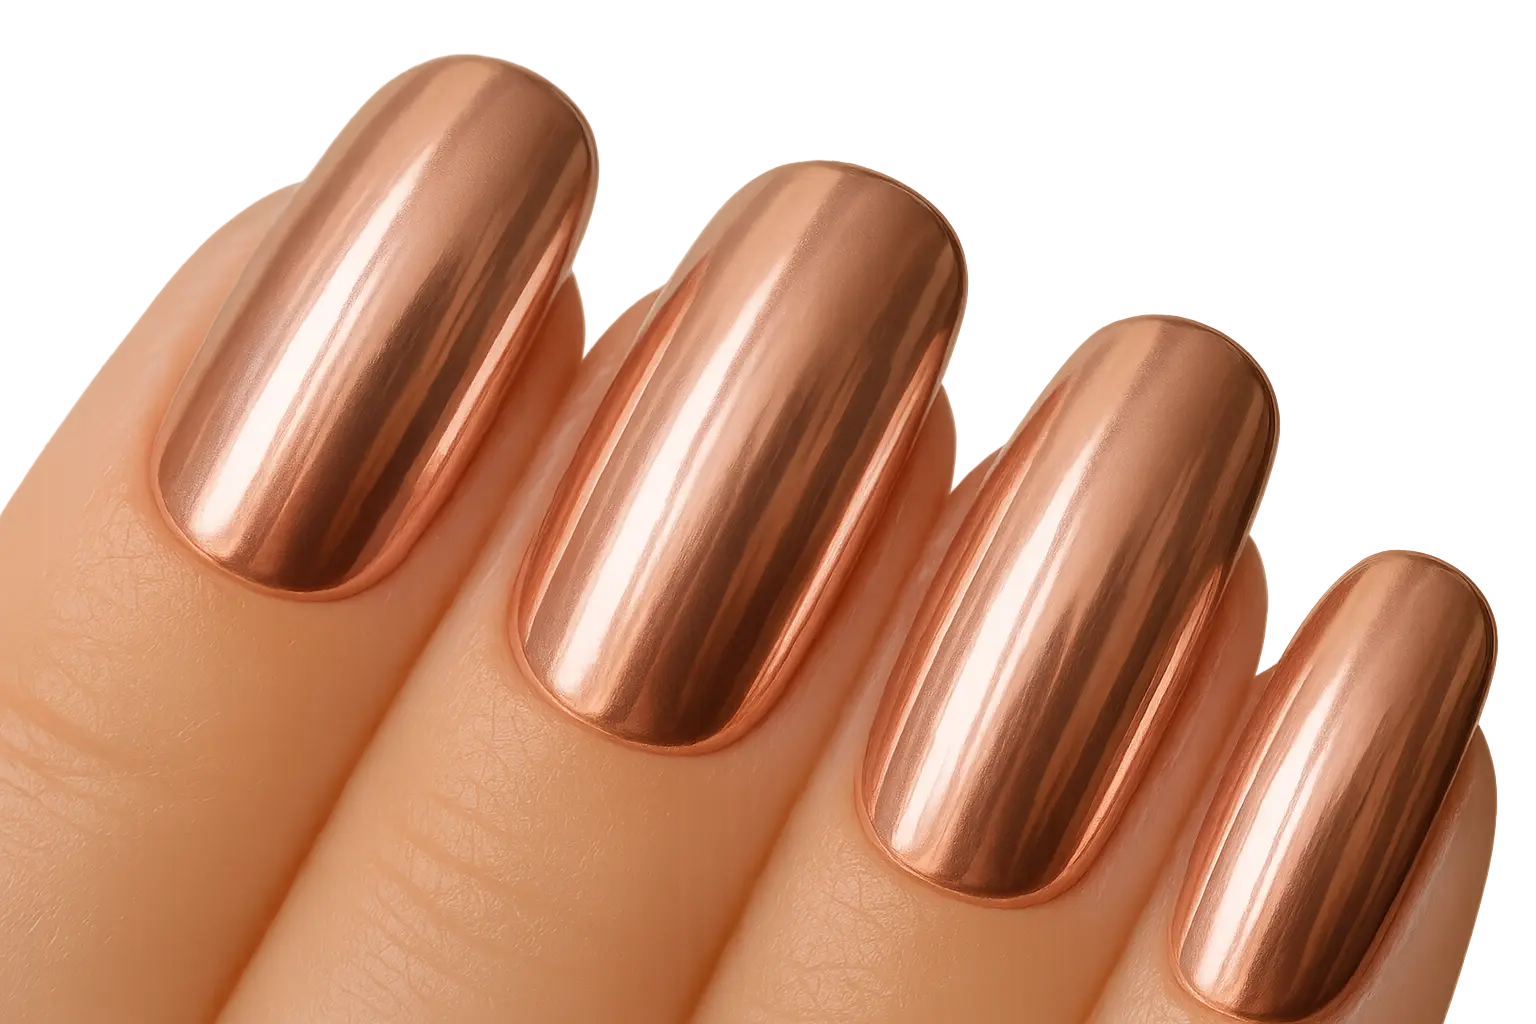
Fair warning: this design photographs like a dream but shows wear quickly on nail tips. Expect 5-7 days of that perfect mirror finish before it starts dulling. Professional application is essential here.
2. Sheer Rose Gold Wash
Perfect for nail health enthusiasts, this translucent application enhances your natural nails with subtle metallic shimmer. The sheer formula lets your natural nail color show through while adding that coveted glow.
This is the gentlest option for damaged nails and requires minimal removal effort. Build coverage gradually with multiple thin coats until you get your desired intensity.
Sarah’s Wedding Day Success: “I chose the sheer wash for my wedding because I wanted something elegant but not overwhelming. The subtle shimmer caught the light beautifully in all our photos, and honestly, I was worried they’d chip during the reception, but they looked amazing even after all that dancing!”
Coordinate your bridal beauty timeline seamlessly with our AI Wedding Planner
3. Matte Rose Gold
Sophisticated and modern, matte finishes offer elegance without the high maintenance. The velvety texture hides minor imperfections and doesn’t show wear patterns like glossy finishes do.
Application is straightforward – apply your base, then finish with matte topcoat. This design complements any outfit and works beautifully in professional settings.
4. Rose Gold French Tips
This modern twist on the classic French manicure swaps traditional white tips for metallic ones. The contrast creates visual interest while keeping that timeless French appeal.
Use striping tape for clean lines, or go freehand if you’re feeling confident. This design elongates fingers and works on any nail length.
5. Nude and Rose Gold Half-Moon
This vintage-inspired design features nude nails with metallic crescents at the cuticle area. It requires steady hands and precise brush control, but creates an incredibly elegant, elongating effect.
Use reinforcement stickers as guides for perfect curves. This works beautifully for vintage-themed weddings or sophisticated everyday wear.
6. Rose Gold Accent Nail
Four nude nails with one statement metallic accent per hand is the perfect way to dip your toes into the metallic trend. This approach lets you experiment without full commitment while staying work-appropriate.
Choose your ring finger for traditional placement, or try the thumb for unexpected flair. This is budget-friendly and super easy to maintain.
7. Nude Base with Rose Gold Foil
Scattered foil pieces over nude polish create texture and dimension without overwhelming shine. The organic placement mimics natural metal veining for an artistic, sophisticated look.
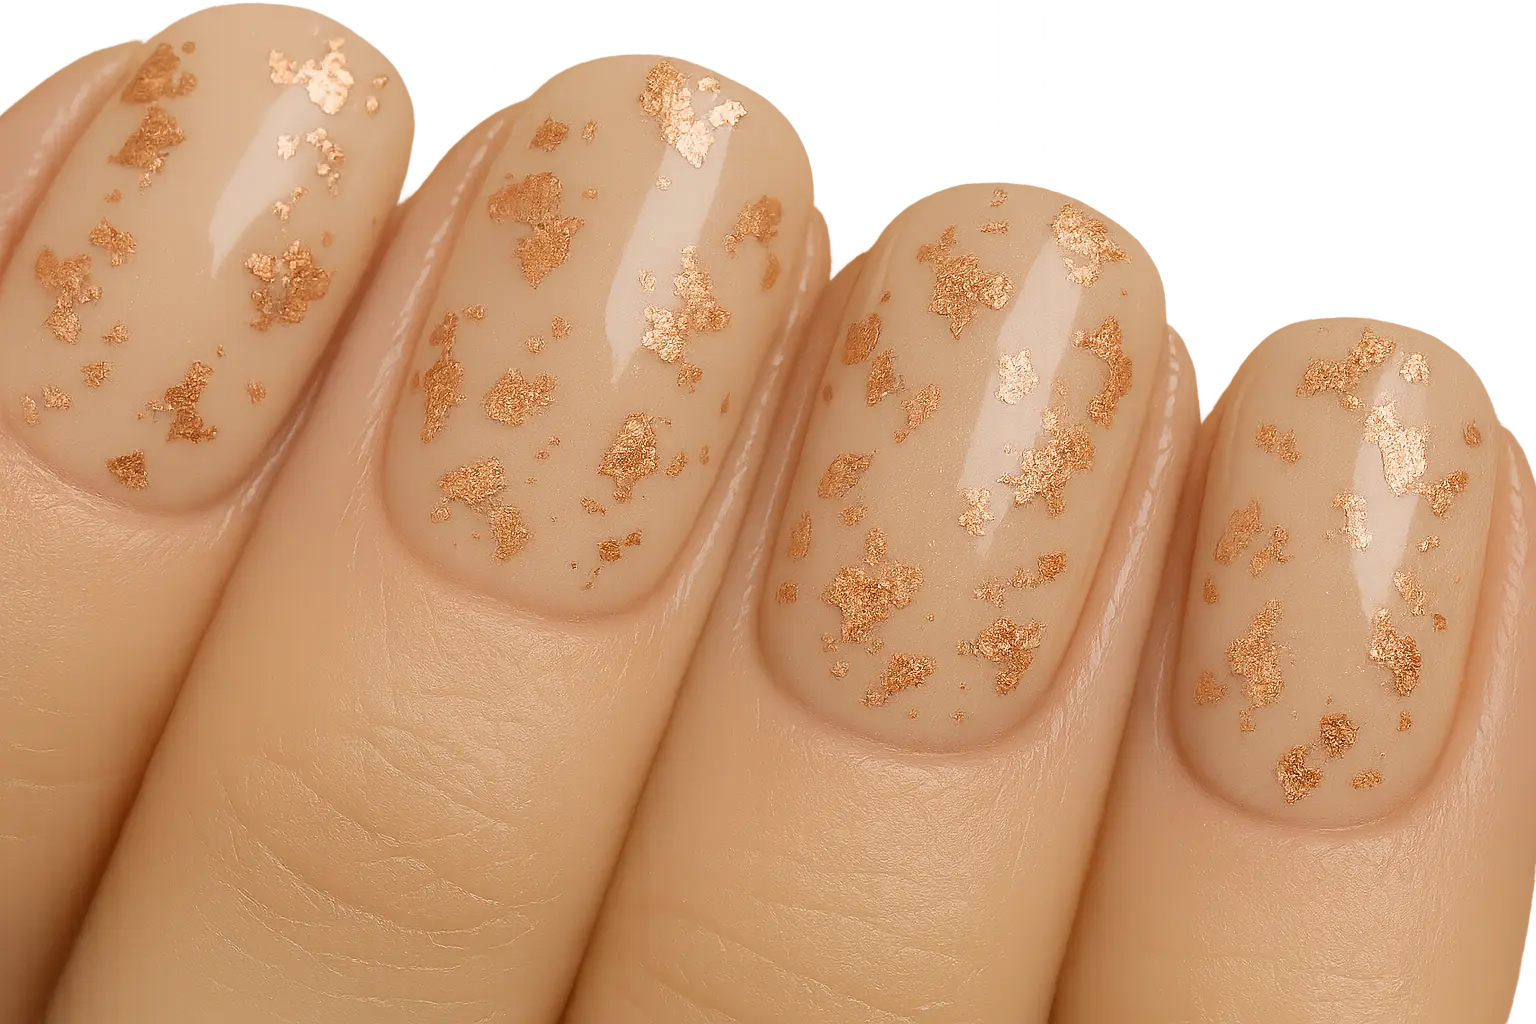
Press the foil on while your base coat is still a little sticky – timing is everything here! This design offers visual interest while remaining office-appropriate and low-maintenance.
8. Ombre Nude to Rose Gold
This seamless gradient transitions from nude at the cuticle to metallic at the tips. The technique requires some blending skills but creates a stunning, modern effect that’s both wearable and eye-catching.
Use a makeup sponge for smooth color transitions. Practice on fake nails first – timing is crucial for seamless blending, and you don’t want to mess up on your actual nails!
Show-Stopping Styles: Glitter & Special Occasions
Ready to make a statement? These designs maximize the metallic’s reflective properties and are perfect for celebrations where you want all eyes on your nails.
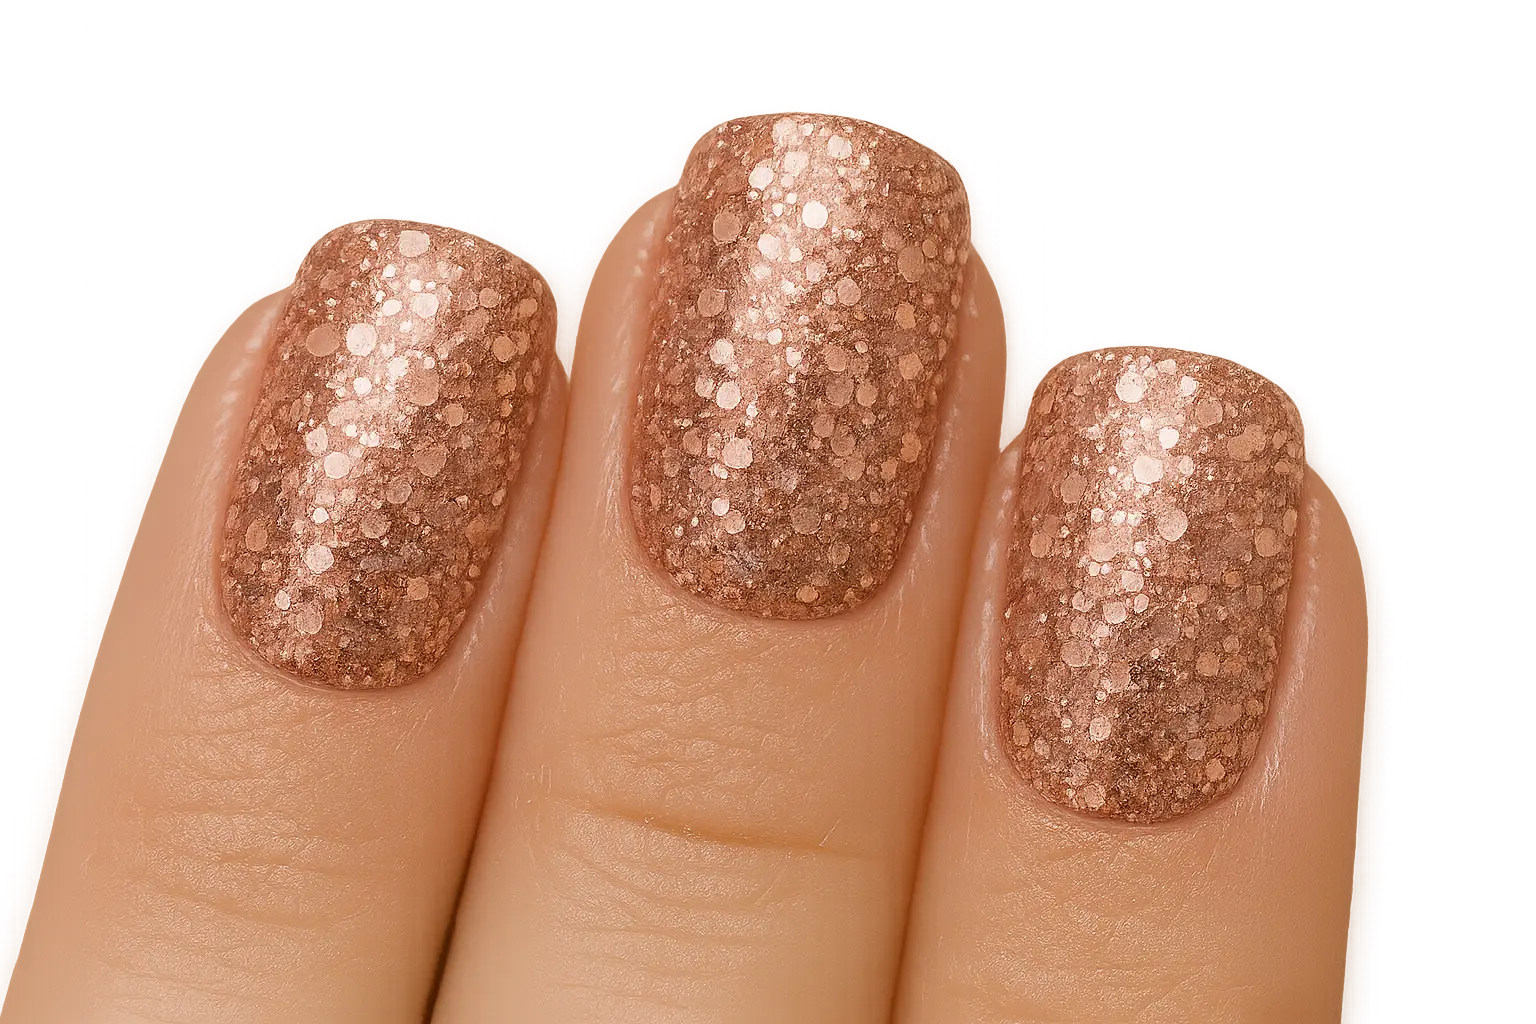
9. Rose Gold Glitter Applications
Let’s talk glitter – because there are so many ways to do this! You can go full glitter bomb for maximum sparkle, create a gradient from cuticle to tip, or concentrate it at the tips French-style.
Glitter Gradient: Start with a nude base and gradually build glitter from cuticle to tip. Use a makeup sponge to dab for the most natural effect. You control the intensity – subtle for everyday or dramatic for special events.
Glitter French: Concentrate the sparkle at nail tips in French manicure style. The clear or nude base keeps it wearable while the glittery tips add celebration-worthy sparkle.
Full Glitter Coverage: Mixed glitter sizes create maximum party-ready glamour. Layer different sizes for depth – start with fine glitter as base, then add medium and chunky pieces. Fair warning: removal is challenging and requires patience.
Jessica’s New Year’s Eve Experience: “I wanted something festive but not over-the-top for our party. The glitter French tips were perfect – elegant enough for dinner photos but sparkly enough to catch the light during midnight toasts. They lasted through the entire weekend!”
10. Rose Gold Holographic
Combining this metallic base with holographic topcoat creates rainbow reflections and multi-dimensional shine. The effect changes dramatically under different lighting, creating visual interest throughout the day.
This can be overwhelming in conservative environments but is absolutely stunning for creative settings or special occasions. The holographic effect photographs beautifully under various lighting conditions.
11. Bridal Rose Gold with Pearls
Elegant metallic base with tiny pearl accents and delicate white details creates wedding day perfection. Micro pearls are placed using nail glue for secure attachment.
Application takes about 45 minutes per hand but creates exceptional photography results. Expect 7-10 days wear with careful handling. Professional removal is recommended to protect your natural nails.
12. Rose Gold Holiday Sparkle
Rich metallics with gold leaf accents and crystal embellishments create festive celebration nails perfect for holiday parties. Layer gold leaf over tacky base coat, then add crystals with nail glue.
This requires careful handling but creates stunning light reflection for evening events and photography.
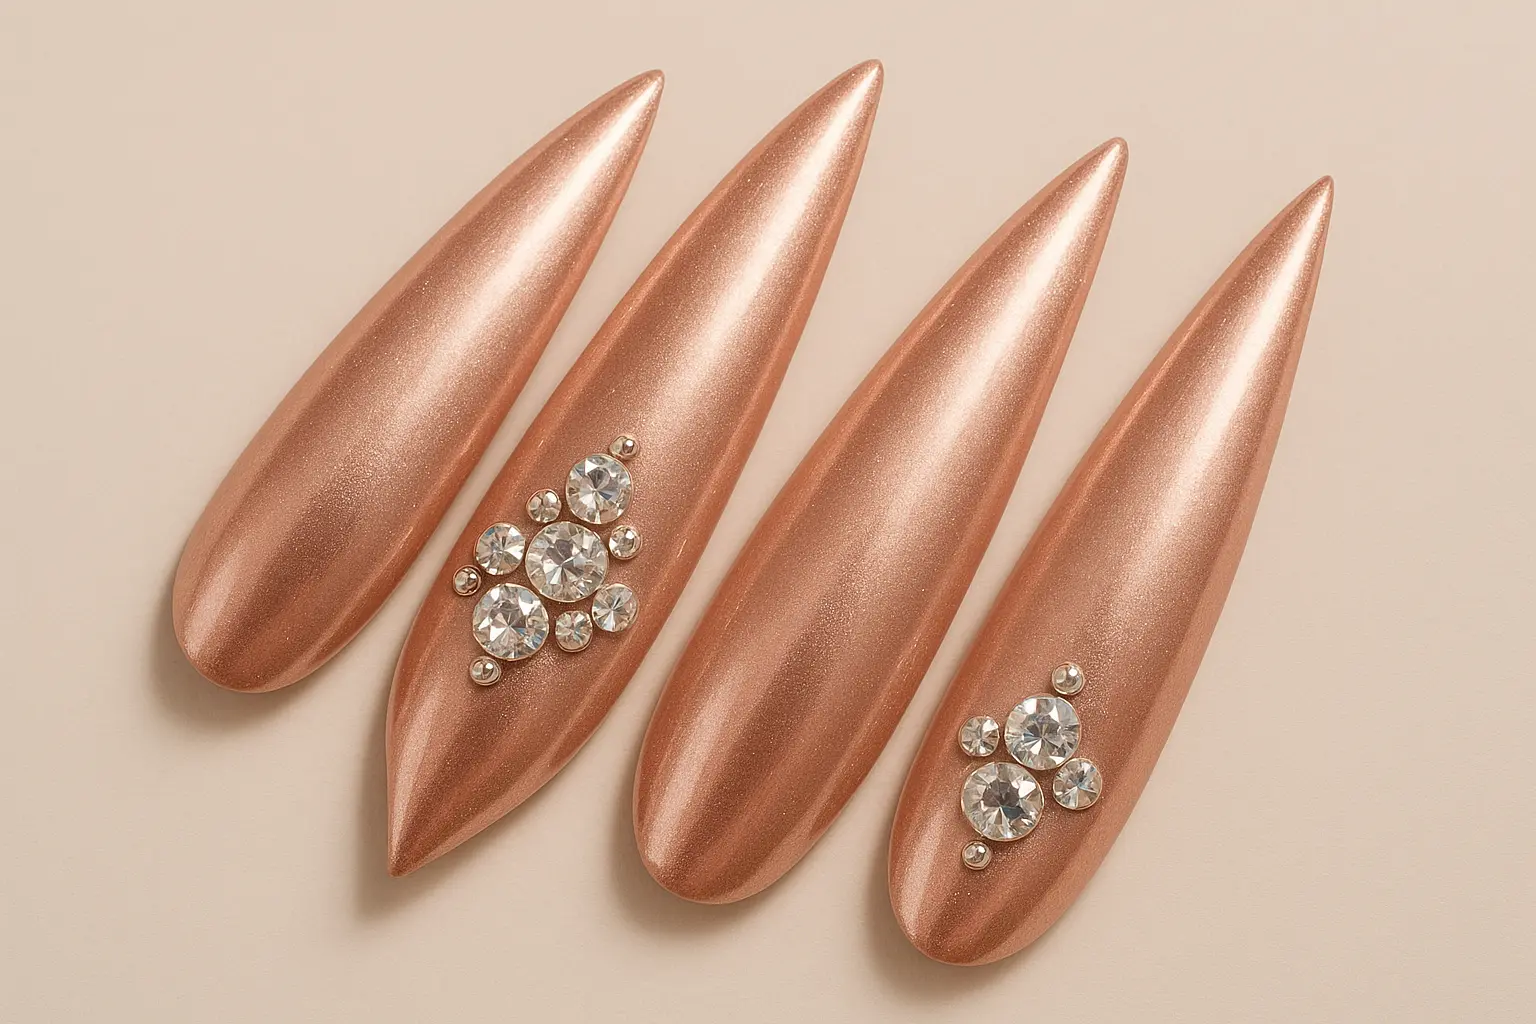
13. Rose Gold Stiletto Drama
Long stiletto nails in high-shine chrome with optional crystal accents create maximum impact for those wanting dramatic, attention-grabbing nails.
Professional shaping and application are essential for stiletto length and chrome finish. This makes bold statements but requires lifestyle adjustments and careful maintenance.
Creative & Artistic Designs
These artistic interpretations transform simple metallic polish into wearable art. Each requires different skill levels, offering options for both DIY enthusiasts and those seeking professional nail art services.
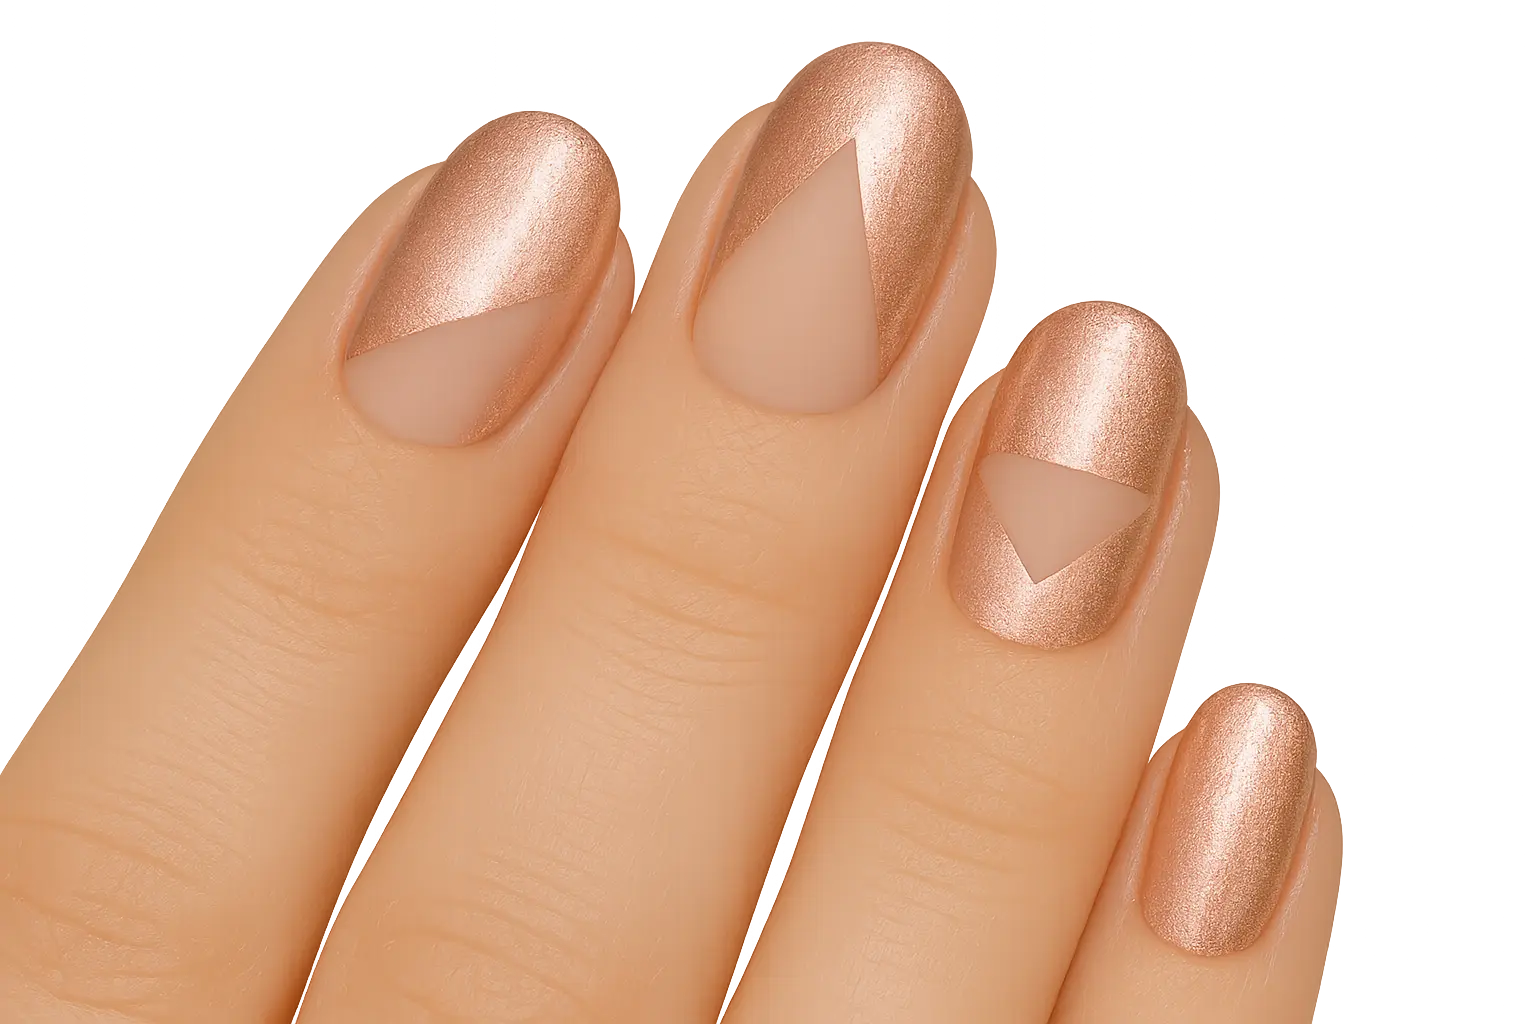
14. Rose Gold Geometric Patterns
Clean lines and shapes over nude or clear bases create modern, minimalist appeal. Popular patterns include triangles, chevrons, and negative space blocks that showcase contemporary sensibilities.
Use striping tape for precise lines or go freehand if you’re feeling brave. This suits modern aesthetics while remaining sophisticated enough for professional settings.
15. Rose Gold Marble Effect
Swirled marble patterns combining this metallic with white or nude create elegant, organic looks that mimic natural stone veining. The water marble technique produces unique designs on each nail.
Master the water marble technique by practicing timing and tool control. Each nail will be unique, creating an artistic, high-end appearance that photographs beautifully.
16. Rose Gold Striping Tape Design
Precise lines and patterns created with striping tape offer professional-looking nail art without advanced painting skills. The tape creates clean, geometric designs with minimal room for error.
Apply base color, position tape while slightly tacky, paint over design area, then remove tape immediately for clean lines. This works well for beginners wanting professional results.
17. Rose Gold Negative Space
Bare nail areas combined with metallic sections create contemporary, artistic appeal. This modern technique plays with positive and negative space for sophisticated, gallery-worthy designs.
Plan your design carefully before application. These require precision but create stunning, modern results that work beautifully in creative professional environments.
18. Rose Gold Floral Accents
Delicate hand-painted or stamped floral designs over neutral bases add feminine, romantic touches perfect for spring weddings or garden parties.
Use nail art brushes for hand-painting or stamping plates for consistent results. This photographs exceptionally well in natural lighting.
19. Rose Gold Constellation
Tiny dots and lines creating celestial patterns offer whimsical, dreamy effects perfect for evening events. The scattered dot placement mimics star patterns.
Use dotting tools for consistent circles and thin brushes for connecting lines. This playful design adds personality while maintaining sophistication.
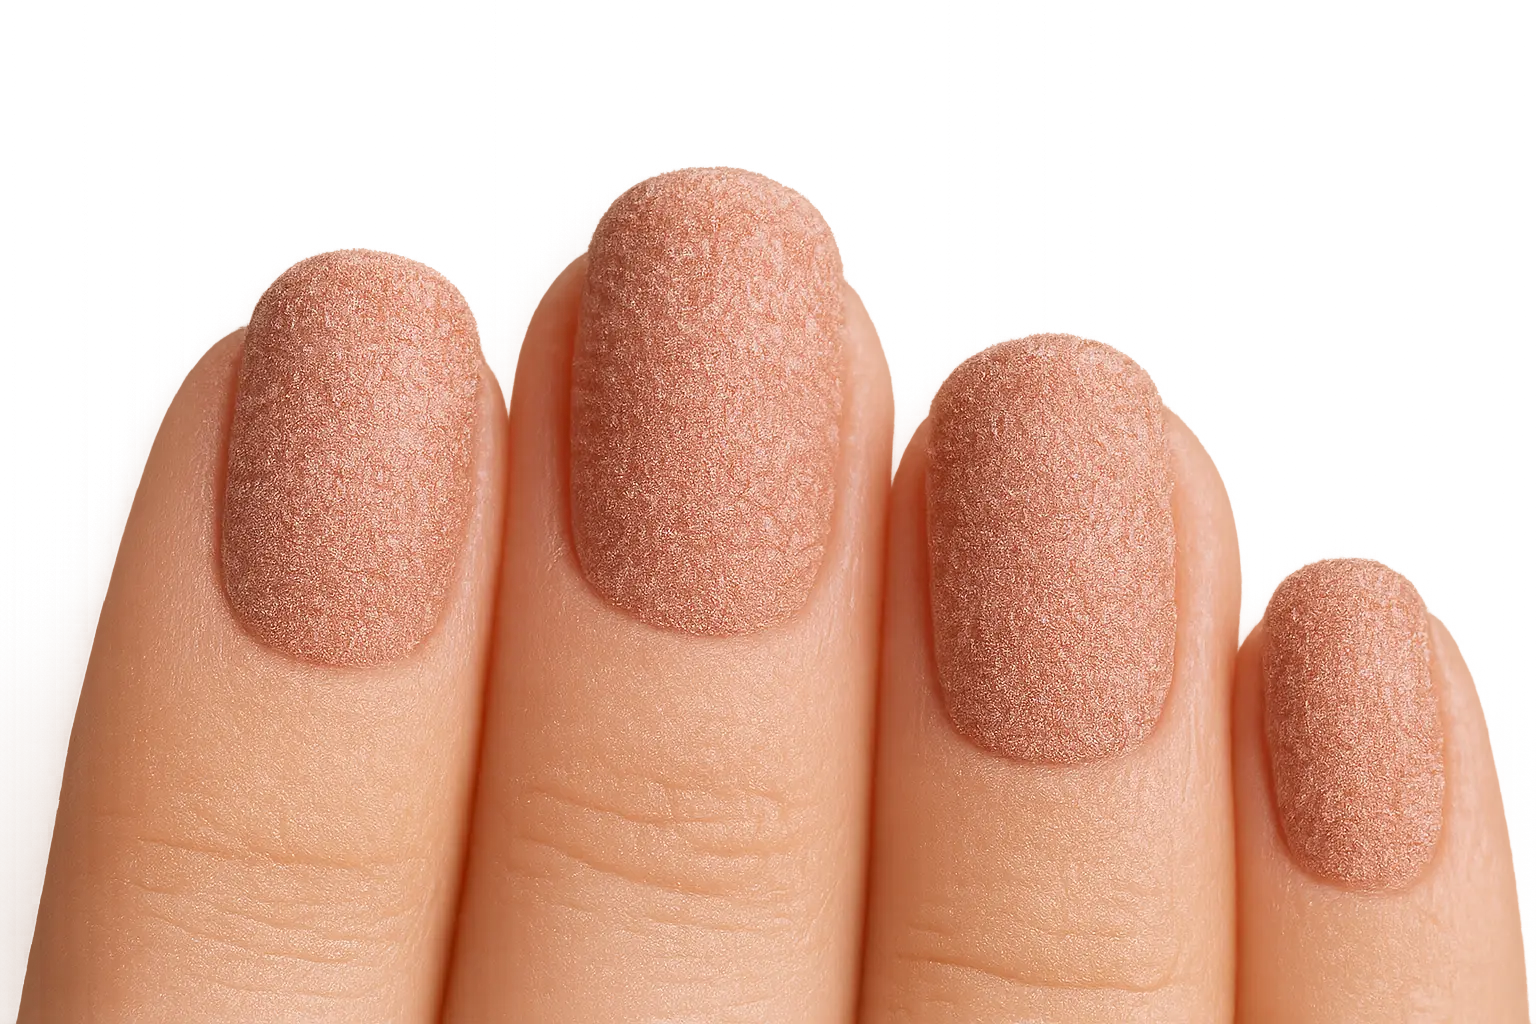
20. Textured Finishes
Want something completely different? These specialty finishes add tactile dimension but typically have shorter lifespans.
Caviar Beads: Tiny beads applied over wet polish create luxurious, textured 3D effects. Roll nails in caviar beads while the base remains tacky. Lasts 3-5 days before beads start falling off.
Sand Texture: Specialty polish that dries to a sandy, matte texture while maintaining color. The grainy finish catches light differently and hides minor nail imperfections.
Velvet Finish: Flocking powder creates soft, velvet-like texture that’s unique to touch. Apply while base coat remains wet, then seal carefully. Requires gentle handling.
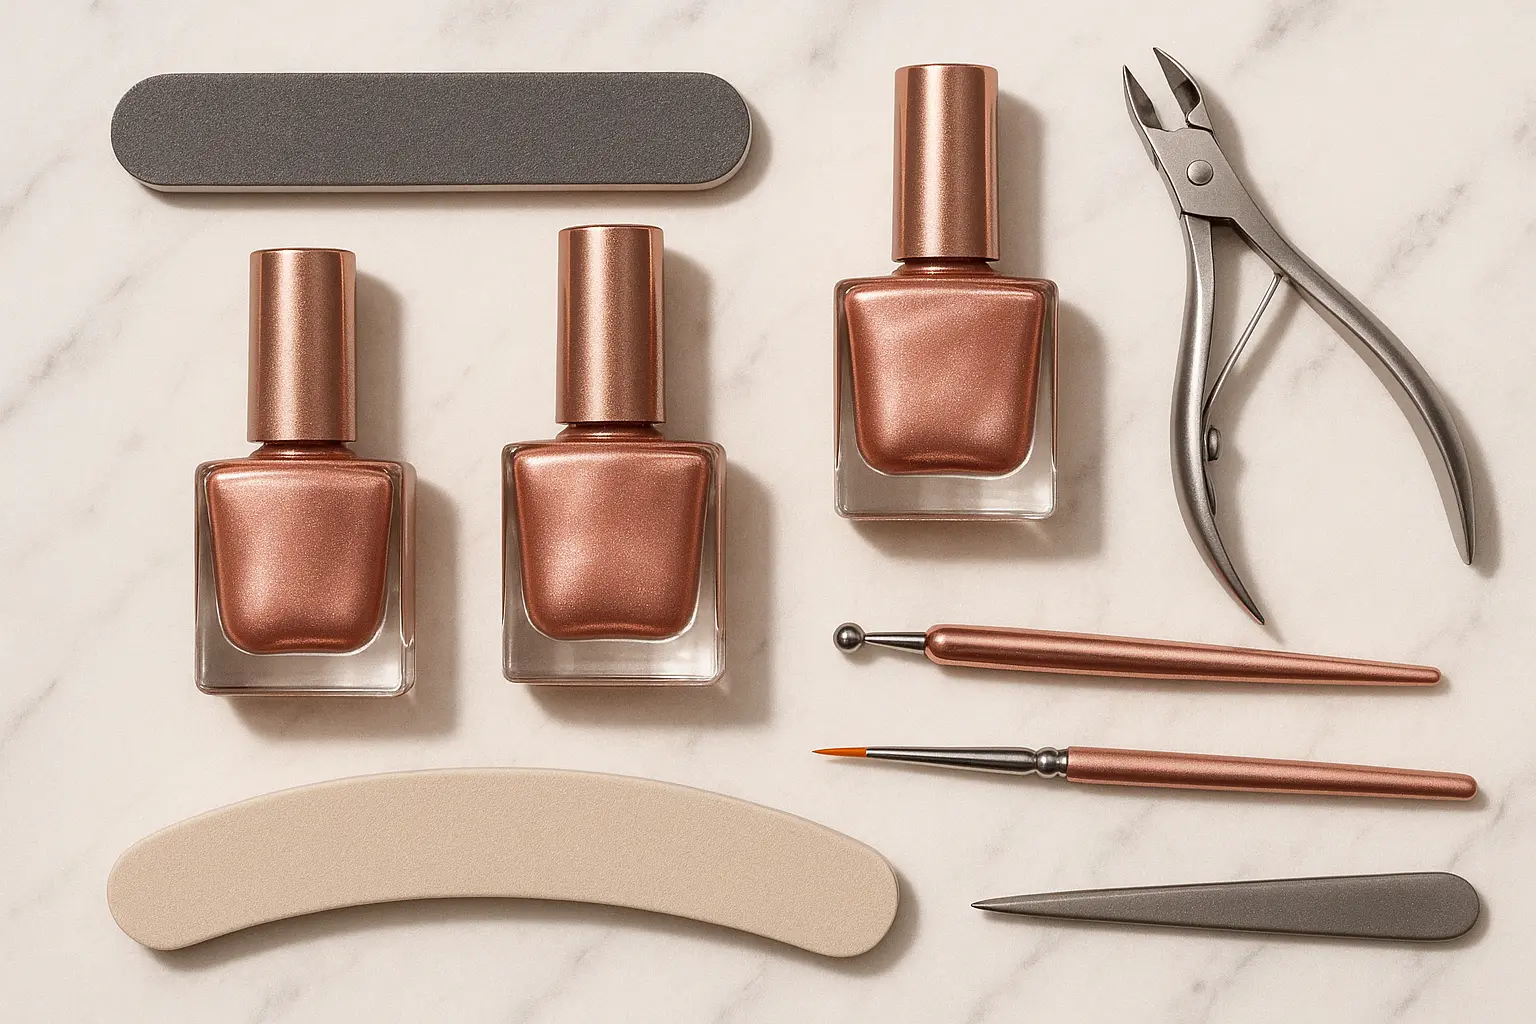
DIY vs Professional: What You Need to Know
Let’s be honest about which designs you can tackle at home versus those that need professional expertise. This breakdown considers skill requirements, tools needed, and realistic outcome expectations.
Total Beginner Friendly:
- Basic polish applications
- Sheer washes
- Accent nail designs
- Simple glitter gradients
These need basic nail tools and standard application skills. Expect 1-2 hours total time including drying.
You’ll Need Some Practice:
- Geometric patterns
- Marble effects
- Striping tape designs
- Basic nail art
Practice makes perfect with these. Start simple and work your way up to more complex patterns.
Save This for the Pros:
- Chrome applications
- Complex nail art
- Textured finishes
- Special occasion designs with embellishments
Professional application ensures proper technique, longevity, and safety. Investment ranges from $40-100+ depending on design complexity and location.
Get personalized help organizing your pre-wedding beauty schedule using the AI Wedding Planner
Maria’s DIY Journey: “I started with the accent nail design as my first attempt at metallics. After practicing for three weekends, I felt confident enough to try the glitter gradient. The key was investing in quality base and top coats – they made all the difference in how professional my DIY look appeared and how long it lasted.”
Making Them Last: Real Talk on Maintenance
Proper care significantly extends the life and appearance of your manicure while protecting your natural nail health. Here’s what actually works:
Quality Products Matter:
Choose reputable brands with good longevity ratings. Non-toxic, long-wearing formulas protect nail health while maintaining color integrity. Base coats prevent staining, quality topcoats extend wear time.
Daily Care That Works:
Apply cuticle oil daily to maintain nail and skin health. Moisturized cuticles prevent cracking that can compromise your manicure. Wear gloves during cleaning – harsh chemicals are your manicure’s enemy.
Real Expectations:
Look, chrome nails are gorgeous but they’re high maintenance. If you type a lot or do dishes without gloves, maybe skip this one. The matte finish? That’s your low-maintenance bestie.
That caviar bead look? Super cool for photos, but you’ll be picking beads off everything for days. Maybe save it for a special night out, not your everyday look.
Touch-Up Tips:
Keep small bottles of your shade for quick fixes. Address chips immediately to prevent further damage. For glitter designs, focus touch-ups on high-wear areas like nail tips.
Removal Reality:
Use acetone-free removers when possible to minimize damage. For glitter or textured designs, soak cotton pads in remover and wrap nails for 10-15 minutes before gentle removal. Never peel or scrape polish off – your nails will thank you later.
| Design Type | Expected Longevity | Maintenance Level | Removal Difficulty | Real Talk |
|---|---|---|---|---|
| Basic Polish | 7-10 days | Low | Easy | Your reliable everyday option |
| Glitter Designs | 5-8 days | Medium | Hard | Gorgeous but stubborn to remove |
| Chrome Finish | 5-7 days | High | Professional recommended | High maintenance diva |
| Textured Finishes | 3-6 days | High | Medium-Hard | Fun but short-lived |
| Special Occasion | 7-10 days | Very High | Professional only | Handle like precious jewelry |
Wedding Day Coordination Tips
Planning wedding nails involves way more than just choosing pretty colors. You need designs that complement your dress, photograph well under various lighting conditions, and survive hours of handshakes, hugs, and celebration activities.
We’ve all seen gorgeous chrome nails chip during cake cutting and watched intricate designs smudge during emotional moments. Here’s what actually works for real wedding days:
Timing Is Everything:
Schedule your nail appointment 1-2 days before your wedding. This gives you time to fix any issues but ensures peak appearance on your big day. Don’t try a brand new design the week of your wedding – stick with something you’ve tested before.
Photography Considerations:
This metallic hue photographs beautifully, but some finishes work better than others. Matte and satin finishes are forgiving under camera flashes, while high-shine chrome can create unwanted glare in photos.
Bridal Party Coordination:
You don’t need everyone in identical nails, but having a cohesive color palette creates beautiful visual harmony. Consider having bridesmaids in nude with metallic accents while you go full glamour, or have everyone in different intensities of the same shade.
Durability for Long Days:
Wedding days are marathons, not sprints. Choose designs that can handle:
- Ring exchanges (avoid chunky textures that might catch)
- Bouquet handling (skip super long lengths)
- Dancing (matte finishes hide scuffs better)
- Emotional moments (waterproof topcoats are your friend)
If you’re feeling overwhelmed by all the coordination details, services like Bridesmaid for Hire can actually help with these decisions – they’ve seen what works in real wedding scenarios and can guide you toward choices that photograph beautifully and last through your entire celebration.
Plan every wedding-day beauty detail confidently with our AI Wedding Planner
Seasonal Wedding Considerations:
Spring and Summer Weddings:
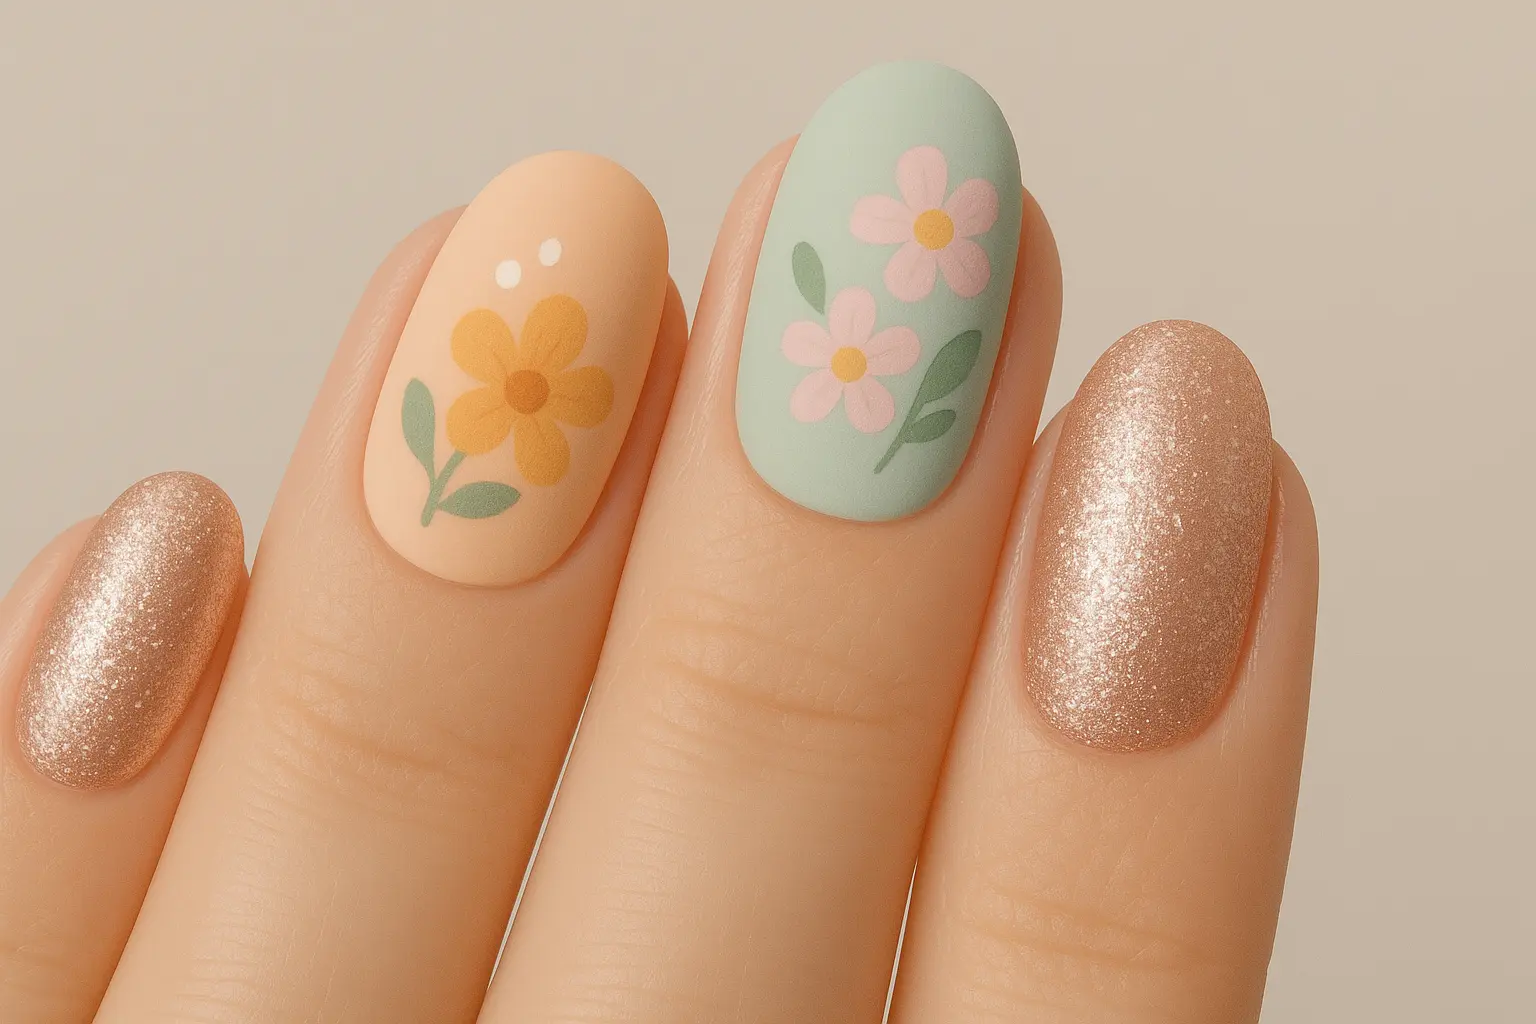
Light, airy designs work beautifully during warmer months. Pair this metallic with soft pastels like baby pink or mint green for fresh, vibrant looks. Floral patterns and negative space designs capture the season’s energy and photograph beautifully in natural sunlight.
Fall and Winter Celebrations:
Richer color combinations suit cooler months perfectly. Burgundy or deep plum bases with metallic accents create warm, cozy feelings. Geometric patterns and marble effects work exceptionally well with deeper seasonal palettes, while glitter applications add festive touches perfect for holiday celebrations.
Final Thoughts
The best part about rose gold? It’s basically impossible to mess up. This universally flattering metallic offers incredible versatility for expressing your personal style while maintaining sophisticated elegance.
From subtle sheer washes perfect for everyday wear to dramatic chrome finishes that steal the spotlight, these 25 designs provide options for every occasion, skill level, and budget. The key is finding the perfect intensity and style that speaks to your personality.
Remember, the best rose gold nails are the ones that make you feel confident and beautiful. Consider your lifestyle, maintenance preferences, and the occasions you’re preparing for when making your selection. Don’t be afraid to start with simpler designs and work your way up to more complex applications as your skills develop.
Start with something simple, see how you like it, and work your way up to the fancier stuff. Whether you choose DIY application or professional services, investing in proper preparation and quality products will extend your manicure’s life and protect your natural nail health.
Most importantly, have fun experimenting with these designs. This metallic shade’s universal flattering qualities mean you really can’t go wrong – your nails are going to look amazing no matter what you choose.
Bring your full bridal look together effortlessly with the AI Wedding Planner


1-800-BRIDESMAID
The Newlywed
Card Game
something extra to love
Read the weekly newsletter from Bridesmaid for Hire, 1-800-Bridesmaid, to hear about real stories, from strangers, who need advice on love, life, friendship, and so much more.
Looking for the perfect wedding gift for someone you adore? Grab The Newlywed Card Game. It's a fun and interactive game they can play on their honeymoon or future date nights.

