


25 Stunning Rainbow Nail Designs That’ll Make Everyone Ask Where You Got Them Done
October 14, 2025
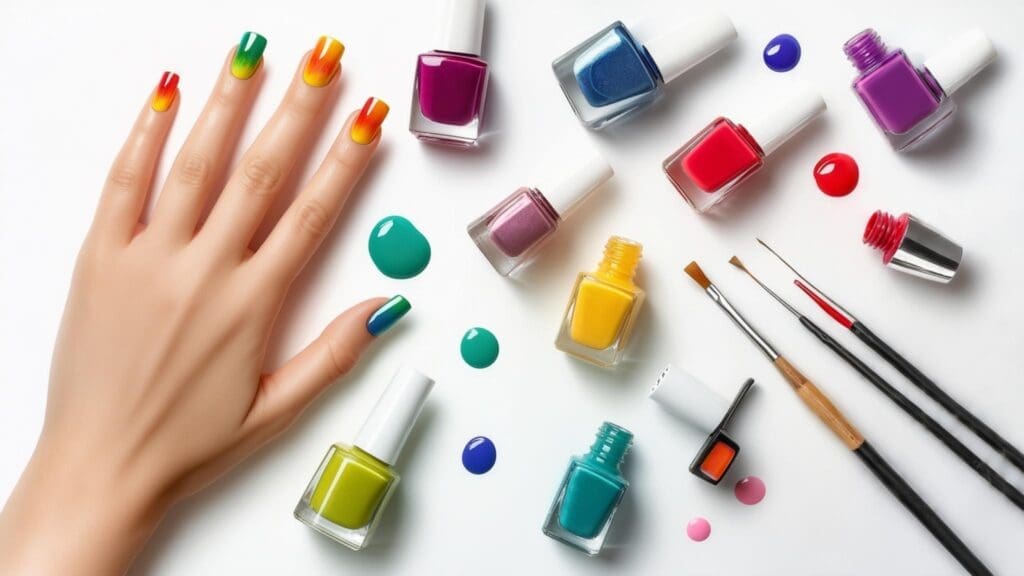

Rainbow nail art has absolutely exploded lately, with nail salons across Georgia reporting a 300% increase in rainbow nail requests according to Fresha’s salon booking data. I still remember walking into my first nail appointment last spring, completely overwhelmed by all the colorful possibilities. The nail tech flipped through her portfolio, and I realized these weren’t just about slapping every color onto your fingertips – they’re genuine art that requires some serious thought about technique, occasion, and your personal style.
I’ve put together 25 gorgeous rainbow nail ideas that I’m honestly obsessed with, covering every skill level, budget, and occasion to help you navigate this colorful world with confidence.
Quick Resources:
-
Find your perfect nail shades with our Free AI Color Analysis Quiz
-
Plan your next celebration with our AI Wedding Planner
-
Explore All Wedding Tools for complete event planning support
TL;DR
- These colorful designs range from simple DIY ombre ($15-25) to complex professional artwork ($150+)
- Consider your occasion, skill level, and maintenance preferences before diving in
- Gel polish lasts 2-3 weeks but needs professional removal, while regular polish chips faster but changes easily
- Longer nails work best for complex designs, while shorter nails suit minimalist accents
- Skin tone affects which variations look most flattering – cool undertones suit blue-based rainbows, warm undertones prefer yellow-based palettes
- Professional application is recommended for chrome effects, 3D elements, and watercolor techniques
- Seasonal timing matters – pastels for spring, neons for summer, jewel tones for fall, metallics for winter
What to Consider Before Choosing Rainbow Nails
Before diving into specific designs, you need to honestly evaluate several key factors that’ll determine which style actually works for your lifestyle. I’m talking about appropriateness for your occasions, your skill level (or budget for professional help), maintenance requirements, color harmony with your skin tone and wardrobe, your natural nail length and shape, and overall budget constraints. Trust me, understanding these upfront will save you from rainbow regret later.
Don’t make this choice on impulse – I learned that the hard way. The occasion where you’ll be wearing them plays a huge role in determining the right design. Wedding events call for sophisticated accents, while casual outings give you freedom to experiment with bold, statement-making looks. Professional settings typically require subtle elements rather than full-coverage rainbow art.
Match your rainbow nail shades to your skin tone using our Free AI Color Analysis Quiz
| Occasion Type | What Actually Works | Skill Level | Professional Cost Range |
|---|---|---|---|
| Professional/Work | Cuticle lines, micro details, single accent nail | Beginner to Intermediate | $30-60 |
| Casual/Everyday | Traditional ombre, pastel variations, simple stripes | Beginner | $15-45 |
| Special Events/Parties | Chrome effects, 3D elements, holographic, neon designs | Advanced | $70-150+ |
| Weddings/Formal | Subtle accents, pastel ombre, minimalist patterns | Beginner to Intermediate | $40-80 |
| Festivals/Creative | Bold geometrics, textured finishes, abstract art | Intermediate to Advanced | $60-120 |
Let’s be real about skill level assessment. Simple ombre works perfectly for beginners, while complex geometric patterns and 3D elements require professional expertise. Don’t underestimate the time investment either – some designs need 2-3 hours of meticulous work, and if you’re anything like me with the attention span of a goldfish, that’s a problem.
Maintenance varies dramatically between techniques. Gel designs last 2-3 weeks but need professional removal, while regular polish allows easy color changes but requires frequent touch-ups. Consider your lifestyle honestly – are you willing to baby your nails, or do you need something more durable?
Color harmony makes or breaks the look. Your skin tone, existing wardrobe, and personal color preferences all matter. Cool undertones look stunning with blue-based palettes, while warm undertones shine with yellow-based combinations. Some designs use traditional ROYGBIV colors, others incorporate pastels, neons, or jewel tones.
Discover which rainbow tones flatter your skin best with our Free AI Color Analysis Quiz
Nail length and shape significantly impact which designs will look best. Longer nails provide more canvas for intricate artwork, while shorter nails work better with simple elements or accent designs. Your natural nail shape also influences the final result.
Budget considerations range widely. DIY attempts can cost as little as $15-25 for supplies, while professional rainbow nail art ranges from $30 for simple designs to $150+ for complex, dimensional artwork.
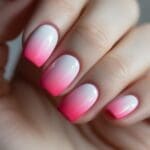
Classic Rainbow Ombre Designs
Classic ombre forms the foundation of this nail art trend, featuring smooth color transitions that create stunning gradient effects. These designs range from traditional vertical ombre across all ten fingers to horizontal gradients on individual nails, with variations including pastel and neon color palettes. Most ombre techniques are beginner-friendly and work well for various occasions, making them perfect starting points for anyone new to colorful nail art.
1. Traditional Vertical Rainbow Ombre
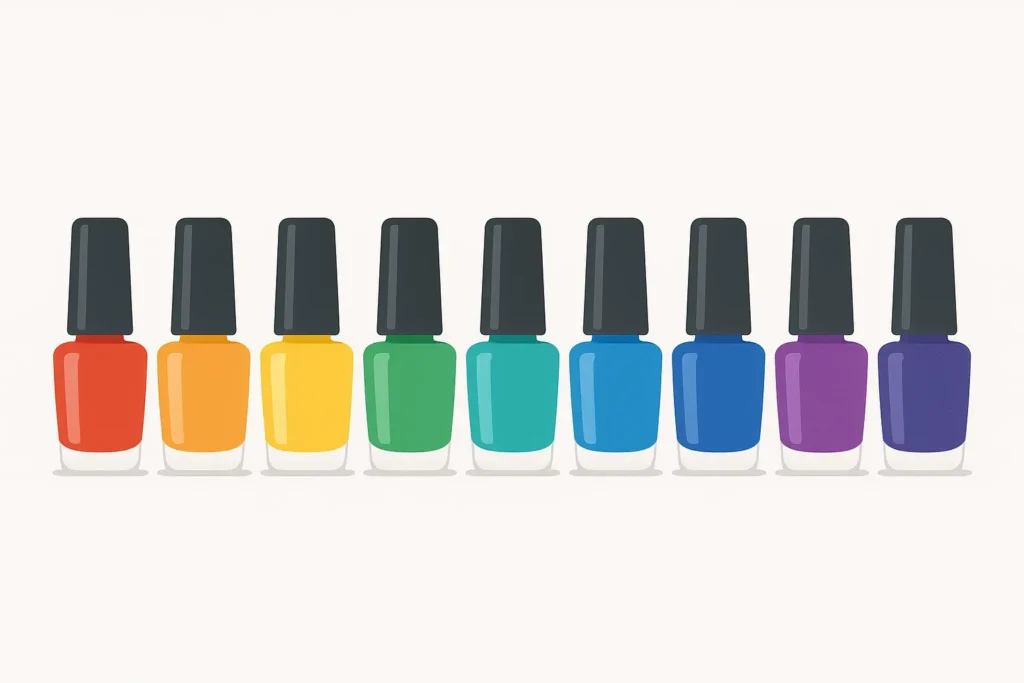
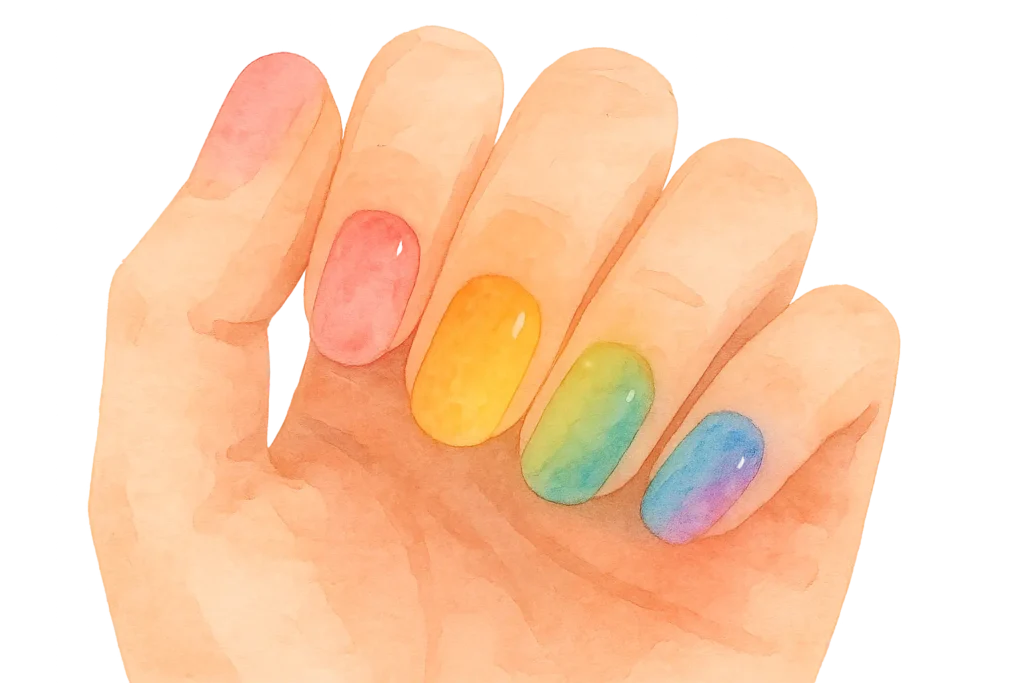
The traditional vertical approach remains the most recognizable design. You’ll paint each nail a different color of the rainbow, creating that classic gradient effect across your hands. Start with red on your thumbs, then move through orange, yellow, green, blue, indigo, and violet on your remaining fingers.
This design works beautifully for beginners because each nail is essentially a single color application. The “ombre” effect comes from the progression across your fingers rather than complex blending techniques on individual nails. You can achieve this look with regular polish in about 30-45 minutes.
Sarah’s First Experience: “I decided to try traditional vertical ombre for my friend’s birthday party. I used drugstore polishes in classic ROYGBIV colors and applied one color per nail. The whole process took about 45 minutes, including drying time. Even though my application wasn’t perfect, the overall effect was stunning and got so many compliments. The best part? When one nail chipped, I only had to touch up that single color instead of redoing complex blending work.”
The versatility makes this design incredibly popular. It works for casual outings, creative workplaces, and even some professional settings when executed with sophisticated color choices. Maintenance is moderate – expect 2-3 weeks with gel polish or weekly touch-ups with regular lacquer.
Budget-wise, this is one of the most affordable options. DIY costs run $15-25 for quality polishes, while professional application ranges $30-50. The design flatters all skin tones, though you can adjust the specific rainbow shades to complement your undertones.
2. Horizontal Rainbow Ombre per Nail
Horizontal ombre takes the gradient concept to individual nails. Each nail features a rainbow transition from cuticle to tip, creating a more subtle overall effect than the traditional vertical approach. This technique requires more skill because you’re blending multiple colors on each nail surface.
The blending process involves applying each color in thin horizontal bands, then using a makeup sponge to smoosh them together (technical term, obviously). You’ll need to work quickly before the polish starts to set, making this more challenging for DIY attempts.
This design shines in professional settings because it’s sophisticated while still being colorful. The effect is present but not overwhelming, making it workplace-appropriate in most creative industries. The horizontal orientation also creates an elongating effect on shorter nails.
Maintenance is higher than simple designs due to the detailed blending work. Any chips or wear will be more noticeable because they disrupt the gradient effect. Professional application is recommended, with costs typically ranging $50-75 depending on your location and the salon’s expertise level.
3. Pastel Rainbow Ombre
Pastel ombre softens the traditional palette into dreamy, muted tones. Think soft pink instead of bright red, peach instead of orange, butter yellow, mint green, and lavender instead of deep purple. This creates an ethereal, romantic effect that’s perfect for spring and summer celebrations.
The pastel approach makes this wedding-appropriate. Brides and bridesmaids can embrace the trend without overwhelming their overall look. The soft colors photograph beautifully and complement most wedding color schemes without competing for attention.
Planning wedding nails? Find your perfect pastel match with our Free AI Color Analysis Quiz
Application is actually easier than traditional ombre because pastel colors are more forgiving. Blending mistakes are less noticeable, and the overall effect remains beautiful even if your technique isn’t perfect. This makes it an excellent choice for DIY enthusiasts.
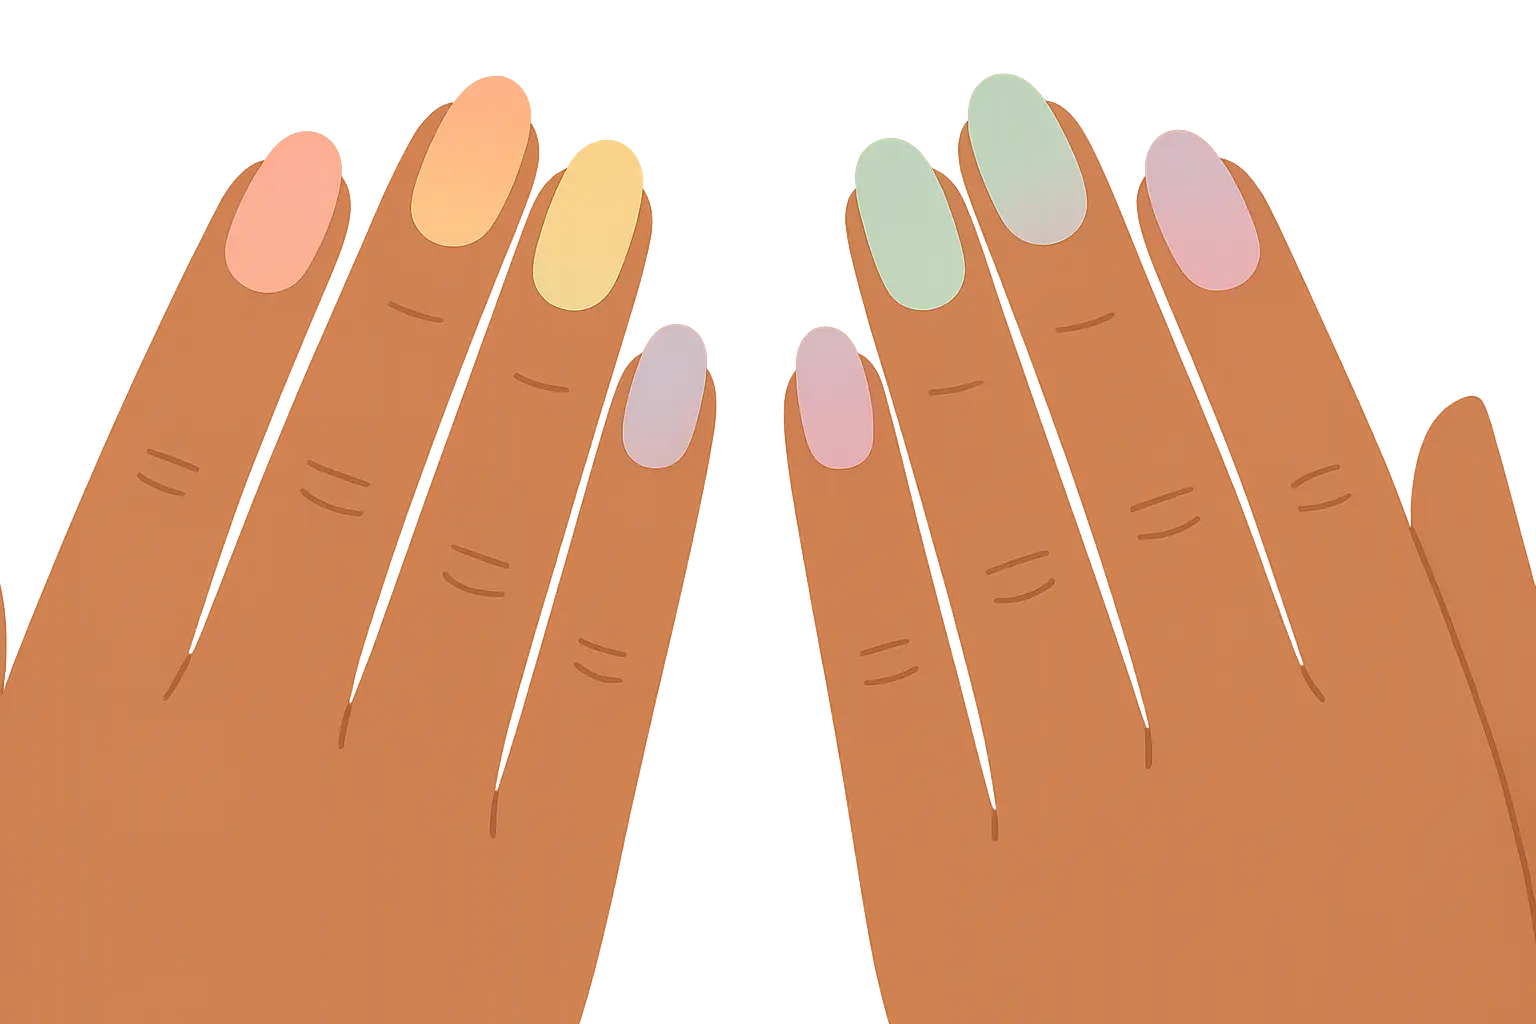
The color palette works especially well on fair to medium skin tones, creating a soft, feminine appearance. However, deeper skin tones can also wear pastels beautifully – you might just need to adjust the specific shades to ensure they don’t wash you out.
Maintenance is moderate, similar to other ombre designs. The lighter colors may show wear slightly more than darker shades, but the overall effect remains lovely even as it fades. DIY costs are minimal since pastel polishes are widely available and affordable.
4. Neon Rainbow Ombre
Neon brings electric energy to the classic design. These bold, fluorescent colors create an eye-catching effect that’s impossible to ignore. Think hot pink, electric orange, lime green, and bright purple – colors that practically glow under certain lighting conditions.
This design is perfect for festivals, summer parties, and any occasion where you want to make a statement. The vibrant colors photograph amazingly under both natural and artificial light, making them ideal for social media-worthy moments.
The application requires intermediate skills because neon polishes can be tricky to work with. They often require special base coats to prevent staining and may need multiple thin coats to achieve full opacity. The bright colors also make any application mistakes more obvious.
Maintenance is higher than other designs because neon colors tend to fade faster than traditional shades. You’ll need to refresh the design more frequently, especially if you spend time in direct sunlight. Professional application costs are moderate, typically $40-70.
Neons look most striking on medium to deep skin tones, where the bright colors create beautiful contrast. Fair skin tones can wear neons too, but may need to choose slightly softer neon shades to avoid looking washed out.
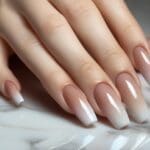
Rainbow Tip and French Manicure Variations
Rainbow tips and French manicure variations modernize the classic French manicure by incorporating rainbow colors in creative ways. These designs include rainbow-colored tips, reverse French with colors at the cuticle, double rainbow elements, and glitter combinations. These techniques require intermediate to advanced skills but offer sophisticated options that work for most occasions while maintaining the elegant structure of traditional French manicures.
5. Rainbow French Tips
This revolutionizes the classic French manicure by replacing traditional white tips with vibrant rainbow colors. You can approach this design two ways: assign each nail a different color for the tip, or create mini rainbow gradients within each tip area.
The single-color-per-nail approach is more beginner-friendly. You’ll use the same precise application technique as traditional French tips, just with rainbow colors instead of white. This creates a playful yet sophisticated look that works in most professional settings.
The mini gradient approach is more complex but stunning. Each tip features a tiny rainbow transition, requiring steady hands and patience. This technique works best on longer nails where you have more tip space to work with.
Application requires intermediate skills because French tip precision is crucial regardless of color choice. You’ll need steady hands, quality brushes, and patience for clean lines. Many people find using nail guides or tape helpful for achieving perfect tip shapes.
The design offers good longevity because the colors are concentrated at the tips, which experience less wear than full-nail designs. Professional application typically costs $40-60, making it a moderate investment for a sophisticated look.
This works beautifully for weddings, work events, and casual occasions. The element adds personality while maintaining the elegant structure of French manicures.
6. Reverse Rainbow French
This design flips everything you know about French manicures on its head – literally. Instead of colors at the tips, you’re putting that rainbow magic right at your cuticles. And let me tell you, it’s trickier than it sounds.
Working near your cuticles is like trying to apply eyeliner while riding a roller coaster. One wrong move and you’ve painted half your finger. I’ve watched nail techs do this and honestly, it’s like watching a surgeon – the precision is incredible.
But when it’s done right? *Chef’s kiss* It looks like your nails are growing rainbows. Perfect for when you want something unique but your boss might side-eye full rainbow coverage.
The downside is that every time your nails grow, it messes with the whole vibe. You’ll be back at the salon sooner than you’d like, but hey – at least you’ll have the coolest cuticles in the waiting room.
Professional application is strongly recommended, with costs typically ranging higher due to the precision required. Expect to pay $60-80 for quality reverse French work.
7. Double Rainbow Tips
Okay, this is where things get fancy. We’re talking French tips PLUS a rainbow line near your cuticles. It’s like the nail art equivalent of wearing a statement necklace with statement earrings – bold, but when done right, absolutely stunning.
Fair warning: this is not a “Netflix and chill” kind of DIY project. You’re basically doing two precise techniques at once, which is why most of us mere mortals need to fork over the cash for a pro.
I tried this once for a wedding and felt like I had tiny works of art on my fingertips. The photos were incredible, but I spent the entire reception being paranoid about chipping a nail. Worth it? Absolutely. Would I do it for grocery shopping? Probably not.
Professional costs are higher, typically $70-90, because of the time and skill required. The design often takes 2+ hours to complete properly, justifying the premium pricing.
8. Glitter Rainbow Tips
If regular tips are a party, glitter rainbow tips are the party with a disco ball and confetti cannons. The sparkle factor is off the charts, and you’ll find yourself making excuses to gesture dramatically just to watch the light show.
Here’s what nobody tells you about glitter polish: removing it is like trying to scrape barnacles off a boat. Seriously, stock up on acetone and maybe invest in some good cuticle oil because you’re going to need it.
But for special occasions? Totally worth the removal drama. I wore these to New Year’s Eve once and literally caught light from every angle. My hands looked like they belonged to a fairy godmother.
Professional costs are moderate, typically $50-75, because while the technique isn’t extremely complex, working with glitter requires extra time and specialized removal techniques that salons factor into pricing.
Geometric and Abstract Rainbow Patterns
Time to get artsy, folks. This is where colorful nail art goes from “pretty colors” to “actual artwork you can wear.” These designs elevate the trend into sophisticated, modern territory through precise lines, shapes, and artistic elements.
9. Rainbow Stripes
Stripes sound simple until you’re trying to make them perfectly straight and evenly spaced. It’s like drawing lines without a ruler while your hand is slightly shaking from too much coffee.
The cool thing about stripes is you can totally customize the vibe. Thin stripes feel delicate and sophisticated – perfect for when you want to sneak some color into a conservative workplace. Thick stripes? That’s your “I’m here to make a statement” energy.
Pro tip I learned the hard way: use tape as guides, but remove it while the polish is still slightly wet. Wait too long and you’ll peel off your perfect stripes along with the tape. Ask me how I know.
Professional application typically costs $60-90 because of the time and precision required. Each stripe must be applied individually and allowed to dry completely before adding the next, making this a time-intensive process.
10. Rainbow Chevron Pattern
Chevrons are basically stripes that went to art school and got all fancy. They’re gorgeous but require the kind of precision that makes me question my life choices.
I once spent three hours attempting DIY chevrons and ended up with what looked like lightning bolts drawn by someone having a seizure. Sometimes you just gotta admit defeat and book that salon appointment.
But when done by someone who actually knows what they’re doing? Pure magic. It’s geometric, it’s modern, and it photographs like a dream.
Professional costs are higher, typically $70-100, because creating perfect chevron patterns requires significant time and expertise. The design often involves multiple steps including base application, pattern creation, and detailed cleanup work.
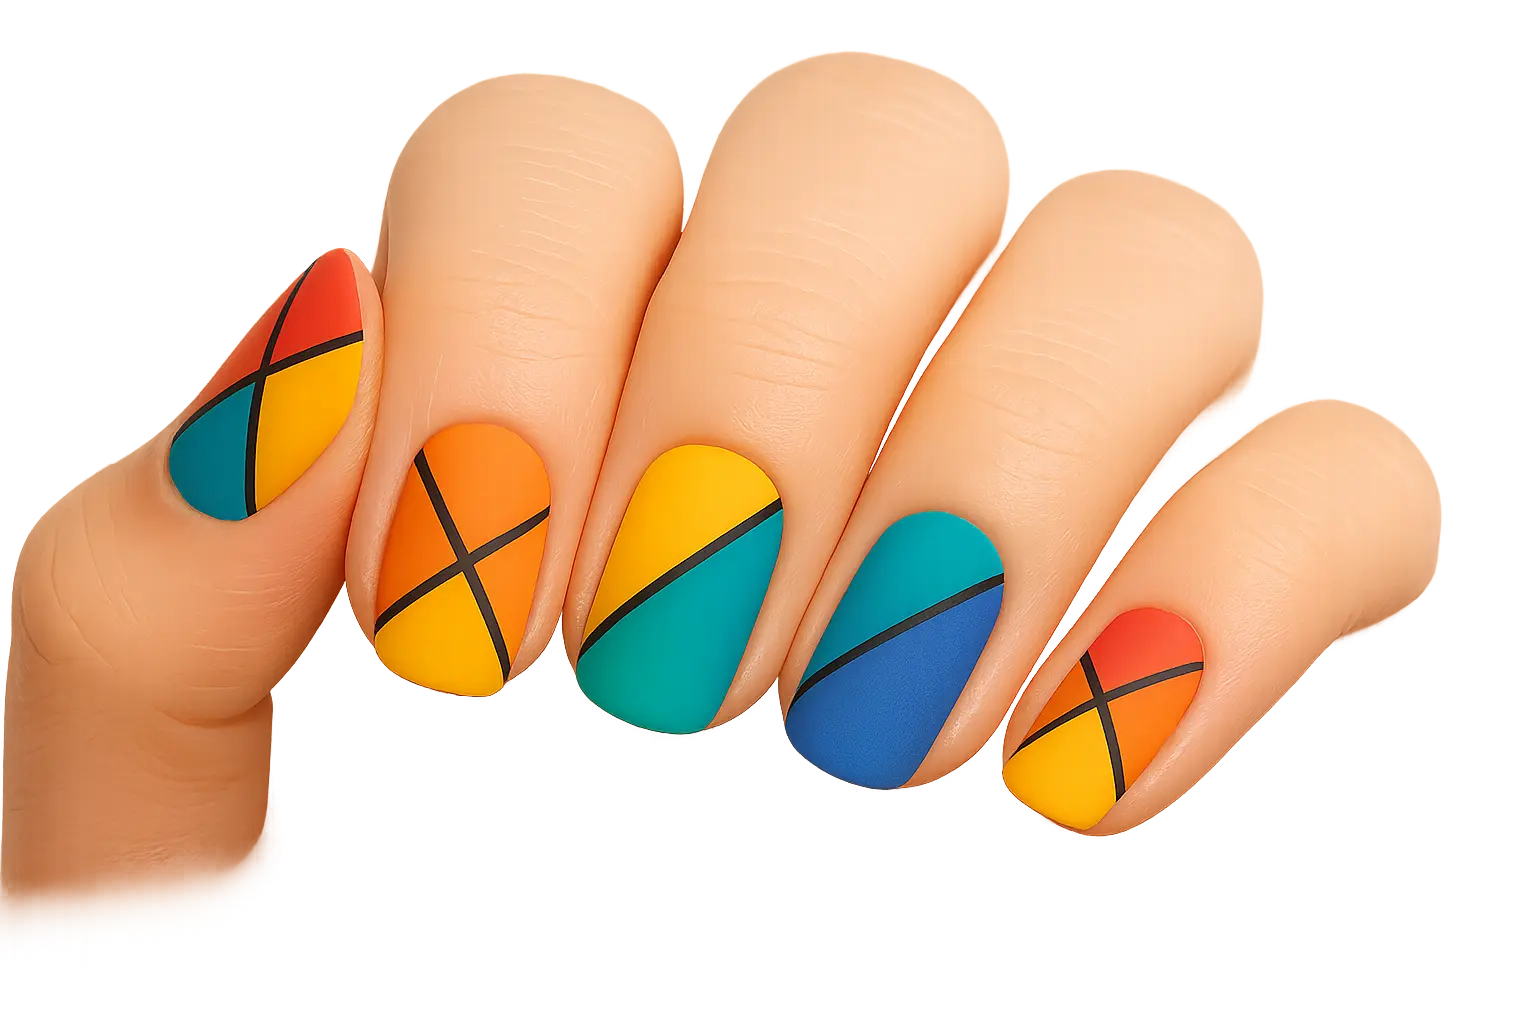
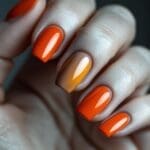
11. Rainbow Color Blocking
This is for when you want your nails to look like they belong in a contemporary art museum. Clean lines, bold shapes, strategic negative space – it’s minimalism meets maximum color impact.
The planning phase is crucial here. I learned this when I jumped in without thinking and ended up with what looked like a rainbow explosion rather than intentional design. Sketch it out first, people!
Maria’s Creative Workplace Success: “As a graphic designer, I wanted colorful nails that felt artistic but professional. I chose color blocking with geometric squares and triangles in muted rainbow tones, leaving plenty of negative space. My colleagues loved the modern aesthetic, and it sparked great conversations about design principles. The clean lines lasted two weeks without looking messy, and I could easily touch up individual color blocks when needed.”
Get personalized rainbow nail shade suggestions from our Free AI Color Analysis Quiz
This design works beautifully in creative environments where artistic expression is valued. The modern aesthetic appeals to fashion-forward individuals who want something that feels sophisticated rather than playful.
Professional costs are moderate, typically $50-70, because while the technique requires skill, it’s less time-intensive than some other geometric approaches. The clean lines and bold shapes are forgiving of minor imperfections.
12. Abstract Rainbow Swirls
Here’s where you can let your inner artist run wild. No two nails need to look the same, which is great because honestly, they probably won’t anyway.
I love that this technique embraces the “happy accident” philosophy. That wonky swirl you thought was a mistake? It’s actually adding character and movement to your design. Bob Ross would be proud.
Professional nail artists often use specialized brushes and techniques to create these flowing patterns. Some use wet-on-wet application methods where colors blend naturally, while others build up layers of swirls to create depth and movement.
Professional costs are high, typically $80-120, because creating quality abstract art requires significant time and artistic expertise. You’re paying for both technical skill and creative artistry.
13. Rainbow Mosaic
This is nail art for people who have way more patience than I do. We’re talking tiny geometric shapes arranged in intricate patterns. It’s beautiful, it’s detailed, and it takes forever.
I tried this once and gave up after the third nail. My hat goes off to anyone who can complete all ten fingers without losing their mind. You’re basically creating wearable stained glass windows.
Professional costs are expensive, typically $100-150, because creating quality mosaic patterns requires 2-3 hours of detailed work. You’re investing in both the time and the specialized expertise needed for this level of intricacy.
Textured and Dimensional Rainbow Designs
Ready to take things up a notch? We’re moving into 3D territory now. These advanced designs add physical depth and tactile elements through specialized techniques and materials.
| Design Type | Skill Level Required | Longevity | Best Nail Length | Professional Cost | Maintenance Level |
|---|---|---|---|---|---|
| Chrome Effect | Professional Only | 2-3 weeks | All lengths | $60-100 | Moderate |
| 3D Flowers | Professional Only | 1-2 weeks | Medium to Long | $80-150 | High |
| Bubble Effect | Intermediate | 1-2 weeks | Medium to Long | $50-75 | Moderate |
| Textured Sand | Easy to Moderate | 1 week | All lengths | $20-35 | Low |
| Holographic | Easy | 2-3 weeks | All lengths | $40-70 | Moderate |
14. Rainbow Chrome Effect
Chrome nails are like having mirrors on your fingertips, but make it rainbow. The color-shifting effect is absolutely mesmerizing – you’ll spend way too much time staring at your own hands.
This is definitely a “leave it to the professionals” situation. Chrome powder is finicky, expensive, and requires timing that would make a Swiss watchmaker jealous. But the results? Absolutely worth every penny.
Professional application is essential because chrome powder application requires specific techniques and timing. The process involves applying a black base coat, curing it, applying a no-wipe gel top coat, curing that, then rubbing chrome powder into the tacky surface using silicone applicators.
Each color requires separate application, so creating full chrome effects involves multiple steps and different chrome powder colors. The technique works on all nail lengths, but longer nails showcase the color-shifting effects more dramatically.
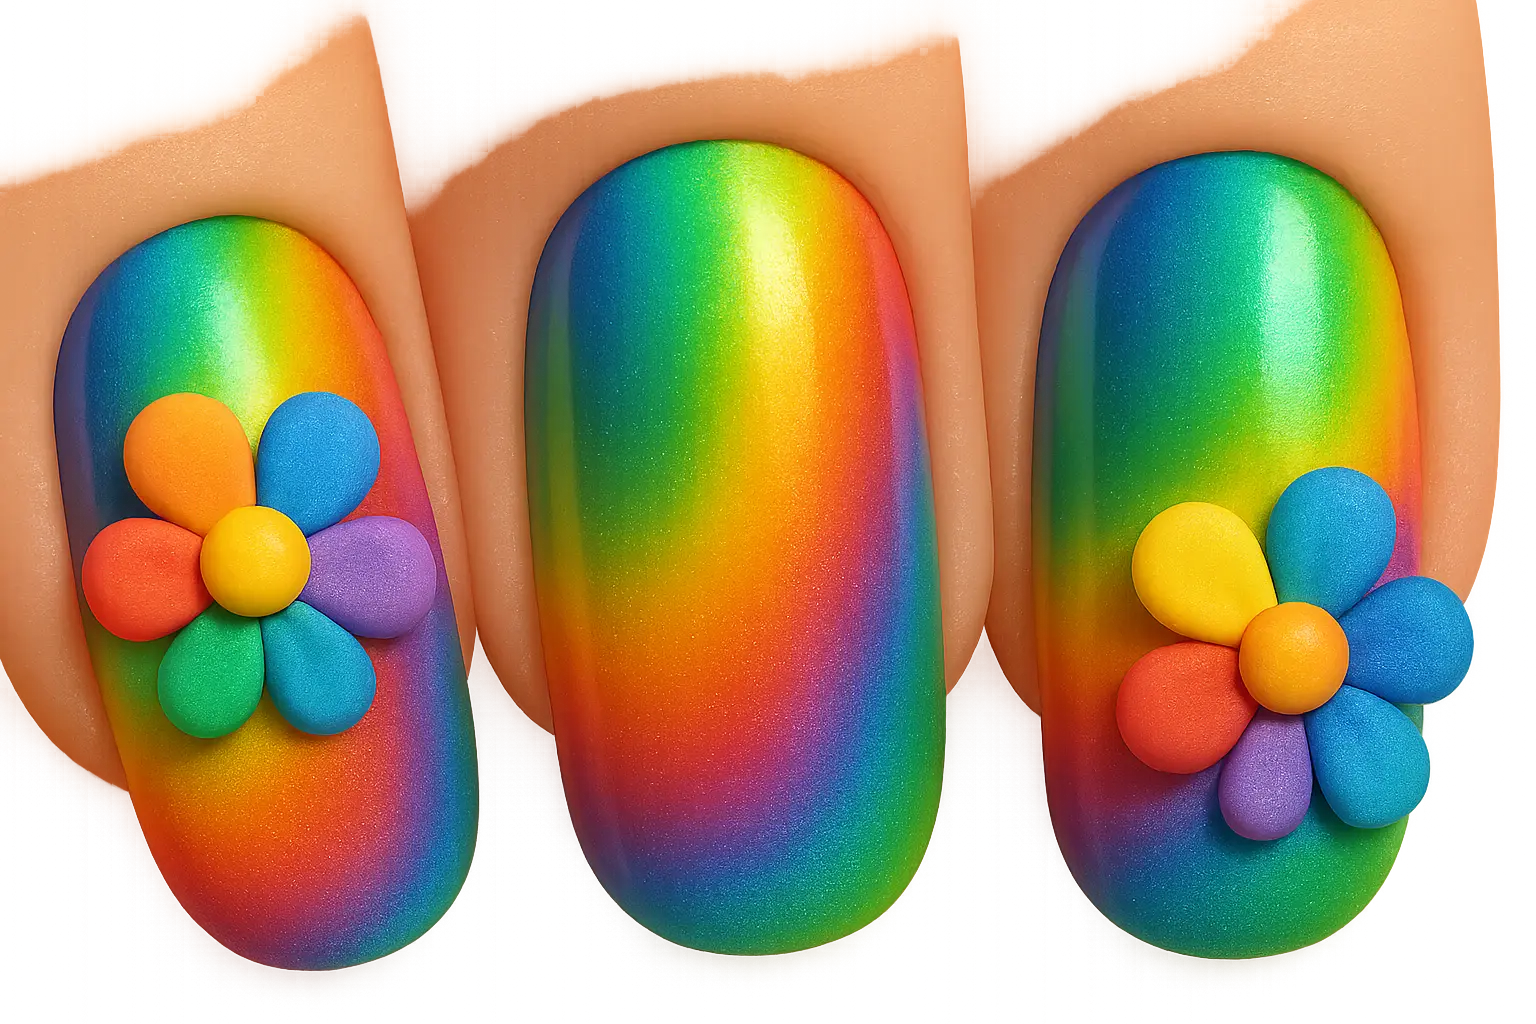
15. 3D Rainbow Flowers
Tiny sculptured flowers on your nails – it’s as extra as it sounds and I’m here for it. Perfect for when you want your manicure to have actual texture and dimension.
Just know that these little flowers have a tendency to catch on everything. Your hair, your clothes, that one loose thread on your sweater. It’s like having tiny hooks on your fingertips.
Professional skill is required because creating 3D flowers involves sculpting techniques similar to those used in acrylic nail extensions. Nail artists use specialized brushes, sculpting tools, and layering techniques to build up petals, centers, and other floral elements.
This design is perfect for weddings and special occasions because the 3D flowers create romantic, feminine appeal that photographs beautifully. The dimensional elements catch light and create shadows that add depth to photos.
16. Rainbow Bubble Effect
This technique creates the illusion of colorful bubbles floating on your nails. It’s whimsical, it’s fun, and it never fails to make people do a double-take.
The bubble effect is surprisingly forgiving – if your “bubbles” aren’t perfectly round, they just look more realistic. Sometimes imperfection is actually perfection.
Different bubble techniques produce varying effects. Some create small, uniform bubbles across the nail surface, while others produce larger, more random bubble patterns. The colors can be incorporated into the bubbles themselves or used as background colors beneath clear bubbles.
17. Textured Rainbow Sand
Sand texture on nails feels as weird as it sounds, but in the best possible way. It’s like having a tiny zen garden on each fingertip.
The catch? Textured finishes are chip magnets. You’ll be touching up more often than you’d like, but the unique tactile experience might be worth it.
The technique is accessible to DIY enthusiasts. Textured polishes apply similarly to regular polish but require slightly different techniques to achieve even texture distribution. Some methods involve sprinkling sand or texture additives onto wet polish.
Minimalist and Subtle Rainbow Accents
Not everyone wants to look like they dipped their hands in a rainbow. Sometimes subtle is the way to go. These designs offer sophisticated ways to incorporate rainbow elements without overwhelming your overall look.
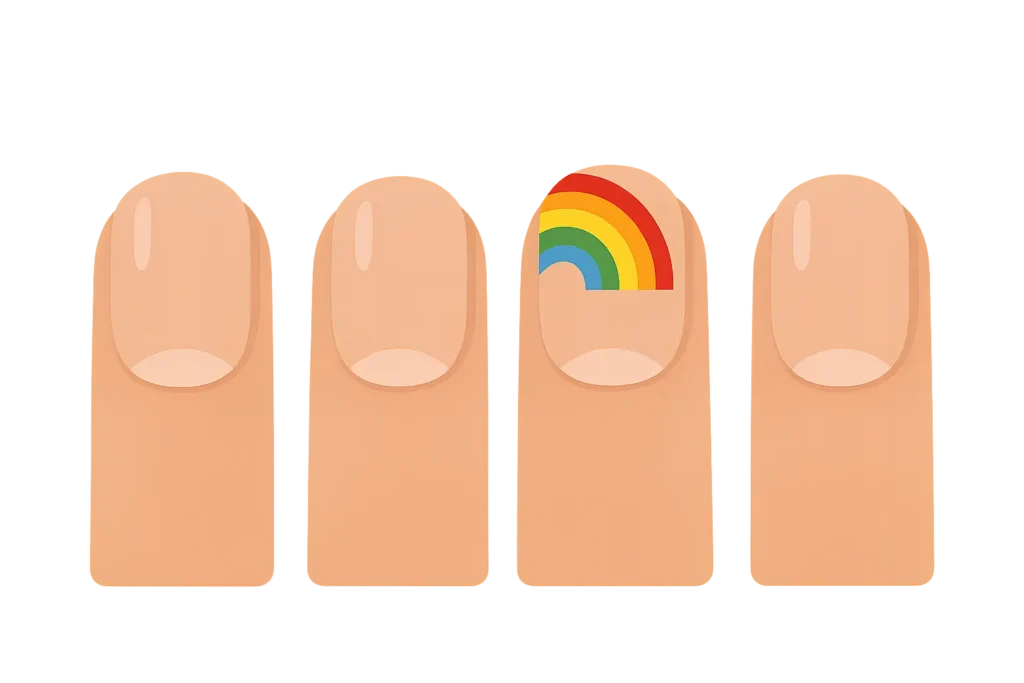
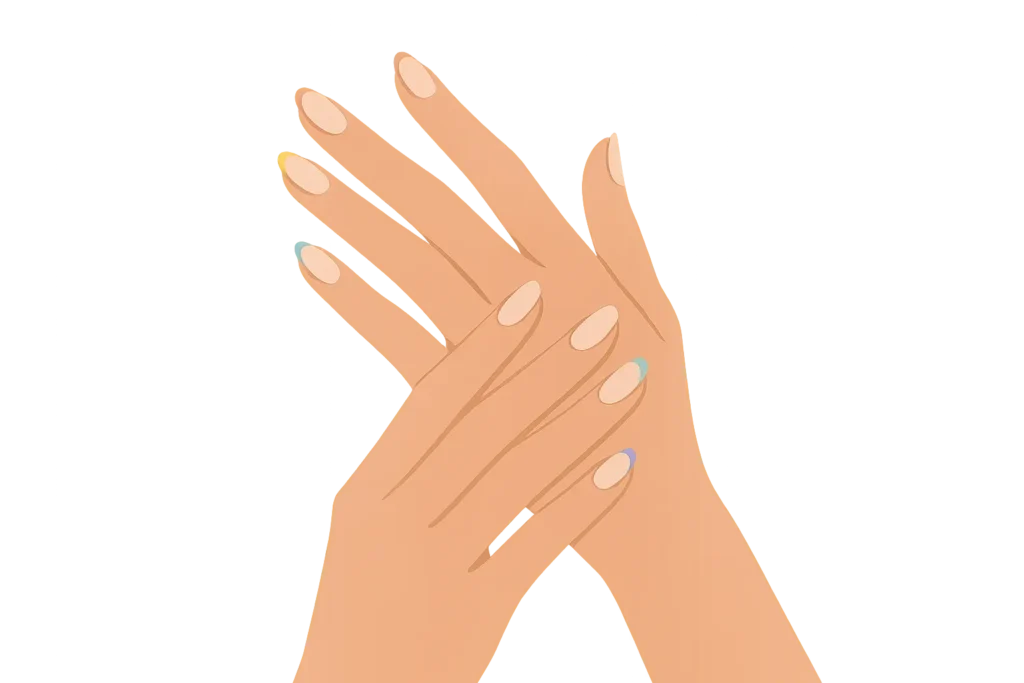
18. Single Rainbow Accent Nail
This is rainbow training wheels – all the fun with minimal commitment. Perfect for testing the waters or sneaking some color into conservative environments.
I love this approach because if you mess up, you only have to redo two nails instead of ten. It’s also great for trying new techniques without the pressure of executing them perfectly across all fingers.
Typically, you’ll choose one nail per hand (often the ring finger) for your design while keeping the other nails in neutral colors like nude, clear, or soft pink. This approach works perfectly in professional settings where bold nail art might be inappropriate.
The beginner-friendly nature makes this perfect for DIY attempts. You only need to master the technique on two nails rather than all ten, reducing both complexity and time investment.
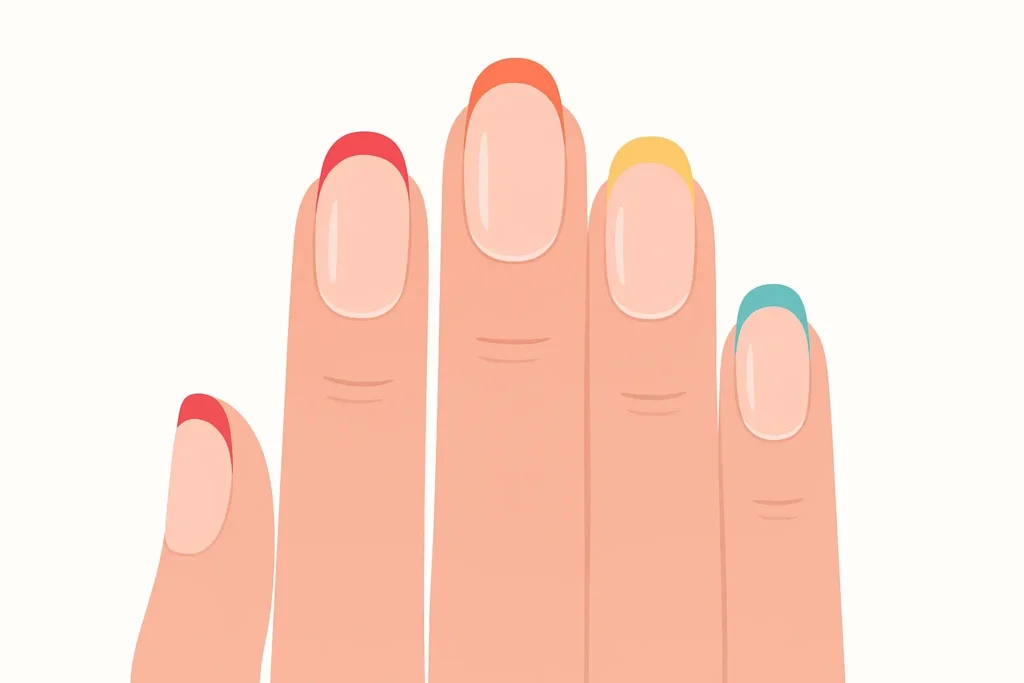
19. Rainbow Cuticle Line
Thin lines at your cuticles are like the nail art equivalent of a delicate bracelet – subtle but special. It’s sophistication with just a hint of rebellion.
The precision required makes this tricky for DIY, but the payoff is a design that’s professional enough for the boardroom but interesting enough to spark conversations.
This design excels in conservative environments where subtle nail art is preferred. The thin lines add just enough color and creativity to be interesting while remaining professional and appropriate for traditional workplaces.
Professional application is recommended for best results, with costs typically ranging $40-60. The precision required and time needed for careful application justify the moderate professional pricing.
20. Micro Rainbow Details
Tiny elements scattered across neutral nails – it’s like confetti for your fingertips. These little details add just enough whimsy without overwhelming your overall look.
Jennifer’s Professional Solution: “I work in a conservative law firm but wanted some rainbow in my life. I chose micro dots scattered across nude nails – just 3-4 tiny dots per nail in different colors. My colleagues barely noticed them, but they made me smile every time I looked at my hands. When I had an important client meeting, I could easily cover them with a clear top coat for an even more subtle look.”
Different micro elements create varying effects. Dots produce a playful, confetti-like appearance, while hearts add romantic charm. Stars create celestial themes, and tiny geometric shapes produce modern, artistic effects.
21. Rainbow Negative Space
This is modern art for your nails. The clear areas are just as important as the colored parts, creating designs that feel fresh and contemporary.
Planning is everything with negative space. You need to think about how the clear and colored areas work together to create something cohesive rather than just random.
Different negative space approaches create varying effects. Some designs use geometric shapes with outlines and clear centers, while others create patterns that weave around clear areas. The interplay between colored and clear areas defines the design success.
Seasonal and Themed Rainbow Variations
Because why shouldn’t your nails match the season? These variations adapt the trend to specific times of year and occasions through carefully chosen color palettes and design elements.
22. Pastel Spring Rainbow
Soft, dreamy colors that whisper rather than shout. Perfect for when you want rainbow vibes without the full commitment.
These colors are like the nail polish equivalent of a gentle spring breeze – refreshing, pretty, and universally flattering. Think soft pink instead of bright red, peach rather than orange, butter yellow, mint green, and lavender instead of deep purple.
Spring events like Easter celebrations, bridal showers, and garden parties are perfect occasions for these designs. The gentle colors complement spring fashion and photography beautifully without competing with floral decorations or pastel color schemes.
The easy skill level makes this perfect for DIY spring manicures. Pastel colors are forgiving and blend beautifully even if your technique isn’t perfect.
23. Jewel Tone Rainbow
Rich, luxurious colors that feel expensive and sophisticated. These are your “special occasion” rainbows – think holiday parties and fancy dinners.
Ruby red, emerald green, sapphire blue, and amethyst purple create luxurious effects perfect for fall and winter celebrations. The rich colors complement autumn foliage, holiday decorations, and winter fashion beautifully.
The moderate skill level comes from working with highly pigmented colors that require careful application. Jewel tones are less forgiving than pastels because their intensity makes any application mistakes more obvious.
Medium to deep skin tones showcase jewel tone variations most dramatically because the rich colors create beautiful contrast against deeper complexions.
24. Holographic Rainbow
Magic on your fingertips. The color-shifting effect never gets old, and you’ll find yourself tilting your hands just to watch the colors dance.
These use specialized polishes that shift through colors depending on the viewing angle and lighting conditions. This creates magical, iridescent effects that seem to move and change as you gesture.
Evening events showcase holographic designs perfectly because artificial lighting enhances the color-shifting effects. Under restaurant lighting, party lights, or camera flashes, the nails create mesmerizing displays.
The easy application process makes holographic variations accessible, but quality matters significantly. Cheap holographic polishes often lack the dramatic color-shifting effects that make this technique special.
25. Watercolor Rainbow
Soft, artistic effects that look like tiny paintings on each nail. It’s romantic, dreamy, and absolutely gorgeous when done right.
This creates the soft, dreamy effects of watercolor paintings through specialized blending techniques that allow colors to flow and bleed into each other naturally. This artistic approach produces romantic, ethereal nail art.
Artistic skill or professional application is required because creating convincing watercolor effects demands understanding of color theory, blending techniques, and timing. The colors must flow naturally rather than looking forced or mechanical.
Creative and romantic occasions are perfect for watercolor designs. The soft, artistic effects complement bohemian weddings, art gallery events, and any occasion where creative expression is valued.
Professional vs. DIY: Making the Right Choice
Let’s be real about what you can actually pull off at home versus what needs professional intervention. Deciding between professional application and DIY depends on design complexity, your skill level, available time, and budget considerations.
Simple designs like basic ombre or accent nails? Totally doable at home with some practice and patience. Complex geometric patterns or 3D elements? Save yourself the frustration and book that appointment.
I’ve learned to be honest about my skill level. Can I paint my nails one solid color without making a mess? Usually. Can I create perfect chevron patterns? Absolutely not, and that’s okay.
Professional application becomes essential for chrome effects, 3D sculptural elements, complex geometric patterns, and watercolor techniques. These advanced methods require specialized tools, materials, and training that most people don’t have access to at home.
| Design Complexity | DIY Feasibility | Professional Recommended | Time Investment (DIY) | Time Investment (Pro) | Cost Comparison |
|---|---|---|---|---|---|
| Simple Ombre | High | Optional | 45-60 minutes | 30-45 minutes | DIY: $15-25, Pro: $30-50 |
| Accent Nails | High | Optional | 30-45 minutes | 20-30 minutes | DIY: $10-20, Pro: $25-40 |
| Geometric Patterns | Low | Yes | 2-3 hours | 1-2 hours | DIY: $25-40, Pro: $60-100 |
| Chrome Effects | None | Essential | Not recommended | 1-1.5 hours | Pro only: $60-100 |
| 3D Elements | None | Essential | Not recommended | 2-3 hours | Pro only: $80-150 |
Consider your time investment realistically. Professional nail art typically takes 1-3 hours depending on complexity, but you’re not doing the work. DIY attempts often take longer, especially when learning new techniques or correcting mistakes.
Quality expectations should align with your choice. Professional results will typically look more polished and last longer, while DIY results may have minor imperfections but offer the satisfaction of personal accomplishment.
Rainbow Nails for Your Special Occasions
Different events call for different approaches. Your wedding isn’t the time to debut neon geometric patterns, and your friend’s casual backyard BBQ doesn’t require chrome effects.
Wedding season offers numerous opportunities for colorful nail art, but the approach should complement rather than overshadow the celebration. Brides might choose subtle accents like cuticle lines or single accent nails that photograph beautifully without competing with their dress or overall bridal look.
Bridesmaids have more flexibility, especially if the bride embraces colorful themes. Pastel ombre works beautifully for spring weddings, while jewel tone variations complement fall celebrations. The key is coordinating with the wedding color palette while expressing individual personality.
Coordinate your bridal party nail colors effortlessly with our Free AI Color Analysis Quiz
Professional settings require careful selection. Subtle options like micro details, cuticle lines, or single accent nails maintain workplace appropriateness while adding personality. Conservative industries may prefer the most minimal approaches, while creative fields often welcome bolder expressions.
Festival and party occasions embrace maximum creativity. These events are perfect for experimenting with chrome effects, 3D elements, glitter combinations, and bold geometric patterns. The celebratory atmosphere supports dramatic nail art that makes statements and starts conversations.
Photography considerations matter for special occasions. Certain techniques photograph better than others – holographic and chrome effects look stunning under artificial lighting, while matte textures may appear flat in photos.
Final Thoughts
Here’s the thing about colorful nail art – they’re supposed to be fun. If you’re stressing about perfect application or worried about what people will think, you’re missing the point.
These designs have evolved far beyond simple color application into sophisticated art forms that offer something for everyone. From the beginner-friendly pastel ombre that takes 30 minutes at home to the complex 3D sculptural flowers requiring hours of professional expertise, these 25 designs prove that this nail art can be as subtle or dramatic as your personality demands.
Start with something simple that makes you happy. Maybe that’s just painting each nail a different pastel color, or adding tiny dots to neutral nails. Work your way up to more complex designs as your confidence grows.
And remember, nail polish remover exists for a reason. If your DIY attempt goes sideways, you can always start over. The nail police aren’t going to come for you if your ombre isn’t perfectly blended.
The beauty of this trend lies in its versatility an d the joy it brings to both the wearer and those who see them. Whether you’re a bride wanting delicate accents for your wedding photos, a professional seeking workplace-appropriate creativity, or someone celebrating life’s colorful moments with bold festival nails, there’s a design that fits your needs perfectly.
Success with these colorful manicures comes from honest self-assessment and realistic expectations. Understanding your skill level, available time, and maintenance preferences helps you choose designs you’ll love and can actually achieve. Don’t be afraid to start simple and work your way up to more complex techniques as your confidence and skills develop.
The investment in quality – whether that’s professional application for special occasions or high-quality polish for DIY attempts – pays off in both appearance and longevity. Your manicure will be part of photos, memories, and daily life, making it worth doing right the first time.
For those planning memorable celebrations and special events, these designs can be the perfect finishing touch that ties together your entire look. From bridal party coordination to festival fashion statements, the right design enhances your confidence and creates lasting memories through every colorful celebration.
Plan every vibrant wedding detail—from nails to decor—with our AI Wedding Planner
Life’s too short for boring nails. Whether you go subtle or go bold, the best rainbow manicures are the ones that make you smile every time you catch a glimpse of your hands. Start with what feels doable, have fun with it, and remember – nail polish remover exists for a reason!
Related posts:


1-800-BRIDESMAID
The Newlywed
Card Game
something extra to love
Read the weekly newsletter from Bridesmaid for Hire, 1-800-Bridesmaid, to hear about real stories, from strangers, who need advice on love, life, friendship, and so much more.
Looking for the perfect wedding gift for someone you adore? Grab The Newlywed Card Game. It's a fun and interactive game they can play on their honeymoon or future date nights.

